The Vaptio Solo F2 kit is a new All In One (AIO) kit in a vape pen style from the people at Vaptio.
Vaptio can really make some quality kits – I loved the C2 and the Solo Flat.
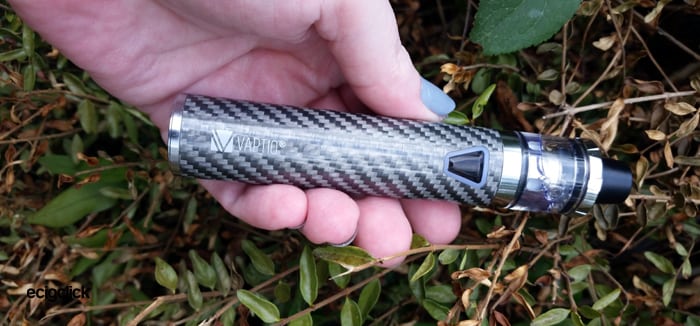
This is marketed as a starter kit but the kit coils are 0.25ohm so not really for MTL (Mouth To Lung) vapers wanting to replicate a cigarette experience. This is more for sub ohm DTL (Direct To Lung) vapers wanting clouds and intense flavour. If the terms DTL and MTL are right over your head have a read of our handy Guide To Vaping Styles.
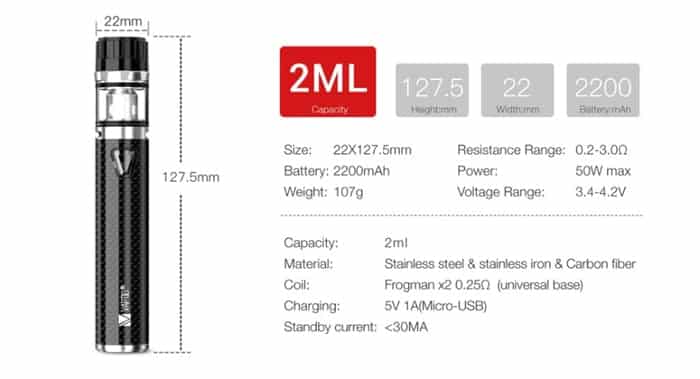
Inside the battery part of the kit is a built in 18650 battery which has 2200mAh capacity and will output up to 50W.
You have a single fire button to fire and turn the device on and off and that is as simple as it gets.
There are 5 colours to choose from – Grey, Black, Blue, Red and Pink.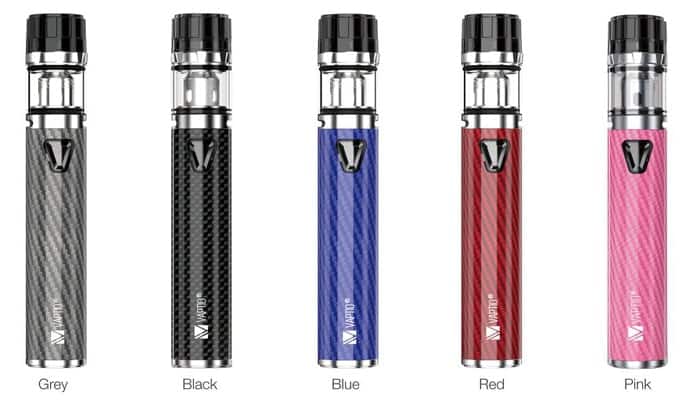
This was sent by Vaptio for review purposes and I will report back on my findings based on the device I received and my experience.
What’s In The Box
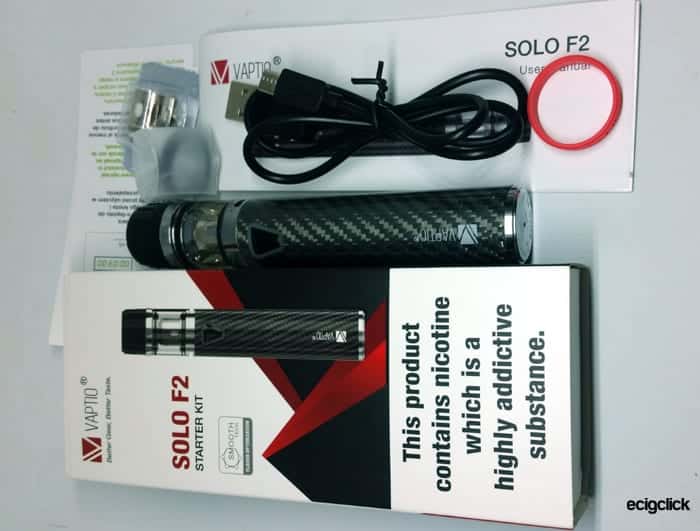
- Vaptio Solo F2 device
- 2x Frogman-X2 coil (0.25ohn NiCr)
- Manual
- USB cable
- Spare glass
Features
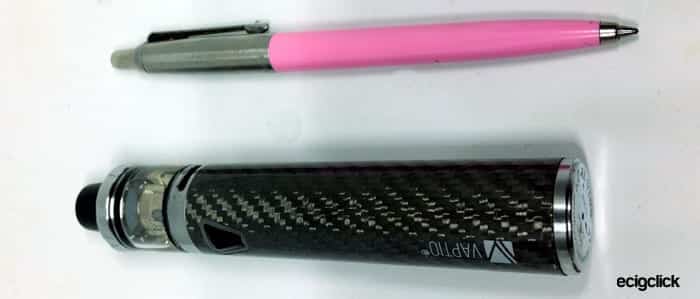
- Size: 22×127.5mm
- Output:50W max
- Battery: 2200 mAh internal
- Resistance range: 0.2-3ohm
- Tank capacity: 2ml
- Coil: Frogman universal base coils
- Battery level indicator light
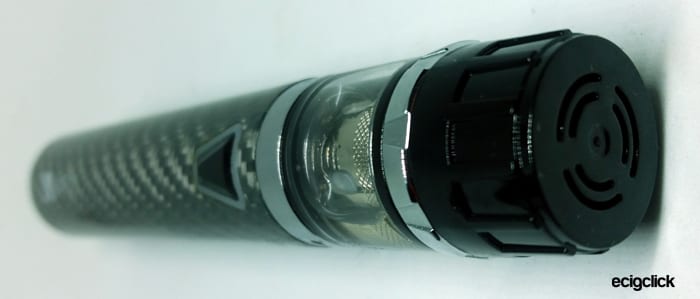
- Magnetic drip tip cover cap
- Top fill
Build Quality & Design
This is a really beautiful looking device. I received the Grey carbon fibre version and it looks absolutely flawless. Although the carbon is smooth it does catch the light and shine like it is textured beneath a clear coating.
The device is a great size and the weight seems spot on – not too heavy or plastic-y light.
For instance when the kit arrived there was an isolator strip between the tank and battery basically preventing the coil from making contact with the battery contacts. This was a pig to remove as the tank is pretty much part of the mod. You end up trying to unscrew the glass!
Tank Component
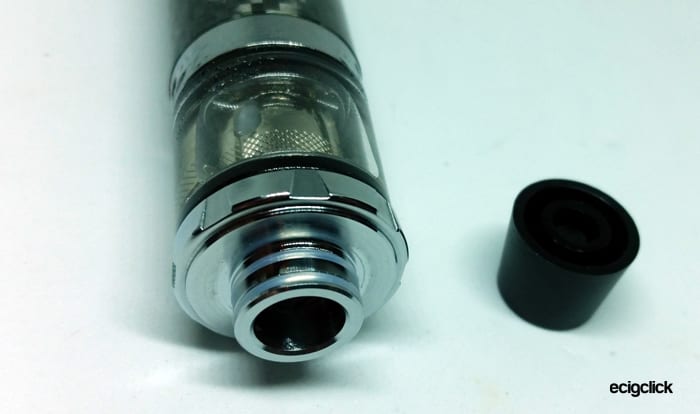
The kit includes a magnetic protective top cap – which you can also vape through – sadly this didn’t really leave the box.
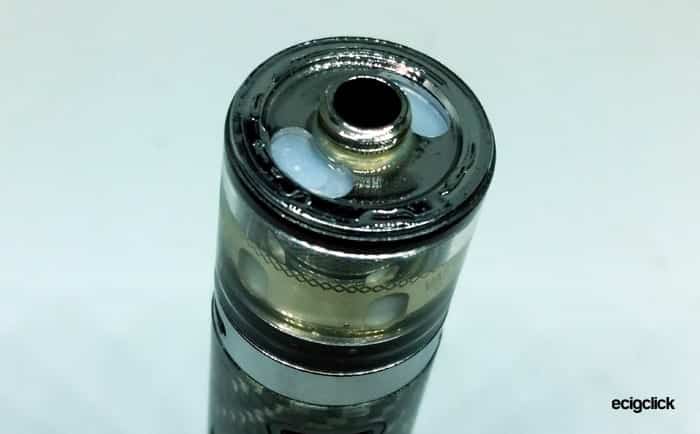
The tank part has the flappy top fill flaps which are to help prevent leaks – they are a bit Marmite – I don’t tend to mind them but some people find them awkward – especially if you have a large drip nozzle it can be annoying.
Inside the tank is the Vaptio Frogman coil – this time it is a 0.25ohm coil – these are also interchangeable with other brand coils – such as the Smok V8 Baby, Eleaf HW and the Vaporesso GT.
So if you run out of coils and can’t get hold of the applicable Vaptio version you can use others. But this is a fixed output device so it may not perform well if using different resistance coils.

The drip tip is removable but not a standard fitment – more a plastic sleeve which fits onto a flange on the tank.
Battery Component
The battery part of the kit has a single fire button and this changes colour according to battery life remaining. I did find that this button was a bit strange and sometimes after use you would hear it “pop” back out – however it didn’t stay on and keep firing.
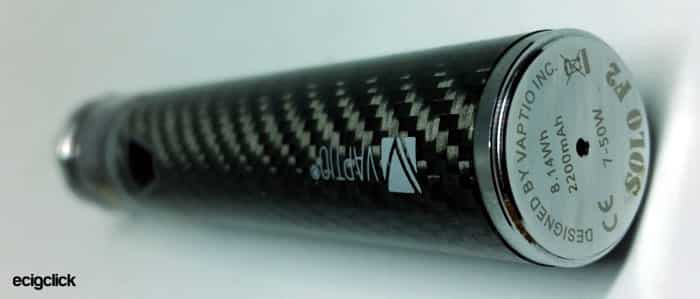
The bottom of the battery had some branding and power info.
Set-up Guide
Before first use you need to remove the isolator which prevents the device from firing up in transit. I wish I had got a photo of this before I removed it – sorry!
- Unscrew the tank top cap.
- Pull the glass off from the battery
- Unscrew the coil and the isolator will pull out.
- Screw the coil back in.
- Replace the tank glass and top cap.
- Fill tank and charge battery as described below.
Basic operation
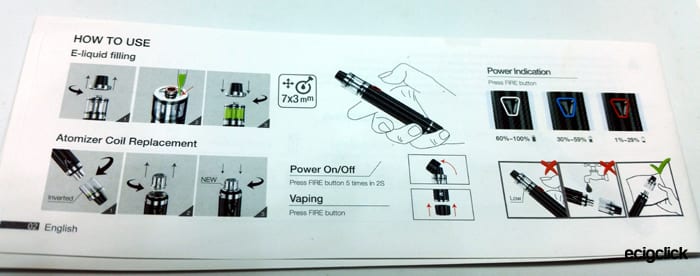
- On/Off – press the fire button 5 times
- To vape – press the fire button
- Battery life indicator light – White = 60-100%, Blue = 30-59% and Red = 1-29%.
- Auto lock – if the device is not fired for 10 minutes it will shut down – simply turn back on with 5 clicks.
- Over vaping protection – if the fire button is held down for longer than 10 seconds the fire will cut out -this is to help prevent accident firing in a bag or pocket.
How To Charge The Battery
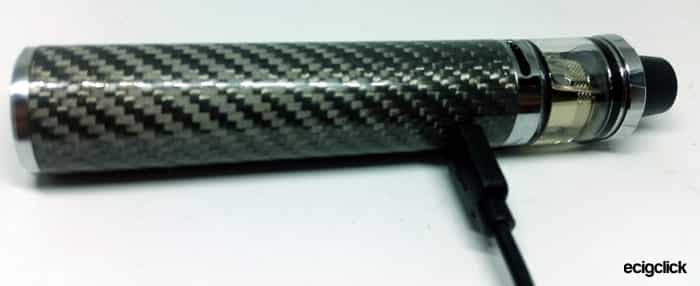
- Use the included USB cable and connect the small end into the USB port on the battery. This has a standard Micro USB fitment.
- Connect the large end to a suitable USB outlet.
- Whilst charging the battery indicator light will be flashing and will go white when fully charged.
I did find this took ages to charge – a quick charge system would be most useful on this kit.
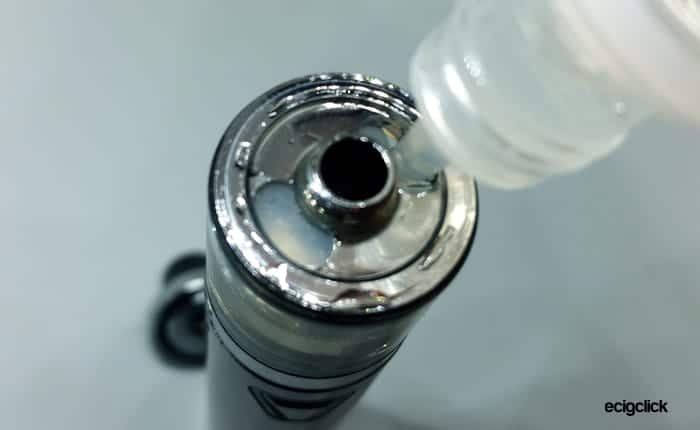
How To Fill The Tank
- Unscrew the top cap.
- Using the nozzle of the filler bottle press down on the white flap inside the fill holes. Do not add e-liquid to the centre hole inside the coil.
- Watch the level of e-liquid through the tank glass.
- Replace the top cap.
- If this is a new coil or first time use leave the tank for 10-15 minutes for the coil head to absorb the e-liquid.
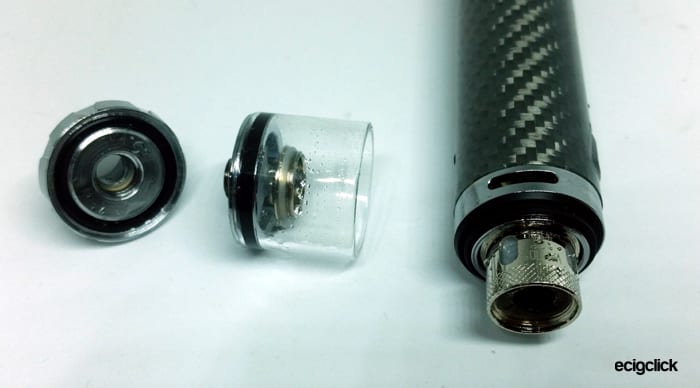
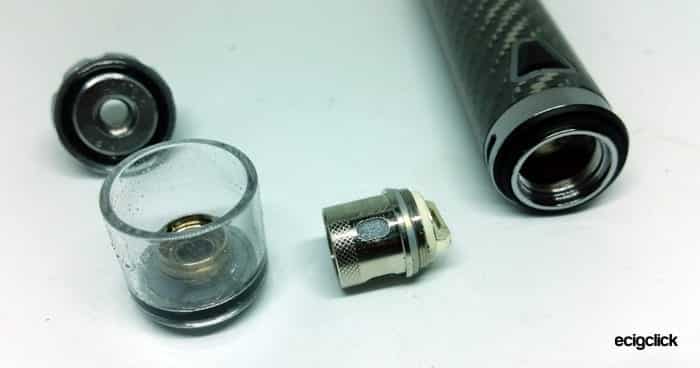
How To Install The Coil
You will need to either have an empty tank or be prepared for the contents of the tank to leak everywhere when changing the coil.
- Unscrew the top cap.
- Pull the tank glass away from the battery- have plenty of tissue.
- Unscrew the coil head from the battery.
- Install a new coil head.
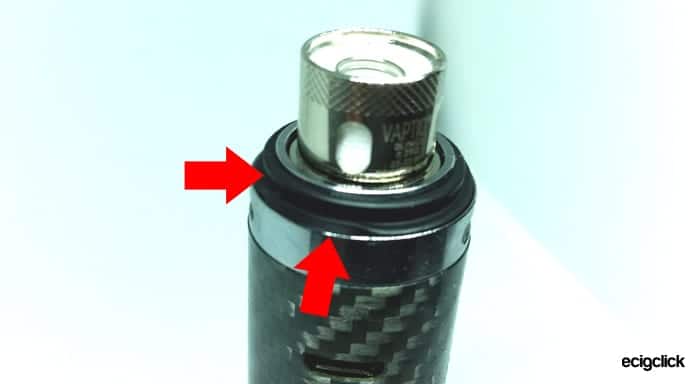
- Before replacing the glass make sure the seal is seated correctly – mine kept moving and it will leak if this is not sat in the groove.
- Fill the tank as described above and leave for coil to soak up the liquid.
- Replace the top cap.
How Does the Vaptio Solo F2 Kit Perform?
Flavour & Cloud Production
This is a sub ohm kit so I used my usual 80% VG – 6mg nicotine strength Stika Bombz Fruit Salad e-liquid. For details about why there are different PG and VG proportions in e-liquid read our handy Guide to PG and VG.
The tank has no airflow adjustment sadly but I did find the default airflow to be pretty good.
You get a lovely flavour from this coil and the vapour is equally excellent. Only slightly below mesh coil sub ohm tanks but still far superior to standard coil sub ohm tanks.
The airflow for me is spot on – not fully open like say a Smok TFV12 Prince, but not MTL tank tight either. Kind of a restricted DTL.
If you chain vaping the tank can get a bit hot so go steady but it does take a lot to get it to this point.
This is way better than a lot of vape pen style sub ohm kits. The only one I think is comparable is the Vaptio C2 which was amazing.
Battery Life
As you have no real variables with this kit – cannot make adjustments etc – the battery life test should be pretty universal.
In total I got 5 hours of pretty regular vaping. In fact when the red indicator light flashed and the mod cut out I was really surprised as the power did not drop off at all.
Pros
- Stunning looking device and beautiful finish
- Great kit contents
- Handy size and shape
- Ability to use other coils from other brands
- Battery life indicator
- Great battery life
- Excellent flavour and vapour
- Coil life has been good
Cons
- Not exactly a “clean hands” style coil change
- Takes a long time to charge
- Very thirsty – the tank is only 2ml – needs a tank extension / bubble glass option
- No airflow adjustment – however the airflow seemed spot on for me.
- You can only use the supplied tank as it is more of an AIO device.
- Not really a starter kit
- Filling flaps can be awkward
Final Review Verdict
This kit is beautiful and you get a lovely vape too. I have had this in use for about 2 months now and use it most days. I only changed the coil today for the photos – the original coil was still working fine.
But it isn’t perfect.
The tank for me seems to be the main issue including how fiddly and messy the coil change is and the lack of airflow adjustment.
Sadly the TPD regulations have also spoilt this – the 2ml maximum capacity is poo when you have a 0.25ohm coil. You are constantly refilling this. Vaptio really need to sell a cheap bubble glass or tank capacity extender – I would buy one like a shot!
The battery life is great – but it needs to be considering it can take up to 4 hours to charge fully.
The sort of devices this is in competition with would be similar sub ohm vape pens such as the Smok Resa Stick, Smok Stick AIO, EPuffer Titan and the Innokin Crios Riptide . I feel that despite the niggles this performs better than all of the above.
If a bubble glass was available I would really recommend the Vaptio Solo F2 Kit.


On refilling. Put the cap on, turn upside down, unscrew top and glass. Set the top and glass with liquid in it to one side, it will sit up right on cap. Change coil, screw back together no need to empty tank. No need to waste liquid or get messy fingers. Hope this helps😀👍