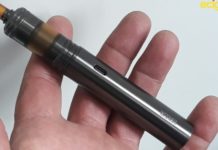
Vaptio have released the Vaptio C2 which is a sub ohm vape pen consisting of a C2 battery and a C2 tank.
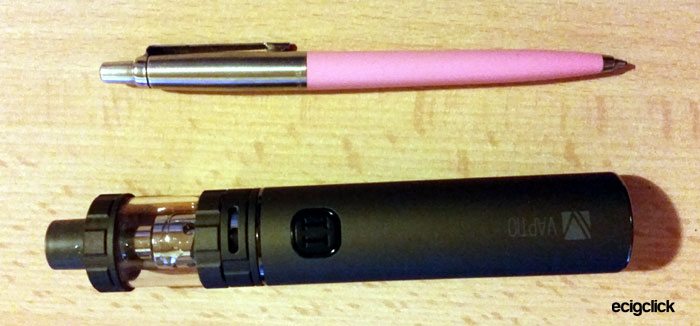
This is massive – which you can expect considering it is concealing a 3000mAh battery! This is chunkier than a KitKat Chunky!
The C2 (or C-II) from Vaptio
The Vaptio website says this will give extended battery life and this also has a shut down facility if unused for 10 minutes.
This will output 100W when fully charged with compatible coils.
This is more of an intermediate kit as it is designed for Sub Ohm vapers who use the Direct to lung (DTL) method.
The prices I have seen this for online makes this feel excellent value when you compare the battery capacity to similar priced models.
So does this satisfy more than a KitKat Chunky? Let’s see!
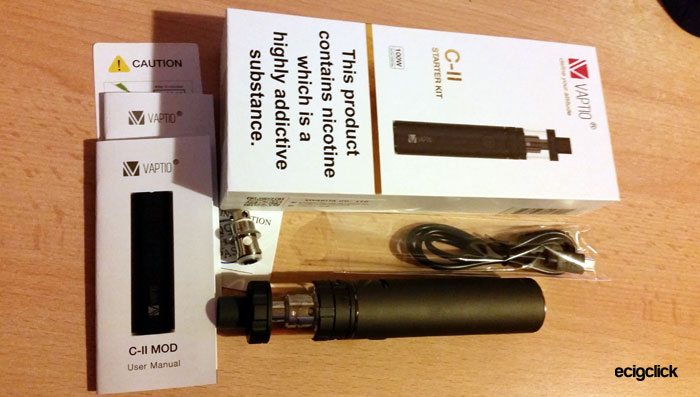
What’s In The Box
- C2 battery
- C2 tank
- 129A coil (Screw in)
- 180A coil (Push fit)
- User manuals
- USB cable
Features
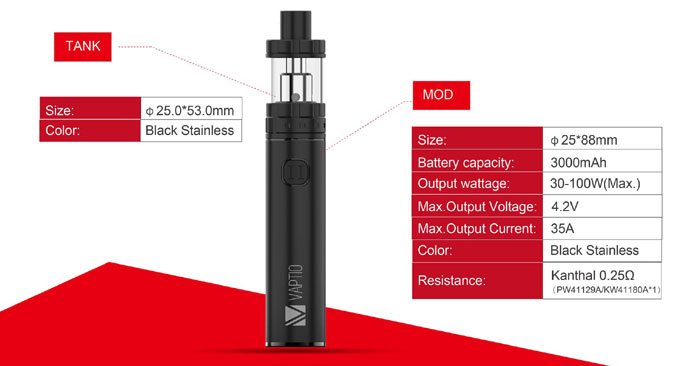
- Battery capacity: 3000mAh built in
- Output: 30-100W
- Maximum output voltage: 4.2V
- Maximum output current: 25A
- Tank capacity: 4ml
- Airflow adjustment
- Liquid flow adjustment
- Size: 25x88mm
- Colours : Black and Grey
- Auto shutdown if unused for 10 minutes.
- 510 spring loaded pin on battery
- 510 connection on tank
Build Quality & Design
This comes well packaged with all you need to get up and running. There are 2 instruction manuals which are written in tiny writing and very vague.
I’m not a total newbie and I am an engineer by trade and I even struggled to work out what the coil installation diagrams meant.
Anyway once you have figured that out you can start taking in the features of the mod.
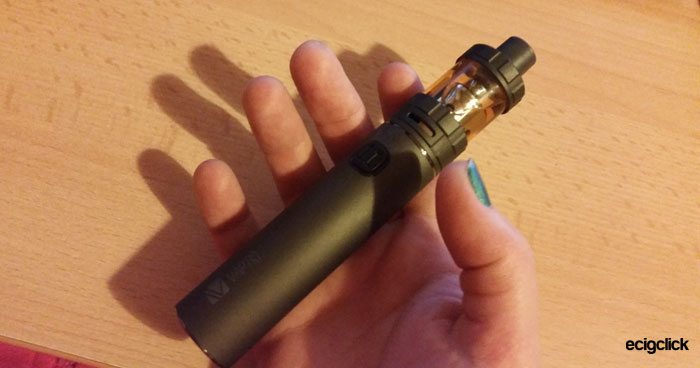
I received the grey colour –but it does look black to me! It says grey on the box so I will have to believe them.
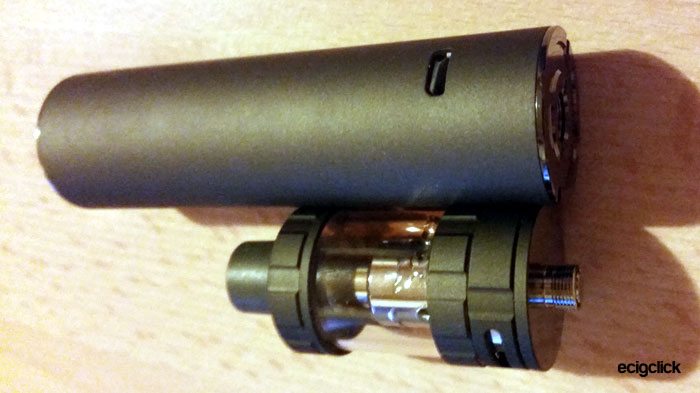
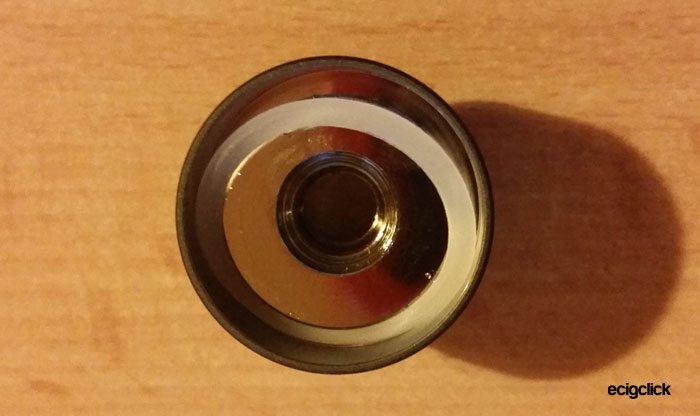
It is a whopping 25mm diameter with a huge drip tip on the top. The drip tip is similar to that of the Cleito tank. You pull the drip tip and it acts like a sleeve. So you still have the metal part sticking up from the top cap. Which makes installing a different drip tip not much fun as you will have this big metal part with o rings on showing.
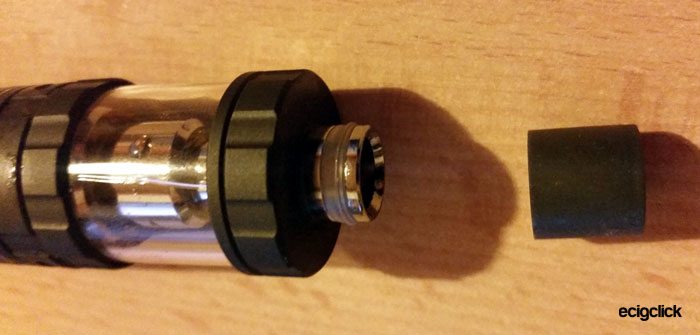
The tank has adjustable airflow and adjustable liquid flow – took a while to work out how to operate the liquid flow as no instructions – surprise surprise. The website has even less info.
There is a lovely big chunky fire button which lights up.
In The Hand
How Does the Vaptio C2 Perform?
Basic operation
To get started use the supplied USB cable – small end connected to the charging port in the battery and the other end to a suitable USB outlet. The light on the fire button will go out when this is fully charged.
The instructions say it takes 4 hours to charge using a 1A supply. You can also use this whilst it is charging.
5 clicks of the fire button turn this on and off. The light will flash to confirm this.
To vape just press the fire button.
From what I can see there is no alert/display showing battery capacity remaining. A real pet hate of mine.
Vaptio C2 Tank
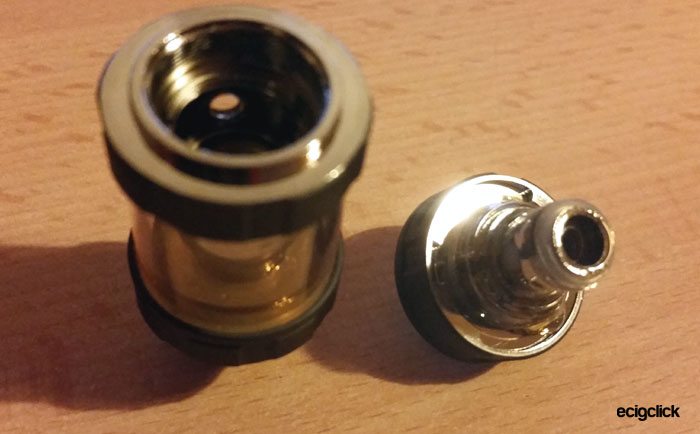
You can pretty much dismantle most of the tank for cleaning – however I could not get the bottom plastic part off and I wasn’t going to use force as you don’t get a spare tank glass with this.
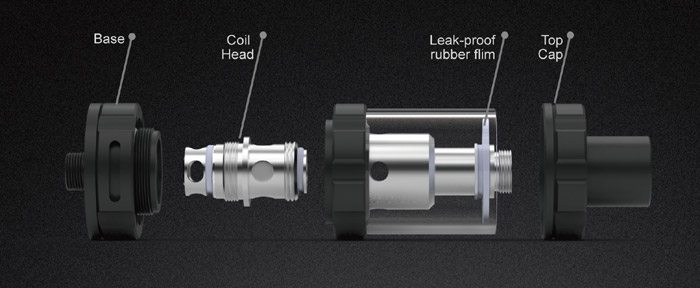
To adjust the liquid flow you have to push down on the tank top cap. When you turn it you can see the holes in the sleeve of the tank open and close. If you unscrew too far you will unscrew the top of the tank. Again the instructions were useless for this.
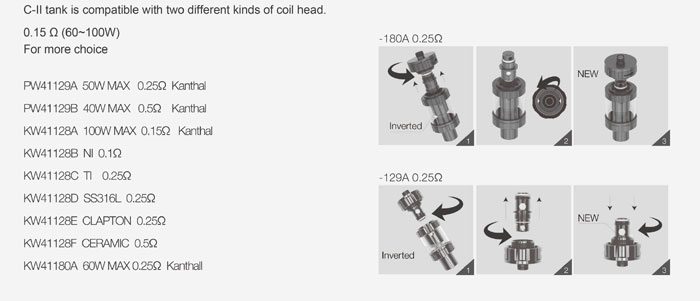
There is a huge range of coils showing on the Vaptio website – however I haven’t been able to find anything other than the 0.25ohm, 0.15ohm and 0.5ohm coils for sale. I can only find them by searching for the P1/P2 coils which are apparently (I hope) compatible.
This does make a big hiss when using it –but hey it is a right beast so what do you expect.
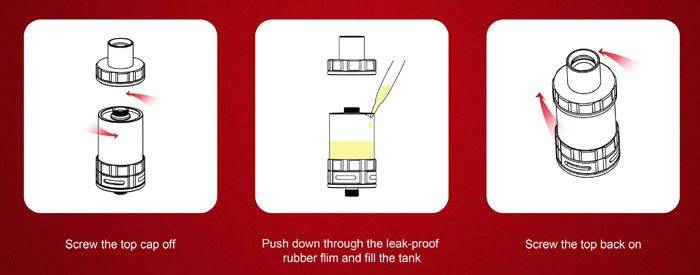
How To Fill The Vaptio C2
- Remove the top part of the tank by unscrewing.
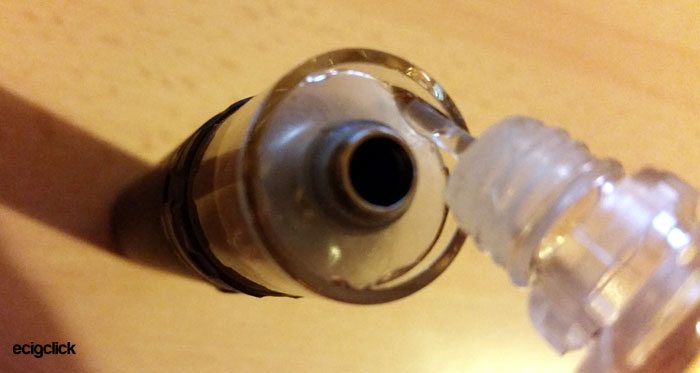
- Using the liquid nozzle gently push down the see through plastic ring (this is to stop leakage).
- Squeeze the liquid into the tank.
- Replace the top cap making sure the O-ring is still in position. The O-ring does seem to move when you remove the top cap.
Make sure to open the juice flow adjustment – this should happen as you screw the top of the tank back on. If unsure press down on top cap and unscrew slightly and watch the lower part of the chimney – you should see the juice holes close. Press the top cap and tighten to see the juice holes open. If you miss out this step you will get a horrible burnt taste and could damage your coils.
How To Change The Coil Head
Now this isn’t as easy as it would seem.
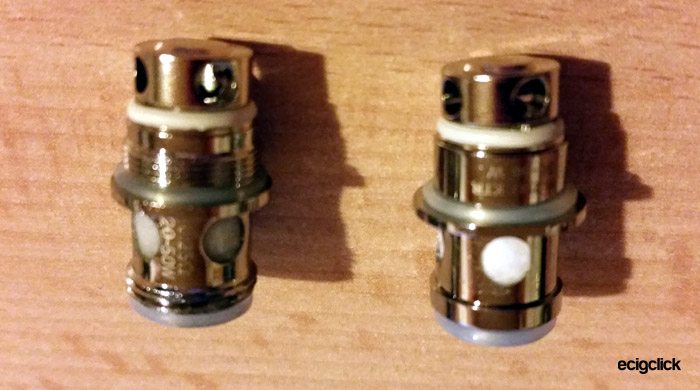
The starter kit has 2 coils – these are both different and are installed differently.
The illustrations in the manual and on the website are of no use at all.
The 180A coil just pushes in. The 129A coil needs to be screwed in.
Both coils are 0.25ohm –the 180A coil says 30-60W and the 129A coil says 20-50W. When you look at them the 129A coil has a screw thread.
In the photo below the 129A coil is on the left and the 180A coil is on the right – sorry couldn’t get a clearer photo of these but hopefully you get the idea!
- Remove the tank from the battery.
- Push down on the top cap and screw until the juice holes in the chimney are closed. This will keep the liquid from leaking.
- Turn the tank upside down and keep it inverted.
- Remove the base section of the tank.
- Depending on the coil – if it is the 129A – screw this into the base.
- If it is the 180A this just pushes in to the base.
- Pop a few drips of E-liquid onto the cotton that is showing through the side slots of the coil.
- Replace the bottom cap.
- Open up the liquid flow adjustment.
- Put the tank back onto the battery.
- Leave the tank to stand for 5-10 minutes to soak up the liquid.
- Take a few draws on the mouthpiece without pressing the fire button before using to pull liquid into the coil.
Flavour & Cloud Production
I used 80%VG liquid (Cloud No 5) in this as I use this all the time and find it easier to judge the vapour and taste performance between devices.
I used a 6mg strength nicotine liquid as with a sub ohm coil you don’t need such a high nicotine level to get a good vape. In fact I didn’t add any of the nicotine shots I have been using and still went a bit light headed – that’s how powerful this is!
Further Reading: What is PG and VG in E-liquid?
0.25ohm 129A Coil
Wow this is lovely warm flavourful vape. With the airflow open or closed. You get so much vapour and a wonderful throat hit. Wow the performance is amazing.
I highly recommend this. The power this kicks out is incredible- but no dry hits, spitting or gurgling – what a brilliant coil in an excellent tank! The power rating for optimum performance of this coil is 20-50W.
In fact I am using this an hour after waking up and it’s blown my head off – not quite an gentle early morning vape! I am also drinking like a fish as the heat has dried my mouth out!
This is such a satisfying vape, I recently reviewed a few higher power tanks the Carrys Green Tank and OBS Crius 2 which I loved for taste and vapour – I have to say this coil on this device is very very close – really lovely.
This doesn’t guzzle the liquid either like you would expect from the vapour and flavour you get! I recommend this coil in the C2 highly!!
0.25ohm 180A Coil
Finally tore myself away from the amazing 129A coil and installed the 180A.
So far so good, slightly better I think than the 129A – a touch more flavour but the vapour volume is the same.
I did find myself topping up the liquid level more with this coil – but not to the extent I would call it greedy by any means. This does run at a slightly higher power being rated at 30-60W.
No spitting or dry hits from this either. I am struggling to tell the two coils apart – not only visually – but in performance too.
However the difference between the coils became apparent a few days later – the 180A leaks! It is the push fit coil – I found E-liquid throwing itself out of the airflow adjustment at the bottom of the tank. I thought the tank was faulty – I changed back to the 129A screw in coil and leak is cured!
Battery Life
This has been in use for over a week but I didn’t run the battery down fully. As with all batteries it’s best to try and re-charge before fully depleted.
I haven’t noticed any drop in performance over 5 hours either which is great.
I did have to stop the test for a while due to a late visit to the hospital but at 8.5 hours this is still going and the vapour is slightly cooler – but still good taste and volume – so I would say it’s starting to lose power a little bit.
It isn’t very noticeable but you might find you need to take longer inhales to get the same throat hit – but it hasn’t stopped working.
At 9 hours the performance is getting quite weak taking several seconds to inhale to match previous performance.
So I would say roughly 7-8 hours of reliable consistent regular vaping – after that it does start to tail off in power a bit – but not massively. If you are taking it to work and only using it every few hours it will easily get you through your work day.
There is no mention of a battery life indicator on the instructions or website and nothing I can see on the battery itself. This really disappoints me – it is something so basic it should be a no-brainer. So I can advise using the power dropping through your vape as a guage on when your battery is running low.
I usually get in a right mood about the lack of a battery indicator feature but the battery life on this is at least good enough that you wouldn’t be on edge all the time about it conking out on you – but please manufacturers just some sort of simple battery capacity display would be great!
What I Like
This does feel robust and chunky. A lovely design.
A really satisfying vape – similar to more expensive and more powerful tanks. In fact when the battery on the C2 went flat I didn’t want to wait for it to charge so put the C2 tank on the IPV8 Mod I am reviewing!!
What I Dislike
The charging time is slow. Some new devices have a quick charge capability which this would have really benefited from.
The coil installation, instructions and website make life a bit harder!
Leaky 180A coil head.
Final Review Verdict
The Vaptio C2 is marketed as being pocket friendly but it is huge and quite heavy so I wouldn’t be stuffing it in any of my girly pockets.
The battery life is immense. The power is incredible. This is a pleasure to use once you have got past the tricky task of setting it up. Sadly the charging is slow going.
Its great value too – the coils seem harder to get hold of than the mod itself – but hopefully they should start showing up in more online stores.
A few niggles stop this from being perfect – but the performance really impresses. I have had to rate it low in the ease of use category as the instructions are not helpful at all.
I did find the 180A push in coil head leaked. Quite significantly too. Swapped back to the 129A coil and leak has gone.
Pros
- Such an amazing warm, flavourful vape
- Incredible vapour production
- Solid well-built mod
- Great airflow adjustment
- Top filling
- Economical battery usage and not a huge drop in performance as the battery discharges
- Economical with e-liquid too
- 129A coil is excellent all round.
Cons
- Terrible instructions and no info on website
- Hard to tell the different coils apart
- You can change the drip tip but the design of the top cap means it will look horrible
- It is very bulky and quite heavy – not an “up your sleeve sneaky mod”.
- Slow charging time.
- Why no display of battery charge level? I can’t believe I have had so many new devices without this basic function?
- 180A coil leaked.

