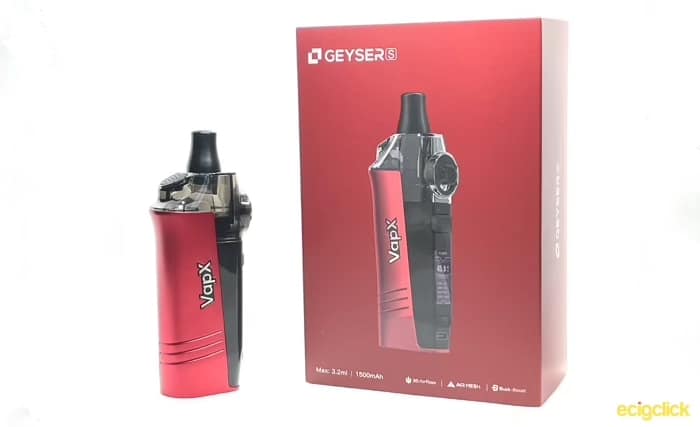
The Vap X Geyser S pod mod review, so let’s see if this one’s good enough for the vaping geezers and gals…
Pod mods with replaceable coils are definitely here to stay, in one shape or another. However one thing that a lot of manufacturers are still refining is how best to control the airflow.
One solution that we’ve seen a lot of, is to have the airflow control ring on the bottom of the coil itself. However this often means having to remove your pod from the device, or take off a door, to be able to adjust it.
So I’m curious to see what the Vap X Geyser S brings to the party, with a large airflow control wheel on the outside.
What Can We Expect From the Vap X Geyser S?
Vap X is a relatively new company, I believe the Geyser S which I got in for review, is only their second product.
Their first one was the unusual looking Geyser that took a 21700 battery and had two airflow control rings.
The Geyser S switches to an inbuilt 1500mAh battery capable of firing up to 50W, and drops down to a single airflow control ring. It’s also a fair bit smaller than it’s big brother (maybe that’s where the “S” comes from?)
It comes with a single coil type, which is a 0.25Ω called the model 10. Apparently this is good for both a loose MTL and a restricted DL. You can read more about the different styles of vaping here.
They also make a 0.6Ω coil called the 10n, which is designed for tight to loose mouth to lung, for use between 15-25W.
This was sent over for the purpose of review directly from Vap X – thank you and as always this in no way impacts my review, and I shall report back honestly with what I find.
Inside The Box
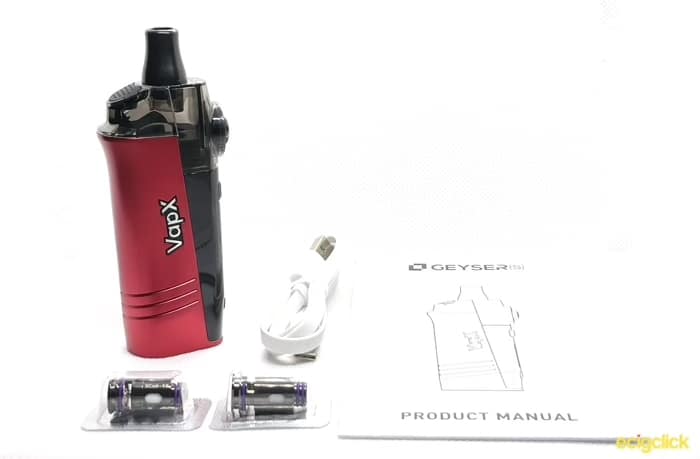
- Geyser S Pod System
- 2x 0.25Ω Mesh Coils
- USB C Charging Cable
- Manual
Specs
- Dimensions – 26 x 43 x 108mm
- Weight – 134g
- Power Output – 5-50W
- Battery – Internal 1500mAh
- Capacity – 3.2ml (2ml TPD)
Design and Build Quality
Vap X Geyser S Colours
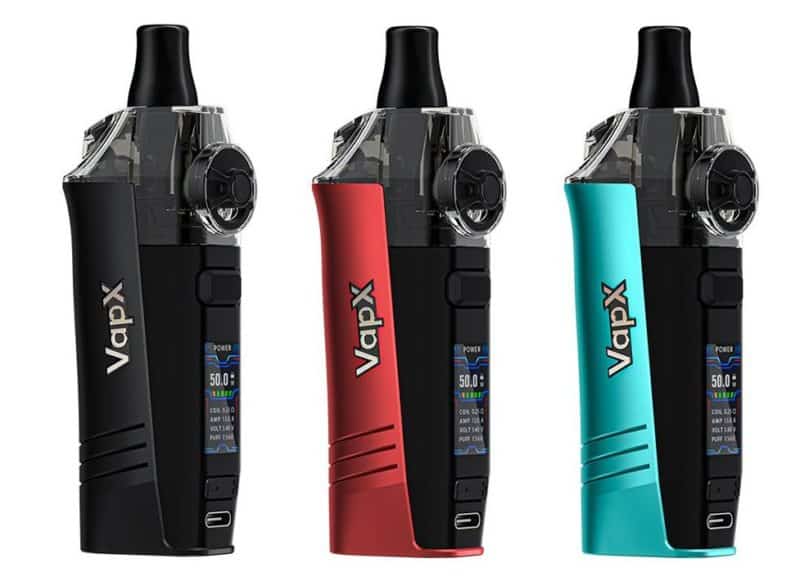
The body is made of lightweight aluminium, and comes in three colours.
Charcoal Black, Volcano Red (which I received) and Crater Lake Blue.
Vap X Geyser S Body
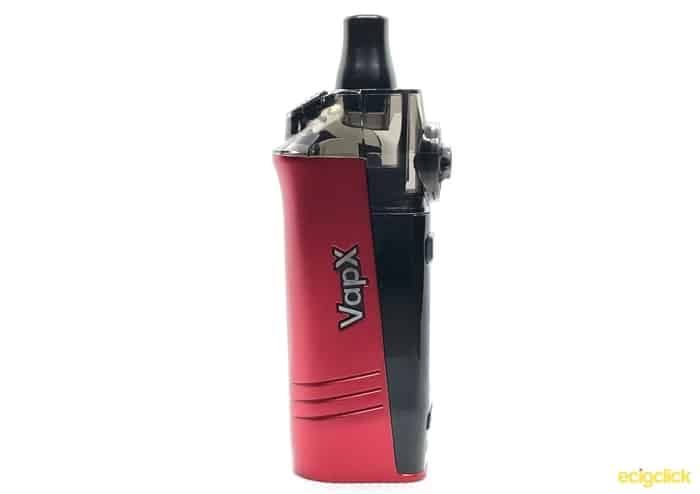
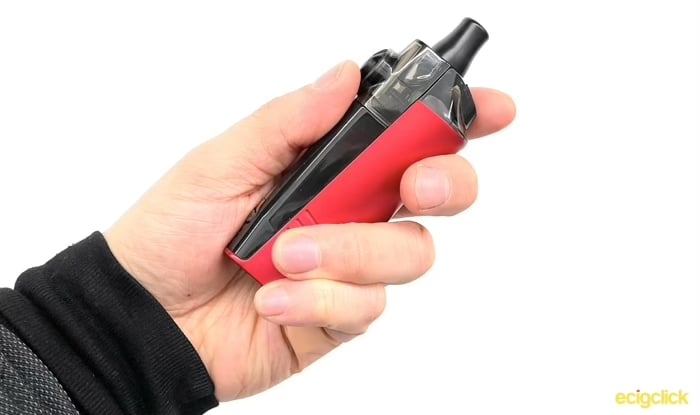
It’s a petite little pod, and feels very comfortable in the hand due to it’s rounded edges.
There’s no flex to it, and it feels reassuringly rigid despite how lightweight it is.
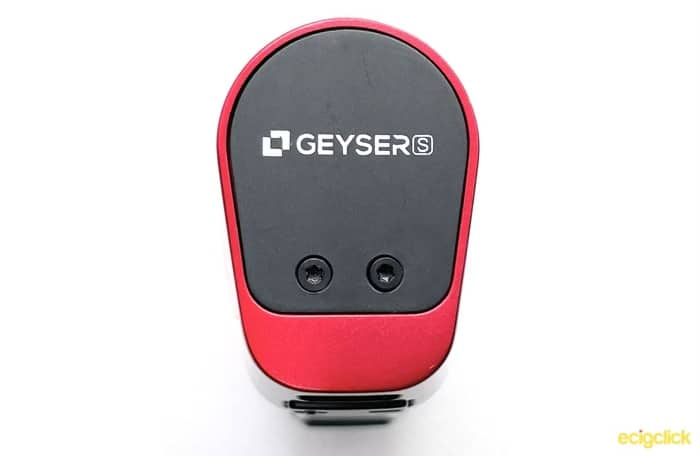
Flipping it over to look at the base, the name is printed, as well as the logo. Unusually there are none of the usual regulatory marks on here. More worryingly is the fact that there seems to be no battery venting…
The base is also the one area that doesn’t feel as solid as the rest of the device. It is held on by two torx screws, but these are only on one side. So if you press on the other side, it flexes inwards slightly with a slight “click”.
The Vap X Geyser S Pod
Unlike so many other pods, this one is not held in by magnets! Instead you have a small rail system that the pod sits on and is then pushed in.
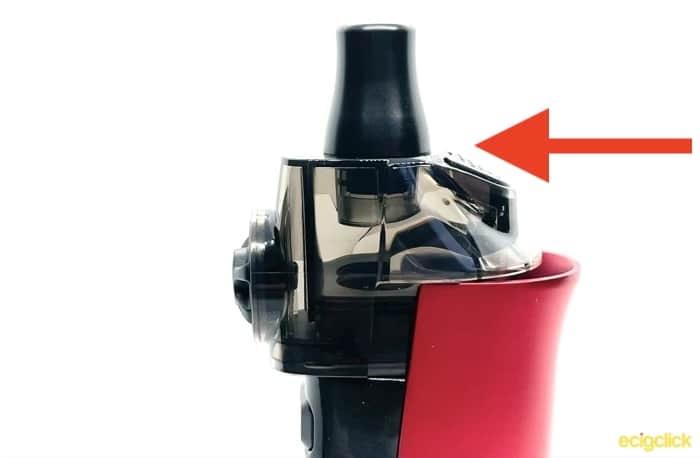
Removing it is easy to do, you just need to push horizontally on the pod, on the side with the fill port. It snaps back into place positively, and there’s absolutely no wobble once it’s there.
The drip tip is a removable 510 connector (yay for replaceable drip tips!) but it does have a skirt to make it look seamless, so just be aware that other tips might not look as good.
Having said that, I didn’t feel the need to change it, as it’s plenty comfortable, and has a good sized bore for a restricted DL vape.
Because of how the pod sits above the main body of the kit, it’s always easy to check your e-liquid level. It’s got a slightly tinted plastic, but unless you’re in the dark, it should be easy to see through.
The pod holds 3.2ml of e-liquid, or 2ml if you’re in a TPD country.
Vap X Geyser S Airflow Control
The airflow control is definitely one of the most stand out features of this pod.
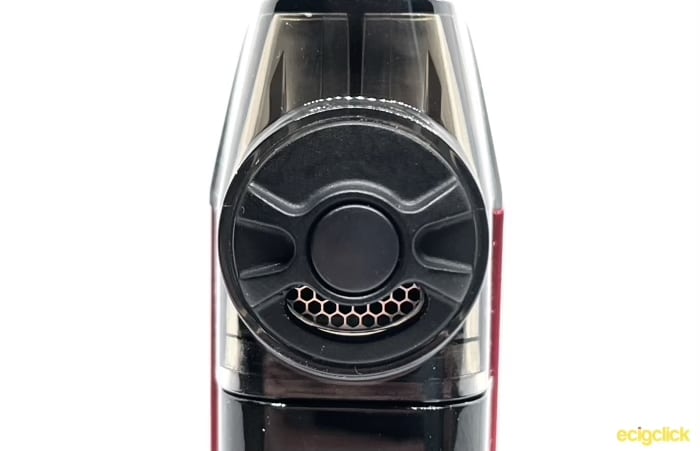
You adjust it by rotating a ring on the flat side of the pod.
It’s got a honeycomb airflow structure underneath the wheel, and you can really fine tune the amount of air that flows through.
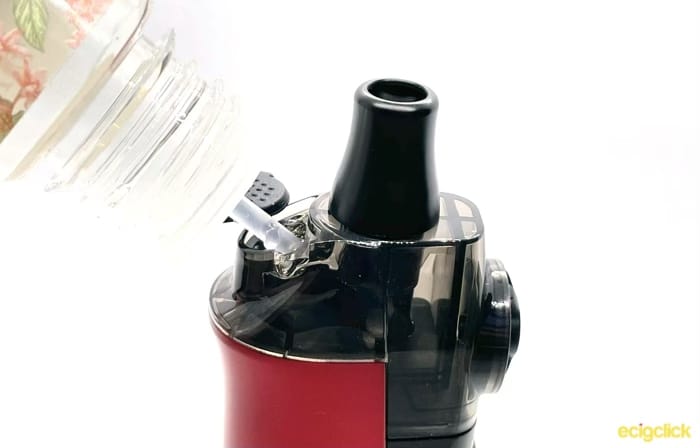
How To Fill the Vap X Geyser S Pod
- Unplug the silicone stopper on top of the pod
- Fill with your preferred e-liquid
- Replace the stopper and leave to sit for 5 minutes
I really like the silicone stopper, and the fact you don’t have to remove the pod from the device to fill it. However it’s worth noting that it’s not a huge fill hole, so you will want to fill it up relatively slowly so you don’t get an airlock and spill e-liquid everywhere.
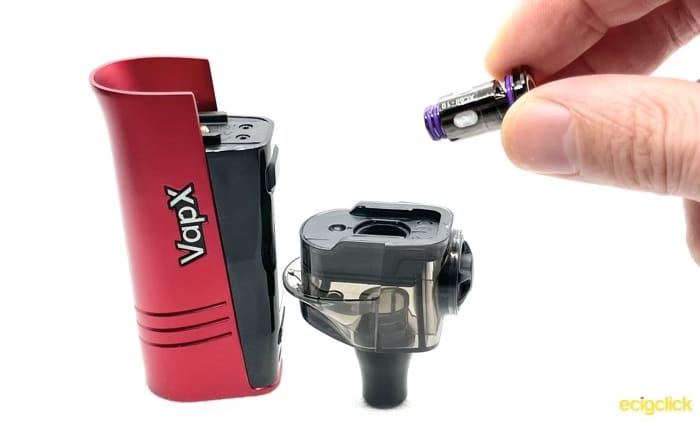
How To Change The Vap X Geyser S Coil
- Slide you pod out of the device
- Turn your pod upside down and remove the coil
- Replace your coil, making sure that it goes in all the way by lining up the flat edges
- Slide it back into the device
Remember to leave it 5 minutes if it’s a new coil – known as priming.
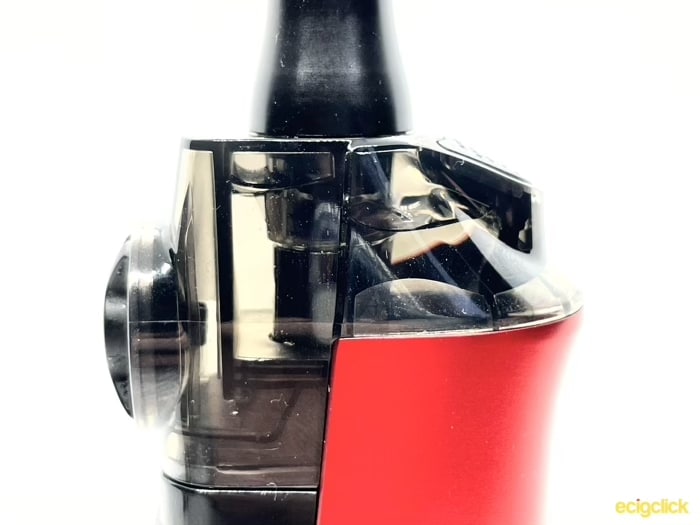
As you may be able to see in the above picture, the chimney section protrudes a decent length into the pod. So as long as your e-liquid remains below this level, you can change your coil with some e-liquid in the pod.
Vap X Geyser S Pod – Screen and Controls
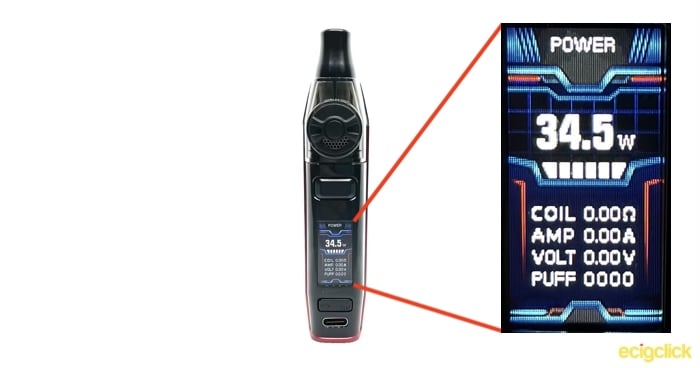
The screen is bright and easy to read, although the graphics do look like something out of the 80’s.
From top to bottom it shows.
- Current Wattage
- Coil Resistance
- Amps
- Volts
- Puff Counter
Above the screen you have a rounded rectangular fire button, and below it your + and – buttons. All the buttons respond positively, and there’s no button rattle from them.
The +/- are quite small though!
Below your adjustment buttons is your USB C port, which I’m always pleased to see!
Wattage is adjusted in 0.5W increments from 5W to 50W. Scroll all the way to the top or bottom and it will stop, then round robin if you press it again.
The other functions are fairly simple, as this is only a wattage device.
- Fire 5x – Turn On/Off Device
- Fire 3x – Puff Settings, press “+” to clear the puff counter
- Long Press “+” and “-” – Lock the Wattage
- Fire and “+” or “-” – Brightness Adjustment
How Does the Vap X Geyser S Perform?
For these tests I was mostly using Ohm Boy’s Apple, Elderflower and Garden Mint, at 70/30 VG/PG.
0.25Ω Coil – Airflow and Cloud Production
The first thing I noticed about the vape was how smooth the airflow was. There’s not a hint of turbulence and the honeycomb airflow really seems to be doing it’s job.
Wide open it lets a lot of air through for such a tiny device.
On a scale of 1-10 where 1 is like sucking a golf ball through a garden hose, this rates an 8.5. There’s just a little bit of restriction.
In fact I found this was actually too much airflow for the coil I was using.
The clouds from this are not huge and room filling, because of that I found that they felt a little “limp” with that amount of airflow.
Even at the coils maximum recommended wattage of 45W, or the maximum the device can reach which is 50W.
Closing the airflow down to about half, and the amount of air seems to be matching the vapour production much better. It’s still absolutely silky smooth, and much more of a restricted direct lung vape. On the 1-10 scale, I found that closing it down to about a 6 was it’s sweet spot.
If you want, you can close it down even tighter, and it does a credible mouth to lung. This manages to pass my test of being able to shut off the airflow completely. When it’s totally off, there is no airflow.
Because of this you can crack it open little by little, to find your sweet spot.
Love this airflow!
0.25Ω Coil – Flavour
The coil is rated at between 35 and 45W.
Starting at 35W the flavour is OK. It’s clear that all the flavours in the e-liquid are well represented, but the best way I can think to describe it is “subtle”.
This gradually improves as you go up through 40 and 45W, and in the interests of completeness I also tested it at 50W.
It’s still quite a subtle flavour you get from the coil even at 45W, and 50W doesn’t improve anything, just makes it a little warmer.
The biggest change to the flavour came when I closed down the airflow to be more of a restrictive direct lung.
This is definitely the sweet spot for the coil, and I would say that Vap X were bang on when they described this as restricted direct lung to loose mouth to lung.
If you prefer more restriction and use it mouth to lung, I would suggest not going above the starting wattage of 35W. There’s not really enough airflow to keep the coil cool otherwise.
Vap X Geyser S Battery
A 1500mAh battery is not huge if you’re going to be using this near it’s maximum wattage. Having said that, I managed to get 140 puffs firing at 40-45W before it refused to fire.
Although it’s worth mentioning that I noticed the power dropping off during the last 15. By the final 5, it was barely producing a wisp of vapour.
Charging time is decently fast, taking 42 minutes to complete a full charge. It also allows pass-through charging, so you can have a vape on it whilst it’s charging.
Pros
- Lightweight but sturdy design
- Great airflow control
Cons
- Flavour is subdued
- Fill hole a little small
Final Review Verdict
It’s a decent performing little kit, it’s well put together and feels like it’s built to last.
It’s not going to be the device of choice for people who want to fog out a room. It’s also not going to be the one for flavour chasers demanding the most punchy of flavours.
But for the rest of us? It ticks a lot of boxes.
It’s easy to use, lightweight, and has one of the best airflows I’ve had the pleasure of testing on a pod mod.
Is this one you’re keen on buying or already using it?
Do let me know your thoughts, opinions or any questions you might have in the comments below.


I love those graphics hahaha!
Hah, thanks Michelle!