I have got my girly hands on the new Uwell Nunchaku 2 Kit and I am a happy bunny!
I am a huge fan of the original Nunchaku kit – we didn’t officially review this on Ecigclick – but I own it myself.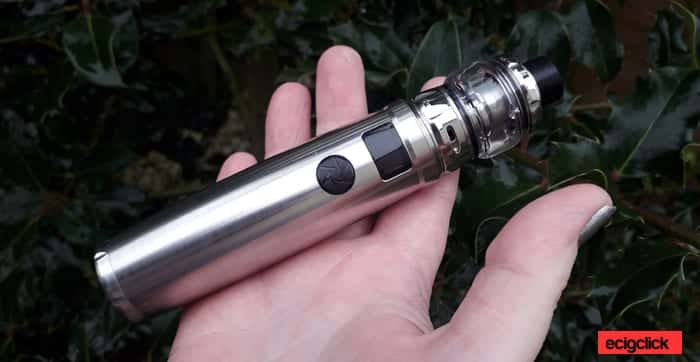
Yes I know my original kit isn’t “matchy matchy”!
I lent it to a friend and some thieving arse pinched the black tank and the mod he was using it on too.
Luckily I also had the rainbow version of the tank – I had bought a second one because I loved the tank so much!
My original kit has had some abuse, been leaked on multiple times, dropped and is generally a bit tatty now but it still works perfectly!
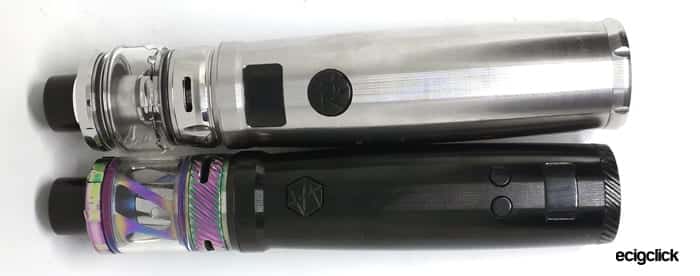
One of my main complaints with the original kit was it was a bit power hungry and battery life suffered as a result.
It’s almost as if Uwell had read my mind…
What Can We Expect From The Uwell Nunchaku 2 Kit?
The biggest new feature is the ability to use different batteries in the Uwell Nunchaku 2 kit.
The original only allowed the use of 18650 batteries which did limit battery life a lot.
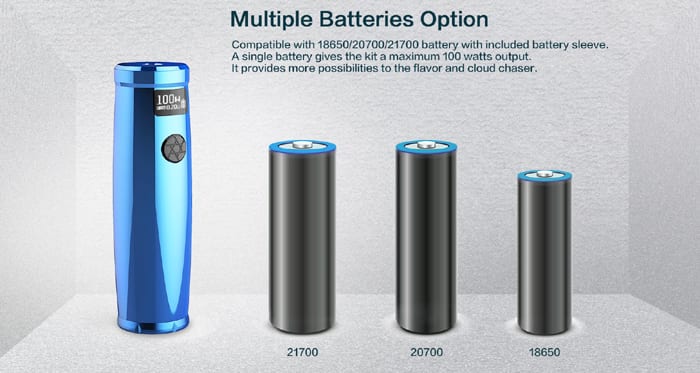
So now you can still use a 18650 (with included adaptor sleeve) or 21700/20700 batteries.
The bigger batteries often have a higher capacity.
The change in battery also means the output is higher with the 21700 at 100W whereas the original Nunchaku kit was a maximum 80W output.
Another new feature is that Uwell have ditched adjustment buttons!
You still get a fire button and screen but the internal motion sensors allow you to make adjustments by tilting the device.
There are 3 user modes – Variable Wattage (power mode), Temperature Control (TCR mode) and by-pass (Mech mode).
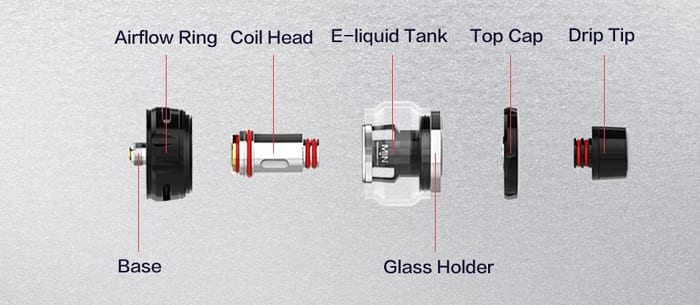
Uwell have created a new sub ohm tank for this kit too the Nunchaku 2 tank strangely enough!
This is designed for sub ohm DTL vapers with 2 coil options. The coils are a push in pull out style and apparently you can use the original Nunny coils in here too!
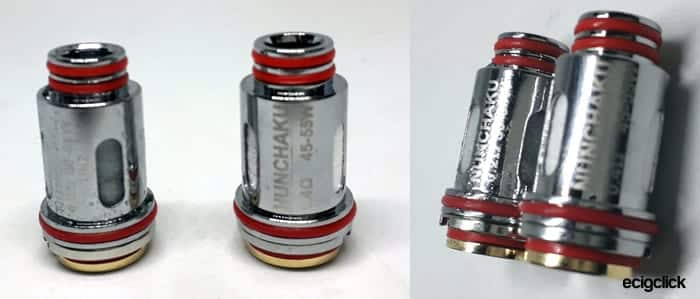
The new coils have a honeycomb mesh structure and come in 0.2ohm (Kanthal Mesh) and 0.14ohm (SS316L Mesh).
We tell you more about vaping styles in our Guide to MTL and DTL Vaping Styles.
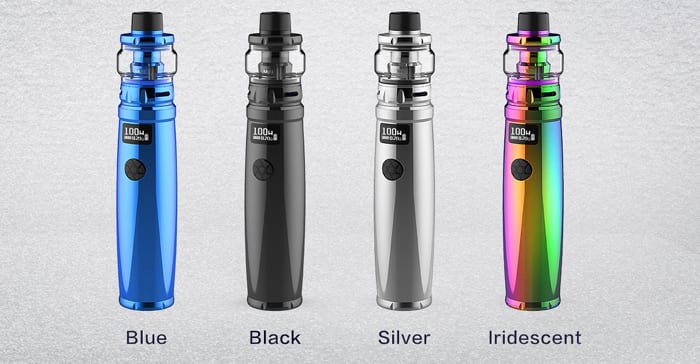
There are 4 colours to choose from: Blue, Black, Silver and Iridescent.
Incidentally and for those not bought up on a diet of Kung Fu films, the name of the device comes from the shape of the handle on those Nunchaku martial arts weapons 😉
I was sent the Nunchaku 2 kit by Vaporl for review purposes (Thank You) and as always I will report back honestly on my findings with the device in my possession.
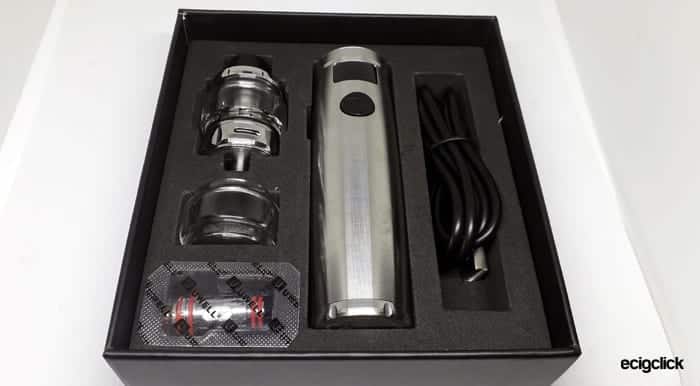
What’s In The Box
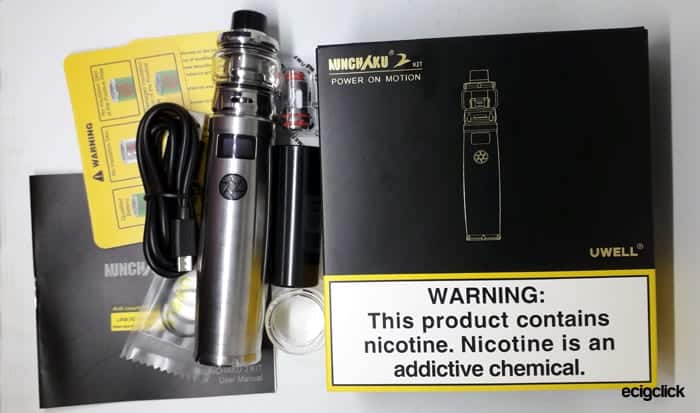
- Uwell Nunchaku 2 mod
- Uwell Nunchaku 2 tank
- UN2 Meshed-H 0.2ohm coil (installed)
- UN2 Meshed-H 0.14ohm coil
- Spare glass
- O-rings
- Battery adaptor sleeve
- USB cable
- User manual
Mod Features
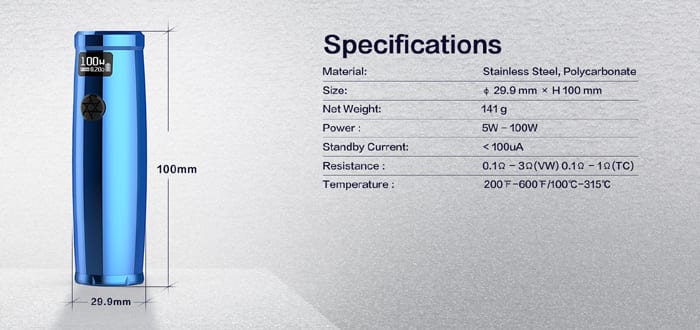
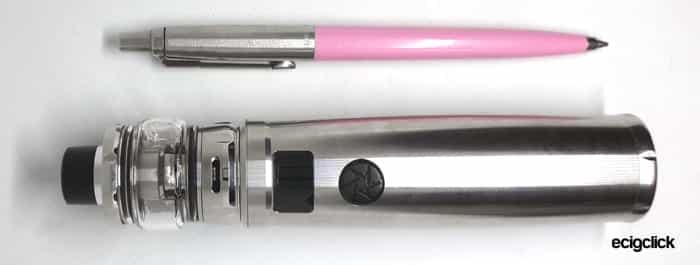
- Size: 100x29mm
- Output: 5-100W
- User modes: VW, TCR, By-pass (Mech Mode)
- Battery: 1x 21700, 20700 or 18650 with adaptor sleeve
- Resistance range: 0.1-3ohm (VW), 0.1-1ohm (TC)
- Display: Screen – size not specified
- Dust proof / moisture proof chip
- 2A quick charge
- Motion sensor to make adjustments / change mode (no adjustment buttons)
Tank Features
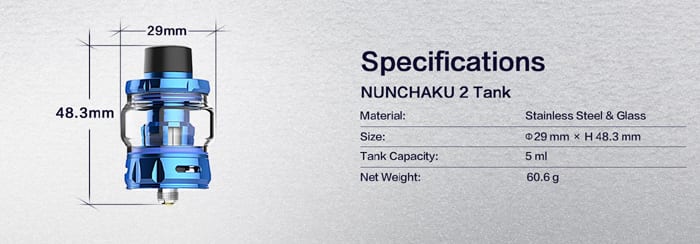
- Size: 29×48.3mm
- E-liquid capacity: 5ml (standard)
- Coils: Original Nunchaku coil range plus new Meshed coils
- Top quarter turn refill cap
- Bottom adjustable airflow
- Plug pull coil installation
Build Quality & Design
I received the Nunchaku 2 kit in the silver design.
The packaging as usual looks super classy.
A protector on the screen meant it arrived pristine and the tank is separate from the mod in the packaging.
Instruction wise I think the leaflet is great actually – better than a lot of manuals I see!
Uwell Nunchaku 2 Mod
Wow this really is a chunk – it is heavy and bigger than the original Nunny – obviously as it takes bigger batteries! The original wasn’t exactly feather light.
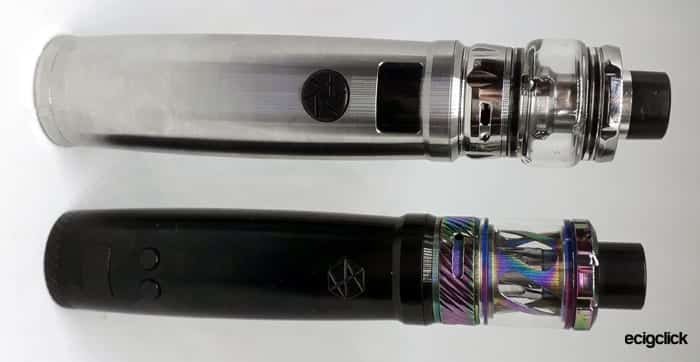
The outside finish is apparently stainless steel which has been hand polished so as you can imagine even without a battery this has some weight.
Also the added bonus is this feels so robust, if I dropped it I would be checking the surface it landed on for damage rather than the mod.
I did find when standing up on a desk or table the kit only needed the slightest excuse to fall over. Which for me it did many many times, but it has survived!
The finish is just stunning a slightly matt silver which does strangely contrast with the super shiny chrome look of the tank.
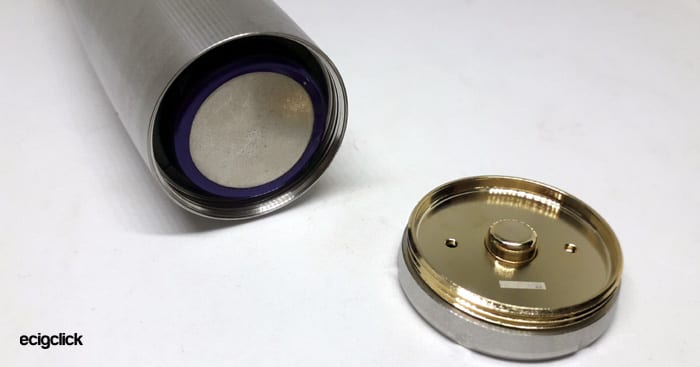
Thankfully the shiny battery cap does give some reference to the tank finish.
On the rear of the mod is an etched style branding with Nunchaku 2 and Uwell written – this is still super classy and not at all garish.
Towards the top of the mod is the micro USB port.
I did plug a charger cable into this to test and it worked fine no wobbly connections.
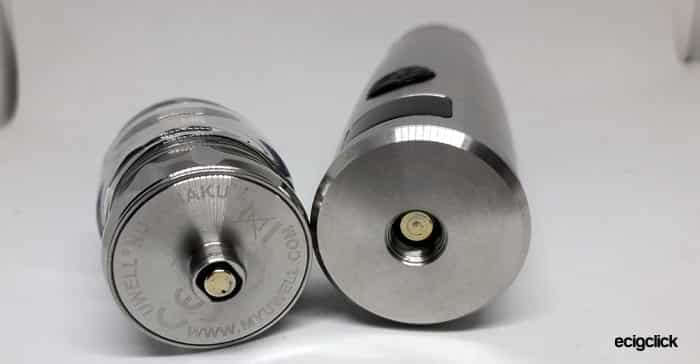
The 510 connector threads are part of the mod top so no chance of the 510 connector coming out of the mod with your tank.
The positive pin is spring loaded.
There is a slight shoulder taper on the top of the mod so a 25mm tank should be the largest you can use to fit with this taper. Anything larger will overhang the bevelled edge slightly.
In fact whether you like plain or funky mods – there is zero to be offended about the looks of the Nunny mod. A real class act.
Battery Cap
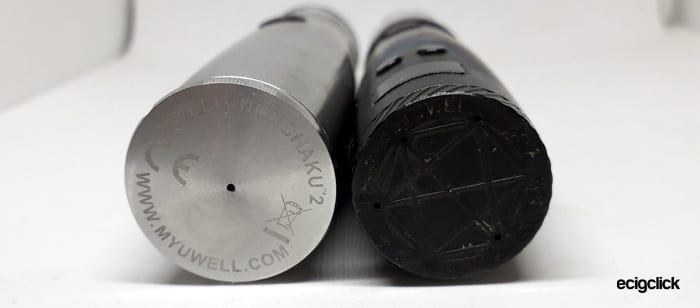
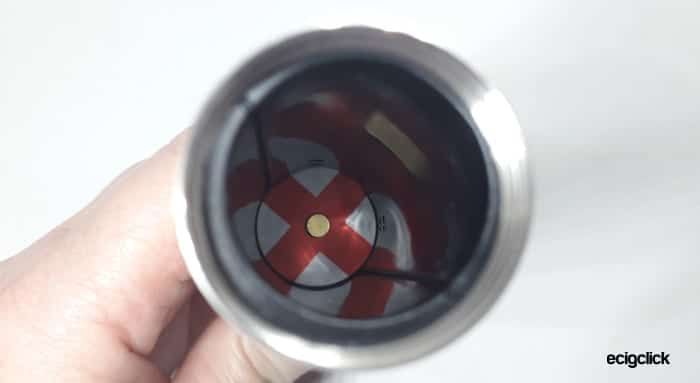
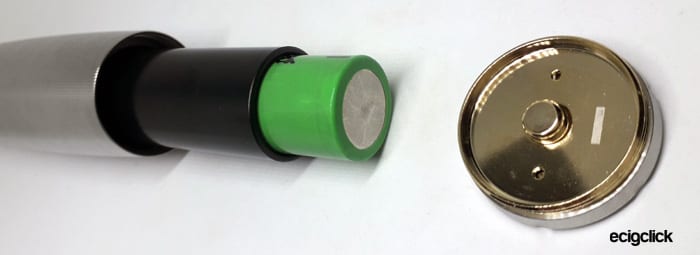
The battery cap unscrews from the base and the negative polarity is clearly marked on the cap.
If you look inside the mod a big red + is visible to show you that is the positive pole.
18650 and 21700 batteries fit snugly with zero rattle and the threads are clean and smooth. I don’t own a 20700 to try sorry!
There are some grips on the cap too so you can grip it with ease.
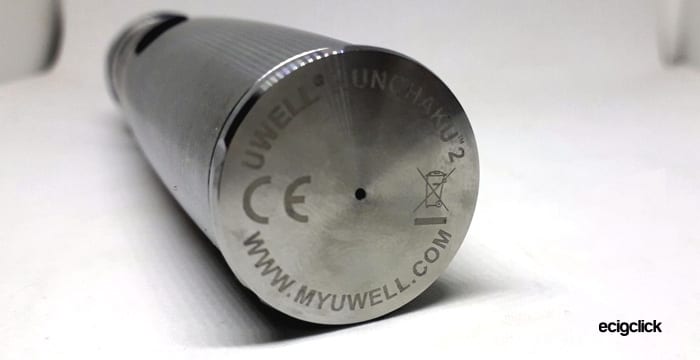
On the base of the cap is the Nunchaku 2 and Uwell branding in addition to the required legal logos.
Controls
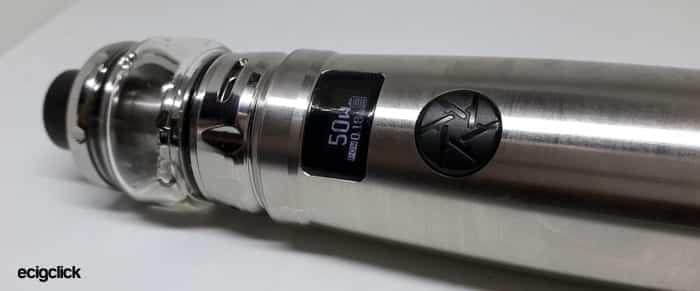
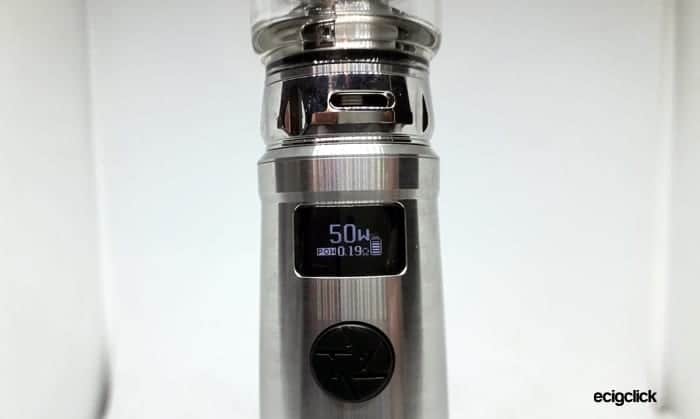
There is no branding on the front of the mod there is just the single fire button and the clear screen which is slightly bigger than the original model.
The fire button has a textured finish and responds quickly with a satisfying click!
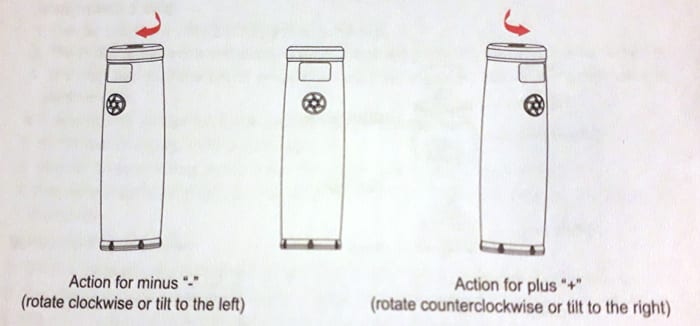
As you no longer get adjustment buttons you simply press the fire button 3 times to enter the menu and twist or tilt the mod for the up and down adjustments.
If you do a single tilt/twist the adjustment will move in single increments, if you hold the mod tilted it will zoom quickly through the increments.
In fact this was too fast for me some times and you end up having to zoom through and then fine tune with single tilt/twist movements.
This system does work, it is innovative but I am sorry I prefer buttons.
Not saying there is anything wrong with this system but I just found it too time consuming to do single increments and it was way too fast on the fast adjustment setting.
I found myself actually dreading having to adjust the output!
Mod Screen
The original Nunny had a slightly smaller screen – but I am unable to actually find the size stated.
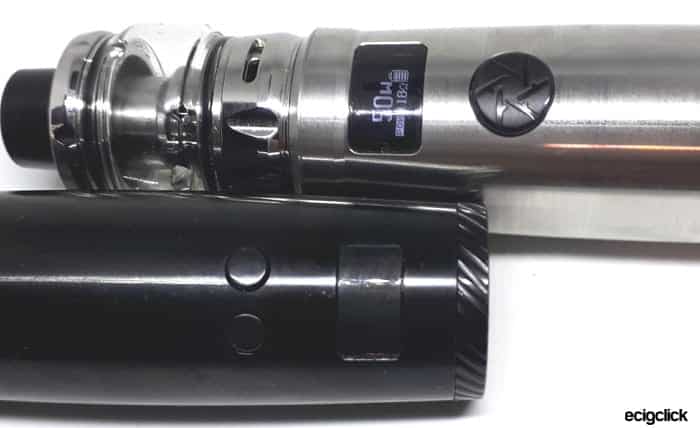
I like the larger screen and it is laid out really well.
The “home screen” displays your power setting, user mode, coil resistance and there is a battery level icon.
Also for some reason – I don’t know why but having the screen higher up on the mod and nearer to the fire button just feels better.
Tank
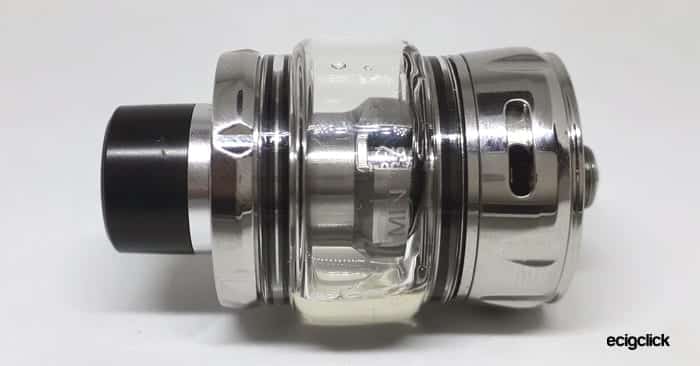
The tank has a different finish to the mod in that it is super shiny where as the mod has a brushed finish.
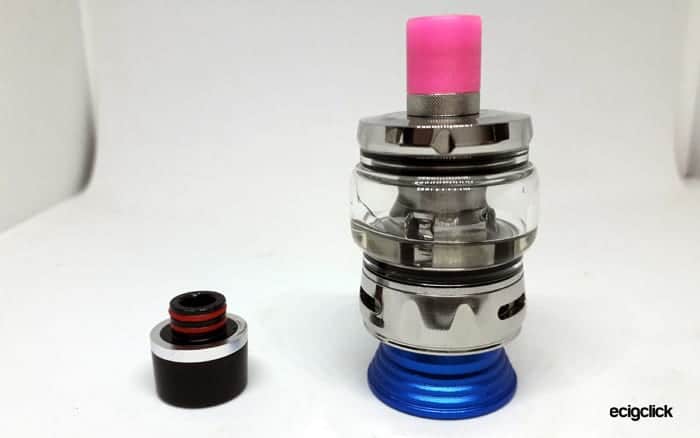
Like the original Nunny tank it still looks the business. This time the tank is not as tall so it does look a lot more balanced.
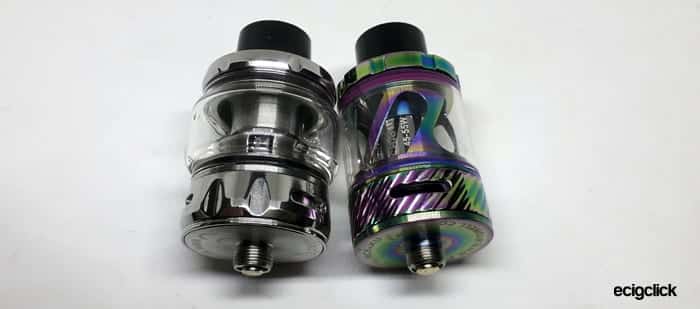
The drip tip is a 510 fitment and other 510 drip tips fit perfectly.
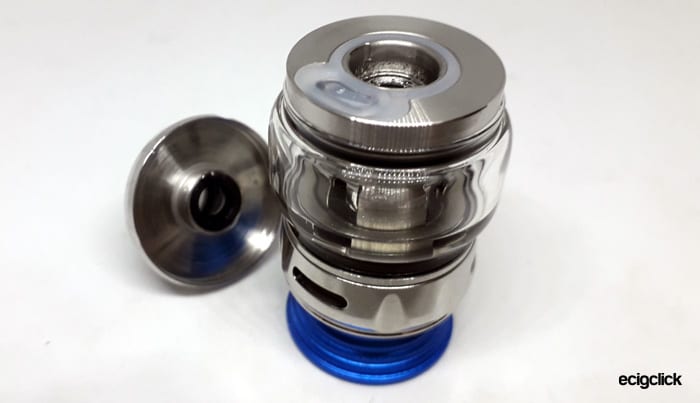
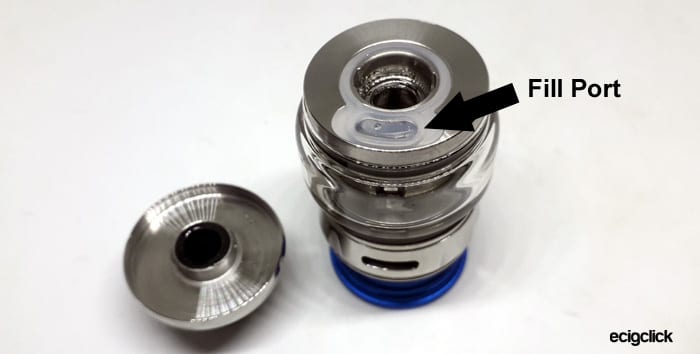
Uwell have kept with the screw top refill method and this time it is only a 90° twist to remove the cap. I found it hard to grip the cap on the original tank sometimes so this is a lot better.
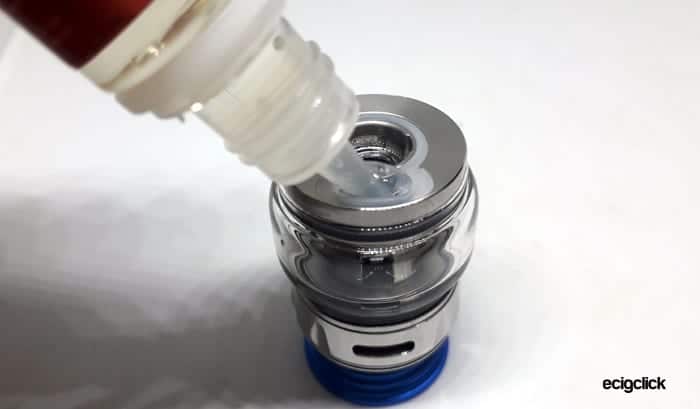
With the cap removed you have a good sized fill port but it does have the silicon flappy thing to close it off.
Great for no leaks but a lot of people find these annoying as you do have to insert your nozzle to get e-liquid to enter.
Might be a pain in the bottom if you use dripper bottles or larger nozzles.
As mine was a review version of the kit I did get the 5ml bubble glass and this still looks great, chubby but without looking ridiculous.
One other great thing about the styling of this glass is that the glass width is still less than the rest of the kit.
If you dropped the Nunny 2 on its side – the glass wouldn’t necessarily be the first part to hit the ground as the centre of the mod is slightly wider.
On the base of the tank is the branding and the required legal logos.
Tank Build Quality
All the threads were smooth and clean and the base and top cap were easy to grip even with my gammy hands.
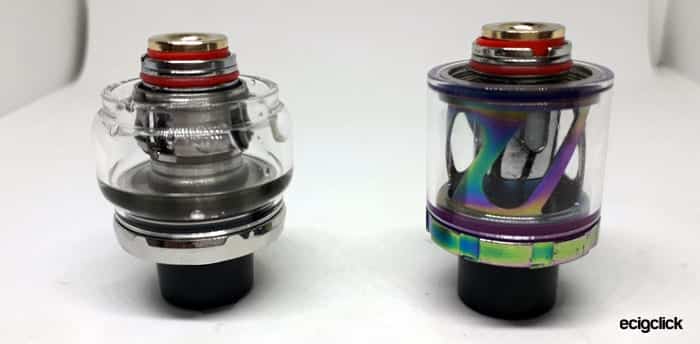
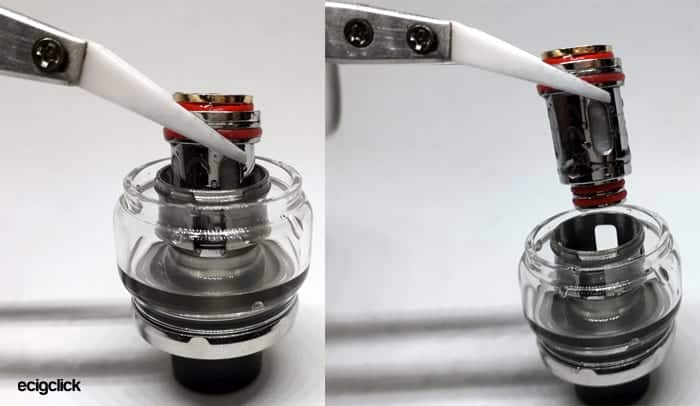
One issue I did find is that when you try to remove a coil there isn’t much to grip on to.
The coils are cross compatible with the Nunchaku 1 coils – I swapped them between tanks too and they fit fine.
I have had zero leaks at all from this kit – nothing from the glass or airflow and it just seems such a quality tank.
Airflow
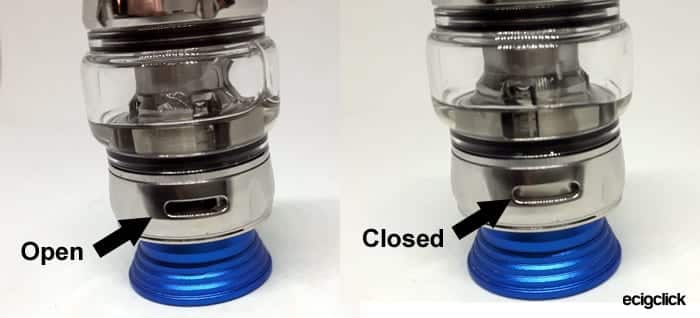
On the base of the tank is the airflow adjustment ring. This is super smooth to turn without feeling loose.
Even when the tank is installed on a mod there is no issue turning the ring at all.
There are 3 slot airflow inlets and fully open these give the same restriction as the original tank – only a lot quieter! The original can whistle a bit!
Fully closed is zero airflow – so everything from a roughly 20% restriction to 100% restriction which is a really decent range of settings.
Uwell Nunchaku 2 Quick Set-up Guide
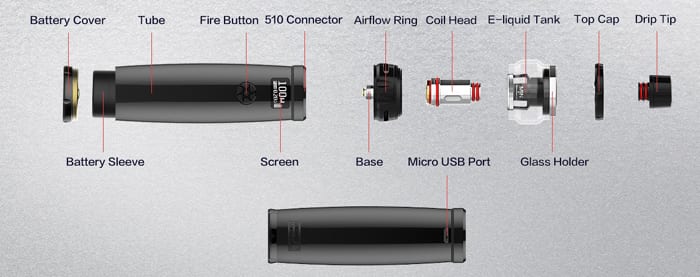
Also inside the mod is the battery adaptor sleeve and a piece of packing material – make sure to remove these before installing a battery.
The next jobs are to choose and install your battery, fill up the tank, adjust your settings and away you go!
Basic operation
- Turn On/Off = 5 clicks of the fire button.
- To vape = press and hold the fire button.
- Adjust output = Twist / tilt mod to the left for “-” or to the right for “+”
Menu System
To enter the menu system press the fire button 3 times quickly.
Once in the menu system tilt the device left or right to scroll through the options and press the fire button to select.
To exit the menu press and hold the fire button.
- Mode: select from Power mode (Variable wattage), TCR Mode (Temperature control) and Mech Mode (by-pass – full battery output).
- Factory settings: restore mod to factory settings.
Sub-Menus
Power Mode:
- Adjust the power using the tilting/twisting movements and press fire to confirm.
TCR Mode:
- When suitable coils are installed the TCR mode will prompt for the temperature required and adjust by tilting the mod. Press fire button to confirm.
- The mod will then ask for the power level required, tilt to adjust and press fire to confirm.
- The mod will then ask for any TCR adjustments you require – this will depend on the wire material. (SS316 = 0.00088±0.00020 / Ni200= 0.00690±0.00020).
- For resistance detection when cold – this is done automatically when you select TCR mode. So make sure to wait until any coil in use is cool before selecting this mode for accurate temperature control.
Battery capacity remaining
The battery capacity remaining is displayed on the screen.
If using the device to charge the battery the display will also show the progress. When fully charged the battery icon will show full bars on the display.
Also if charging via the USB port a charging current of up to 2A (5V) can be used.
But as always we advise the use of a separate good quality charger to safely charge your batteries and prolong their useful life.
Protections
- Short circuit / no tank = Atomiser Short / Check Atomiser warnings will display
- Maximum fire time = 10 second fire cut off
- Low voltage protection = “low battery” warning will display on screen.
- Reverse battery polarity = the device will not turn on if the battery is installed the wrong way around
- Temperature protection = if the chip reaches a temperature over 80°C the screen will display “over temp” and the fire will cut out.
How To Change The Coil In The Uwell Nunchaku 2 Tank
- Remove the tank from the mod.
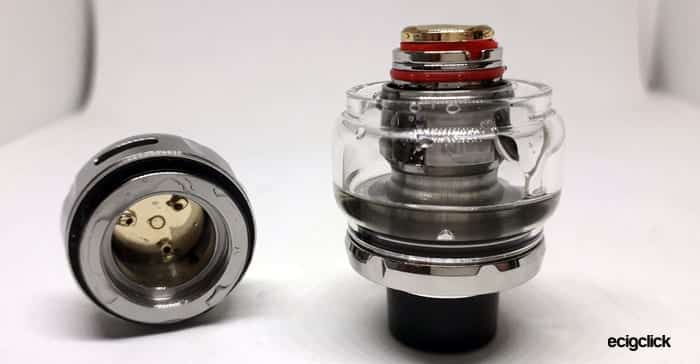
- Turn the tank upside down and unscrew the tank base.
- If a coil is installed this just pulls out of the tank.
- Check all the O-rings are in place.
- Install a new coil by pushing it into the tank.
- Replace the tank base and adjust airflow if required.
- Fill the tank as described and leave to stand if using a new coil.
How To Fill The Uwell Nunchaku 2 Tank
According to the user manual the top fill port is only suitable for bottles with nozzles smaller than 3.5mm.
- The top cap has a 90° turn system. So unscrew and remove.
- Add e-liquid through the filling port and watch the level through the tank glass.
- Replace the top cap.
- If first fill or a new coil leave to stand for 10-15 minutes before vaping to prevent a dry hit and knackering your coil!
How To Install The Battery
As mentioned you can use different battery types in this mod.
If using a 18650 battery you will need to install the adaptor.
If using 21700 or 20700 no adaptor is required.
Uwell state that a battery with a minimum 30A output is required so check you have a battery which can cope with this.
- Turn the mod upside down and unscrew the base cap.
- If a battery is installed turn the mod the right way up and catch the battery as it comes out of the tube.
- Make a note of the plus and minus polarity markings and install the new battery correctly.
- Replace the base cap on the mod.
How Does the Uwell Nunchaku 2 Perform?
Tank
This is a sub ohm tank and designed for thicker e-liquids therefore I used my favourite 80% VG E-liquid Stika Bombz Fruit Salad with a 3mg nicotine strength.
Further reading: Guide to VG and PG in e-liquid
UN2 – Meshed-H 0.2ohm coil
This was the first coil I tried as it was already installed!
The ratings for this coil are 50-60W.
I started really low at 35W and moved up to 50W. At 50W I have to say I am happy! I did go up to 55W but it felt a little bit harsh for me.
Between 50 and 55W the flavour is immense. It is like drinking your e-liquid. Oh and the clouds were no disappointment either – wow this is a lovely lovely coil.
It is rare for a tank to manage the airflow correctly to give masses of vapour whilst not losing flavour by diluting it with the airflow.
But the wonderful range of airflow control on here means you can strike a brilliant balance and get both clouds and flavour.
I loved the original tank but this is even better!
This coil is not massively thirsty either – it will chug through the liquid quicker than a low power tank, but equally nowhere near as greedy as some mesh tanks I have used.
UN2 – Meshed-H 0.14ohm Coil
This coil has a Stainless Steel 316L mesh heating element which means you can use this coil with Temperature Control.
I stuck to the simple wattage range of 50-60W which is stamped on the coil head.
This is a slightly “fiercer” vape – if that makes sense? You can hear the crackle of the e-liquid, the vapour production is even better than with the 0.2ohm coil.
I think I prefer the flavour from the 0.2ohm coil – even at 50W this feels slightly dry and more throat hit. The 0.2 is much smoother and easy going?
At 55W this is a really warm vape and the flavour is excellent – still slightly dry for my liking – I suppose it is all that vapour drying my throat out!
At 60W more of the same just warmer. I prefer this coil at 50W because I am a total girly wuss.
Coil Life
Your e-liquid and vaping habits will impact the coil life.
I used a known “coil friendly” e-liquid and so far have refilled 10 times (approx 40-45ml – 4ml ish per refill as there is a minimum level) with the 0.2ohm coil. The flavour is exactly the same as when I first used the coil!
Neither of the supplied coils had any issues wicking 80%VG e-liquid and not a single dry hit when used within the suggested power range.
Mod
This is a solid bit of kit it really is. You only have to look at it to get a sense of the quality.
In use I got zero issues, although I found the adjustment system weird it works, the screen is clear and bright and the fire speed seems to be up there with dual battery mods in my eyes.
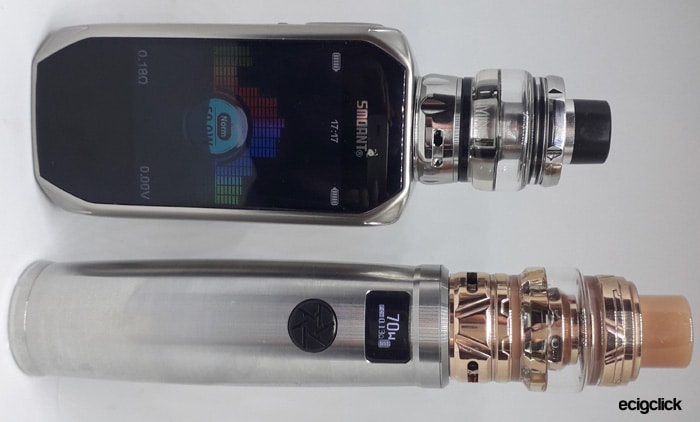
I swapped between the Nunchaku 2 and Horizon Falcon 2 tank using the Nunchaku 2 and Smoant Naboo mods. With the Nunchaku tank at 50W and the Falcon 2 tank at 70W the vape was the same between both devices which tells me the power output of the mod must be pretty accurate.
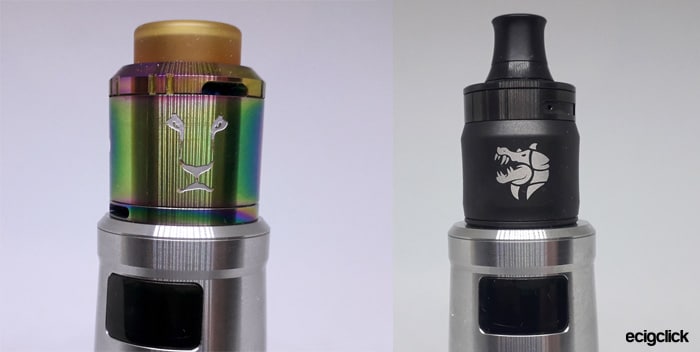
As I am reviewing some e-liquids at the same time as using the Nunny 2 – I decided to chuck some RDA’s on here. The Geekvape Ammit MTL RDA and the Kaees Aladdin RDA and the performance was just as good.
Battery Life
As always your battery life will depend on the power level, battery, coil/tank you use and your own vaping habits.
Firstly I used a 21700 battery – Vapcell 3750mAh – I got 6.5 hours vaping at 50W with the 0.2ohm coil.
Then I changed to a Sony VTC5A battery which has 2500mAh capacity, at the same wattage (50W) with the same coil I got 4.5 hours.
I will add I’m quite a heavy vaper!
When the battery level drops to the last “bar” on the icon I did find the mod was only outputting 46W – which is basically the mod lowering the power to cope with the low battery charge remaining.
Other than that the mod kept the power stable.
Pros
- Stunning classy looking kit
- Mod is super robust
- Quick fire time and responsive
- Ability to use 21700 battery with zero rattle
- The FLAVOUR and Vapour are incredible
- Huge airflow range of adjustment
- Great top refill cap
- No leaks or faults at all
Cons
- A bit heavy even without battery
- Tank finish is different to the mod finish
- Coils can be a bit difficult to grip to remove
- Swinging the mod about to make adjustments is strange
- Would be nice to be able to lock the fire button – for use in pockets and bags etc.
- Device will tip over easily if stood on a table etc
Final Review Verdict
I will admit that I am a mainly MTL vaper at the moment rocking nicotine salts, so some of the sub ohm tanks do blow my lungs out!
However I have thoroughly enjoyed my time with the Uwell Nunchaku 2 kit – I really have.
The vape is full of flavour and plenty of clouds without being harsh or hard on the lungs.
If you are a walking cloud machine choose the 0.14ohm coil, for a smooth all round great vape pick the 0.2ohm coil.
The coils are just beautiful and this kit has made me miss DTL vaping as the flavour is just so superior and no worrying about Vaping Vom side effects from heavy nic salt use.
The mod is solid and does everything you ask of it.
I think this version is an excellent upgrade with the ability to use a 21700 battery and the battery life is much better.
This mod is not going to be much use for people who want a 10 hour battery life or use at 80W or more – but with the included tank or attys below 60W I think you will be really pleased with the Nunchaku 2 mod.
I could live without the motion sensor stuff and still be happy with adjustment buttons.
But this does not make the mod bad in any way – just a bit fiddly to adjust.
I didn’t think the original Nunchaku tank could be improved upon but wow this version is even better!
If the single battery mod idea disgusts you – consider using the Nunchaku 2 tank on a dual battery mod – at only 50W you will have epic battery life!
Have you used or thinking of buying the Nunchaku 2 kit? Let us know in the comments below.






Hi. Maybe cause I’ve dropped my vape but now the 21700 batteries are wobbly and not connecting properly, keeps turning off. Any chance you have an idea to fix this?
What a fantastic review.
You’ve convinced me to purchase.
I have the original nunchaku and based on your review, which was a superb read , really gave a great insight .
Thank you
Really nice review. I took it today as well. Build quality is great. Did not test the tank yet. The only bad thing for me is the missing stealth display option, kinda bugs me the display is staying lit after each fire. Anyway not a huge turn off.
Great review!