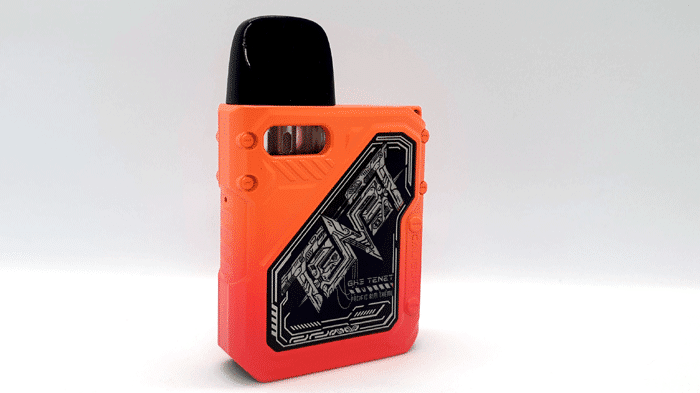
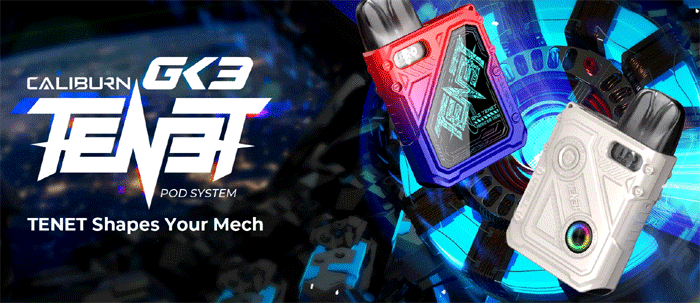
The Uwell Caliburn GK3 Tenet is a new compact pod kit from the popular Caliburn family.
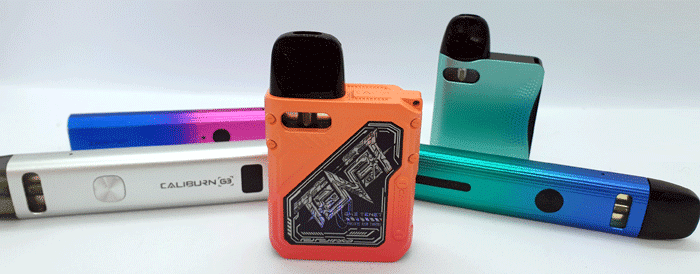 As the name suggests this is heavily based on the Caliburn GK3 with the additional more industrial styling of the Tenet range.
The Caliburn range are split into the A series and the G Series. So far the G series have given us the original Caliburn G, G2, GK2, G3 and GZ2.
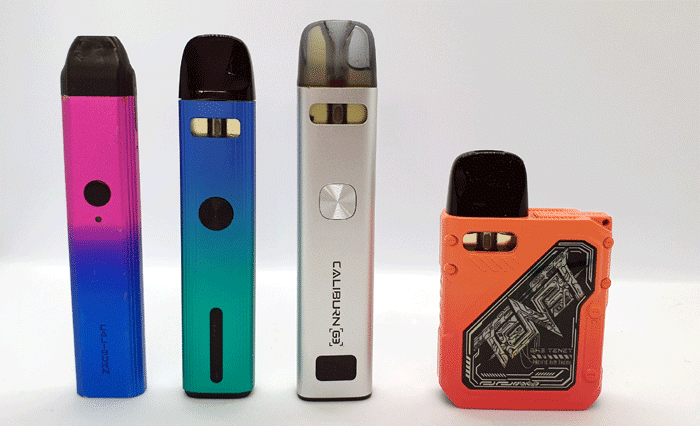
Of course the brand name Uwell will be familiar to most vapers – not only due to the Caliburn series but also the Crown, Valyrian and Nunchaku ranges.
Thank you to Vape Club for sending this over for review! I will report on my experience with the device in my possession!
What To Expect From The Uwell Caliburn GK3 Tenet …
The “K” in the title stands for “KOKO” (Keep On Keeping On) and the “K” badged kits have a square format rather than the standard bar shape.
Inside the little square device is a 1000mAh battery which is charged via the Type C USB port at up to 2A.
To keep everything simple this has an auto draw activation and will automatically adjust the output to suit the pod installed up to 25W.
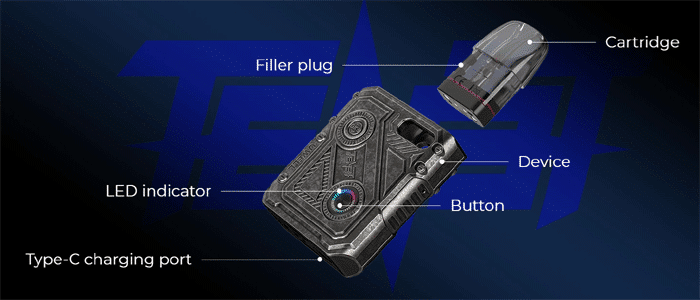
There is an operation button which is used to switch the device on and off and turn off the lighting.
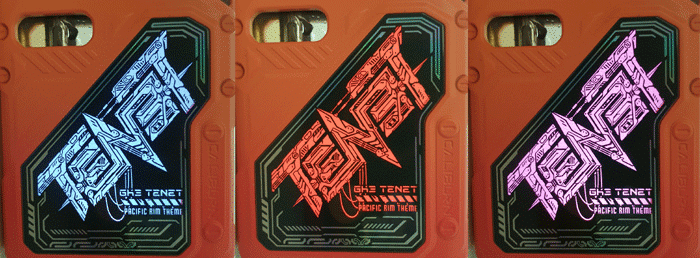
Talking of lighting – the panel on one side lights up in various RGB colours when you vape – you can of course turn this off.
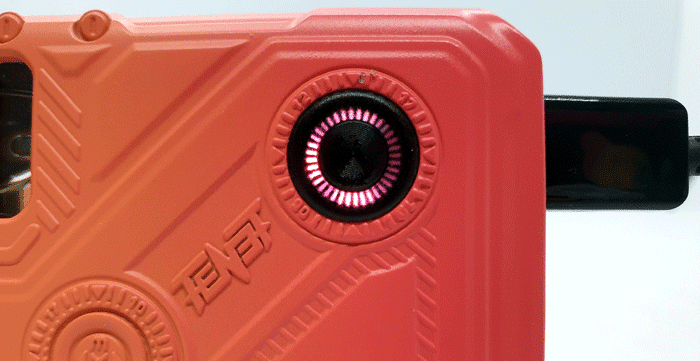
Around the operation button is a circular light which is animated and lights up to display the device status – such as charge remaining and faults.
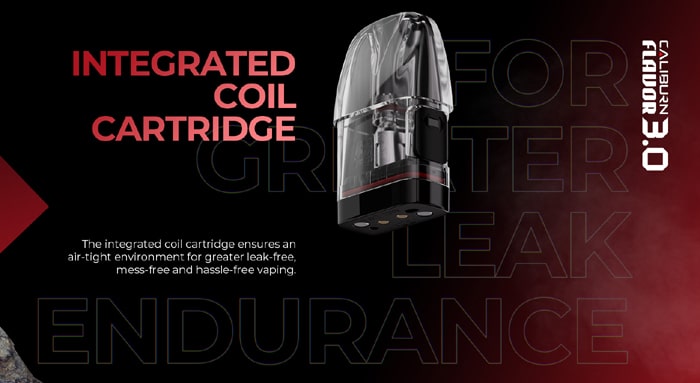
This is compatible with the G3 range of pods with fixed coils. All the previous Caliburn G devices used removable coils which I did prefer.
This device is not backwards compatible with previous G pods.
There are 3 pod resistances to choose from – 0.6ohm, 0.9ohm (both included in kit) and a new 1.2ohm which promises to be on the way soon.
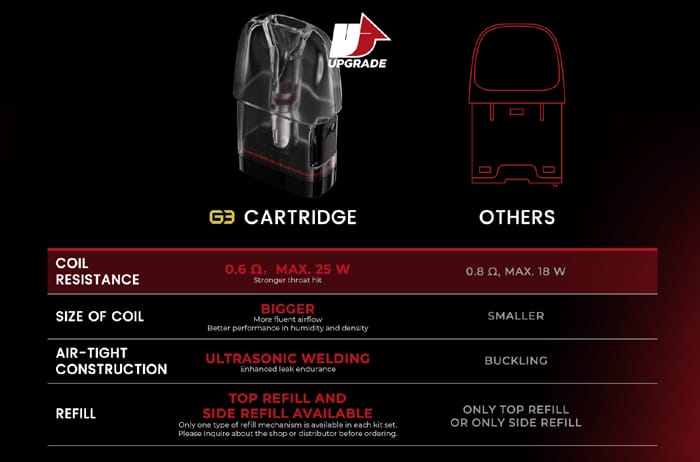
Apparently the new pods have bigger coils and improved flavour output.
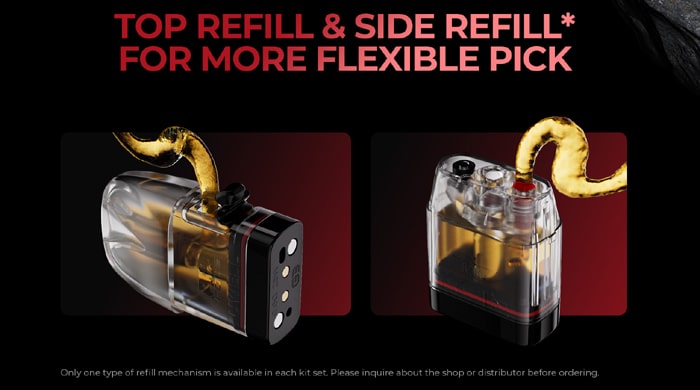
When it comes to filling there will be two options. For the 2.5ml standard versions these will have a side refill port. For the 2ml TPD regulated areas this will be a top fill which is also designed to be Child Resistant (CRC).
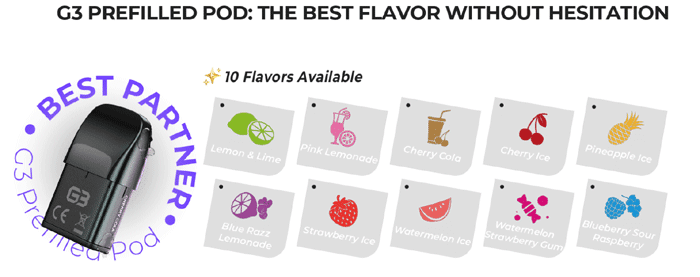
You also have the option to use Pre-filled pods – for those who want the simplicity of a disposable vape but the sustainability of something reusable. These were reviewed alongside the Uwell Caliburn G3 Lite.
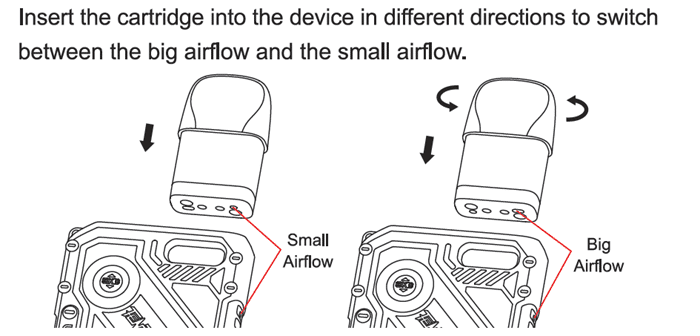
You can adjust the airflow by rotating the pod 180° in the mod – which seems a slight backward step compared to the excellent little Red adjustment wheel on previous Caliburn G pods.
There are 7 colours to choose from: Black, Evening Sunshine, Dark Ocean, Sweet Morning, Powder Blue, Grey and Vista White.
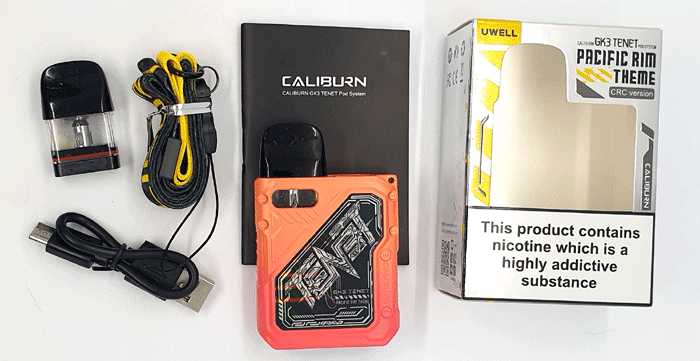
Kit Includes
- Uwell Caliburn GK3 Tenet device
- 0.6ohm G3 Pod
- 0.9ohm G3 pod
- Lanyard
- USB Type C cable
- User manual
Uwell Caliburn GK3 Tenet Specs
- Size: 50x19x78mm
- Battery: 1000mAh (internal)
- Display: Side light up panel and rotating LED around button
- Output: 25W max – auto adjusts output
- Type C USB charging – 2A charge rate
- Resistance range: Not specified
- Capacity: 2.5ml (standard) / 2ml (TPD)
- Pods: Refillable, fixed coil
- Compatible with: Caliburn G3 pods only, pre-filled pods available
- 2 airflow settings
- Side fill (2.5ml pod) / Top fill (2ml TPD CRC Pod)
- Auto Draw
- Ability to turn off the side panel lighting
Uwell Caliburn GK3 Tenet Design & Build Quality
I received the Sweet Morning colour in the 2ml version.
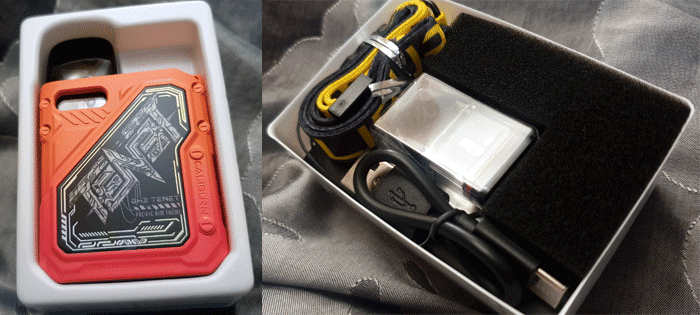
The packaging is great, despite being very compact they have crammed a lot in there! The kit generously includes 2 pods, lanyard and charging cable!
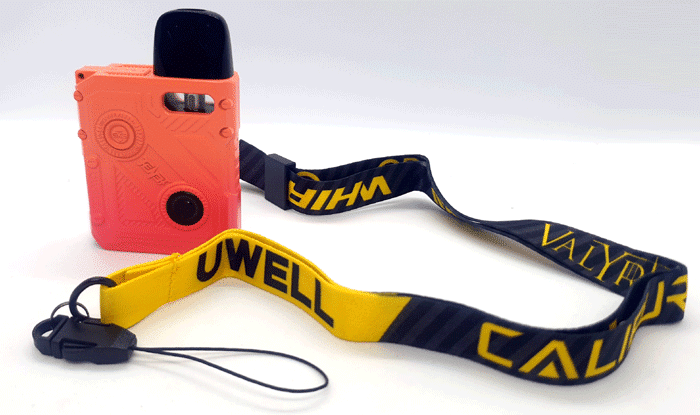
The lanyard is of excellent quality I might add!
On the top of the inner tray is the device with one pod. On the underside of the tray is the rest of the kit!
Instruction wise this is great and if you find it a bit hard to read you can download a PDF version here.
Just to give an idea of size, here is the Uwell Caliburn GK3 Tenet alongside the OXVA Xlim SQ Pro and the Caliburn AK3.
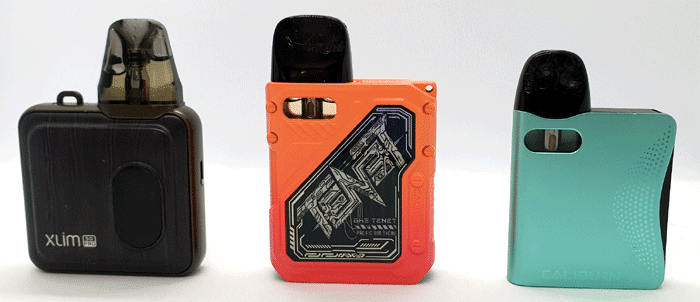
Uwell Caliburn GK3 Tenet Mod
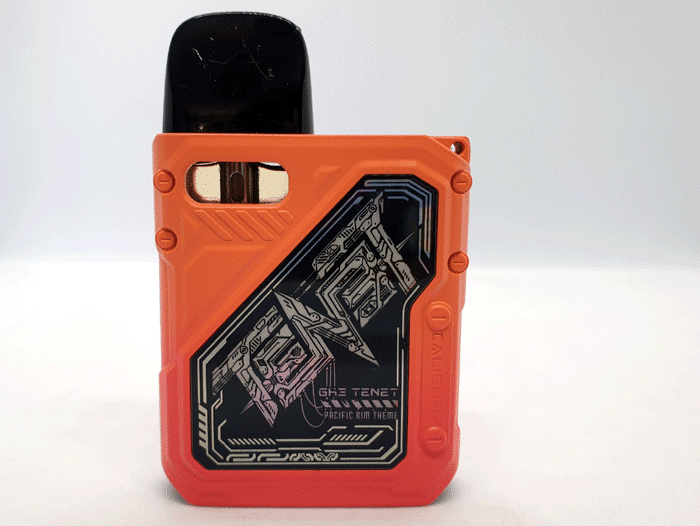
The main body is made from metal which is cast into an “industrial design”.
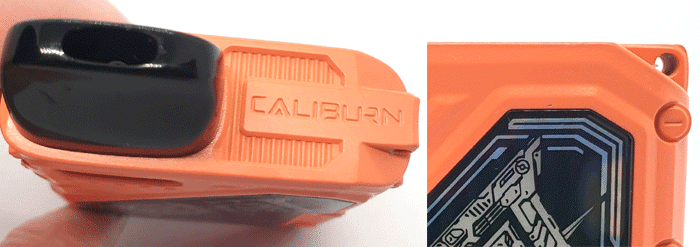
Whilst the front of the device has a large shiny Black plastic panel with mirror finish Silver patterns.
These patterns also light up when you are vaping with RGB lighting. You can turn the lighting off.
The video below shows the panel in action!
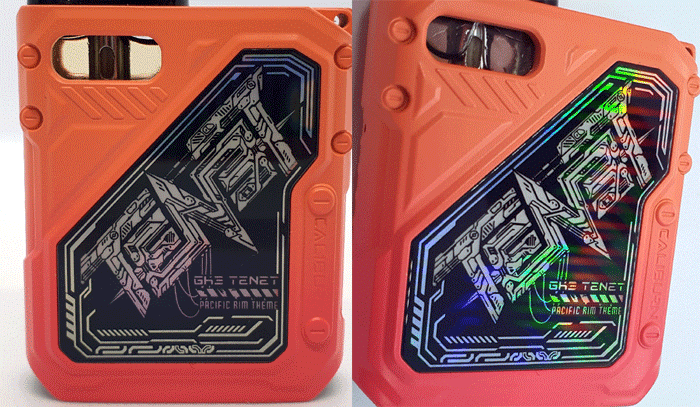
I love the look of the front panel, some might find it a bit “busy” but it is super shiny and the Silver bits have a holographic finish when you angle them in the light.
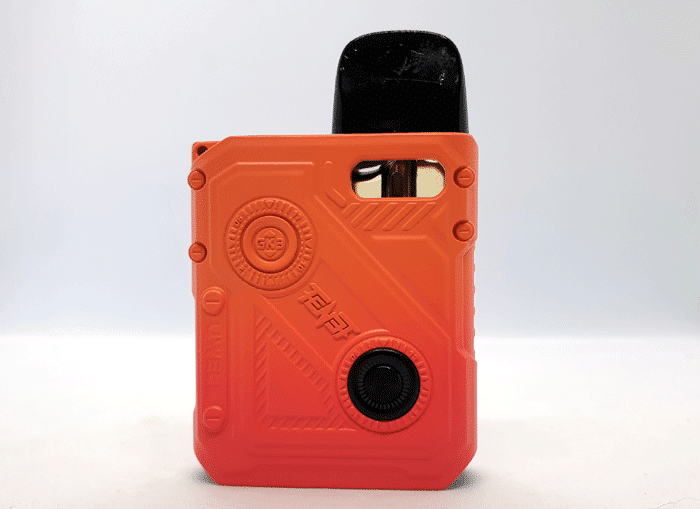
The rest of the body has all sorts going on. There are fake screws, fake screwed on plates and some weird dial shape with numbers on the back. Sadly these remind me of a cheap watch, where you get dials which are fake. I wish they were actual screws or plates screwed on as these details detract from the appearance.
On the rear you will find the round operating button which is nice and clicky. But you only need to use this to turn the device on or off or if you are fiddling with the light setting.
Surrounding this button is an animated light ring. It has all the RGB colours and the light circles around the ring. I think this is what is meant by the “Pacific Rim Theme” which is written on the box and the front panel. I love this effect and you can see it in action in the video below.
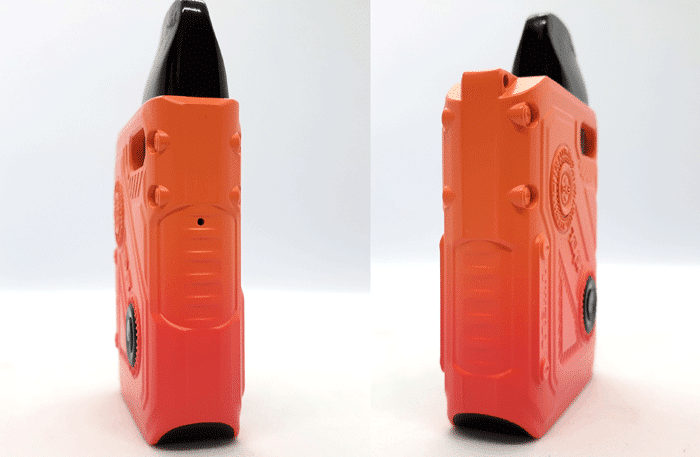
Both sides feature more of the same mock mouldings and the side where the pod sits has a single airflow inlet hole.
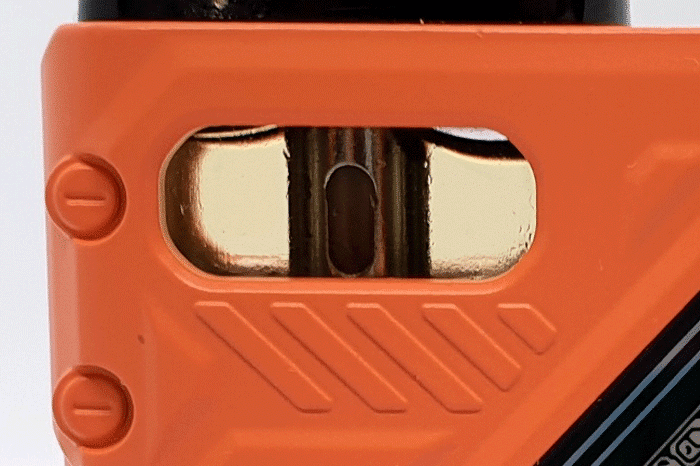
An e-liquid viewing window is provided which works perfectly as this time Uwell have cut out both sides so there is plenty of light to show the level clearly.
At the top is a hole for attaching a lanyard.
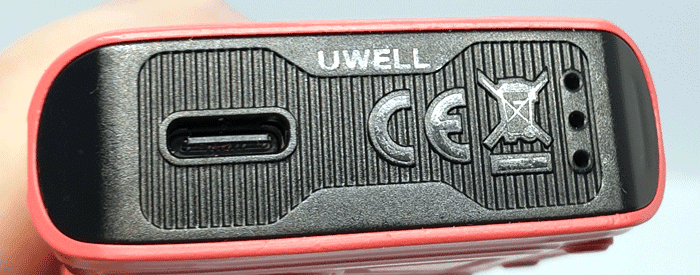
On the base is the USB Type C port, the required legal logos and what I assume are venting holes in case the battery has a tantrum.
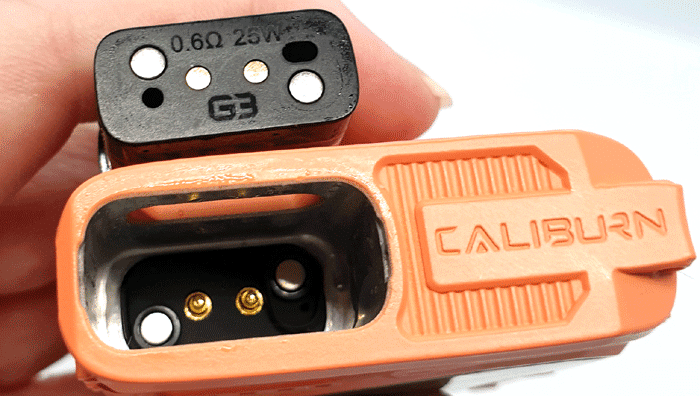
The pod compartment is quite deep and you will find 2 magnets and 2 spring loaded electrical contacts. There is a slight wobble to the pod but it still sits in there firmly requiring a good tug to remove it. The strong magnets pull the pod into position when you insert it half way.
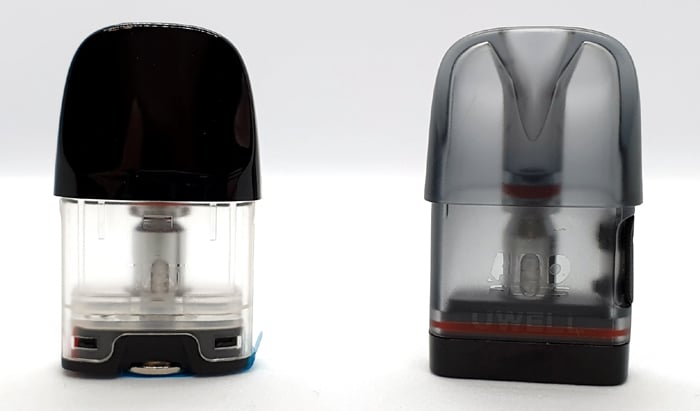
Uwell Caliburn G3 Pod
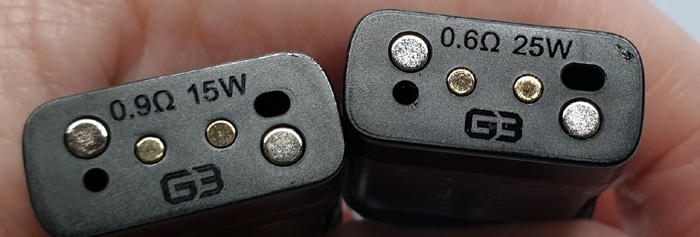
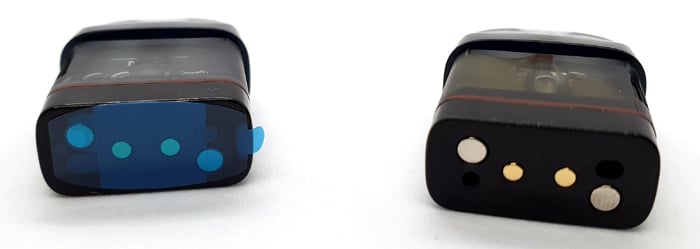
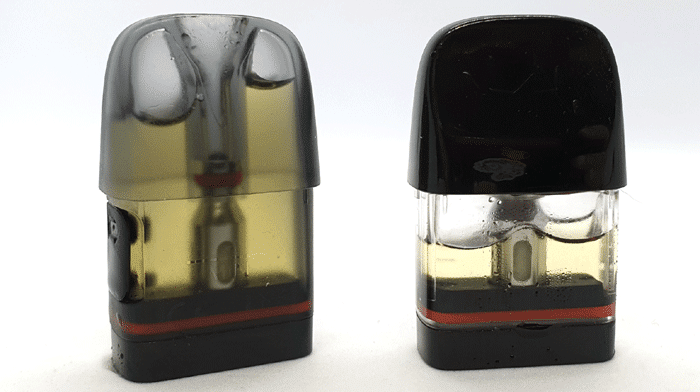
Sadly the G3 pod is not interchangeable with the G/G2 pod. They just do not fit in the others device. You can see the two pods side by side in the image below.
With this kit I have been supplied with the 2ml Top fill pods. But I have also experienced the side fill pods in my Caliburn G3 review so I will discuss both.
Side Fill Pods
Anyway these are a tinted Black colour all over but the e-liquid level is still nice and easy to see as the tinting is not too dark.
The mouthpiece is a very very smooth design and is super comfortable to use. The size of the pod width decreases with a small step below the mouthpiece area.
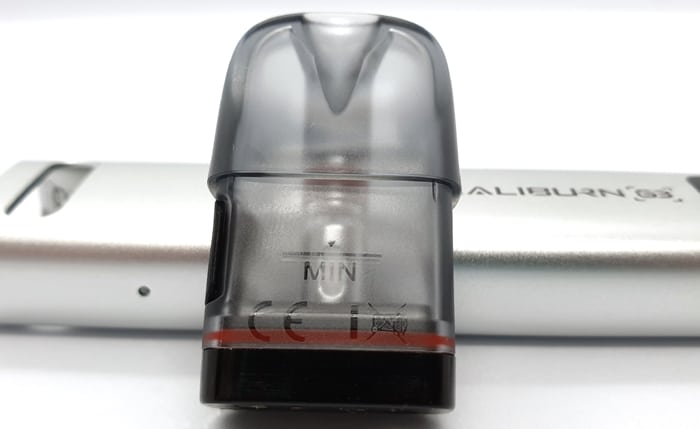
In the lower half of the pod you will find the minimum mark etched in plus the “Uwell”, “Pro-FOCS” and required legal logos. They are very faint so they do not look garish.
The base of the pod appears to be made from solid Black plastic which has a Red O-ring to seal between the outer pod and base.
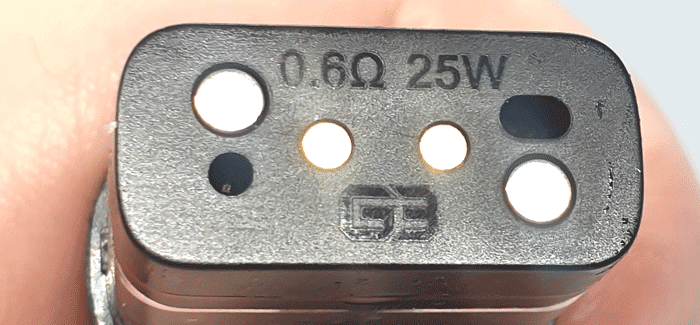
On the bottom of the pod you will find the coil resistance and optimum power level etched in along with the “G3” logo.
There are 2 Gold coloured electrical contacts and 2 magnets to connect the pod to the mod.
On the outer edges of this face are the 2 airflow inlet holes. They are 2 different sizes, the smaller hole when selected will give a more restricted airflow and the larger hole will give a less restricted airflow.
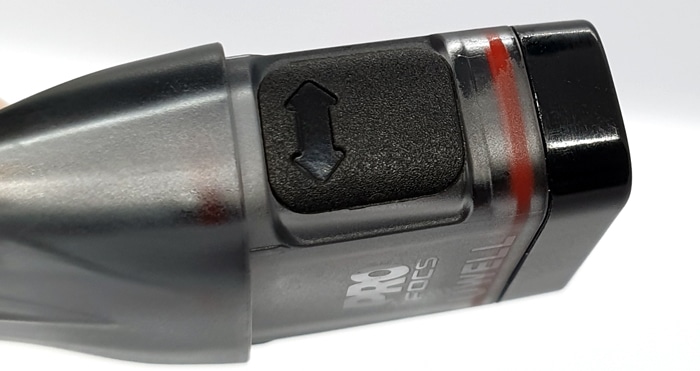
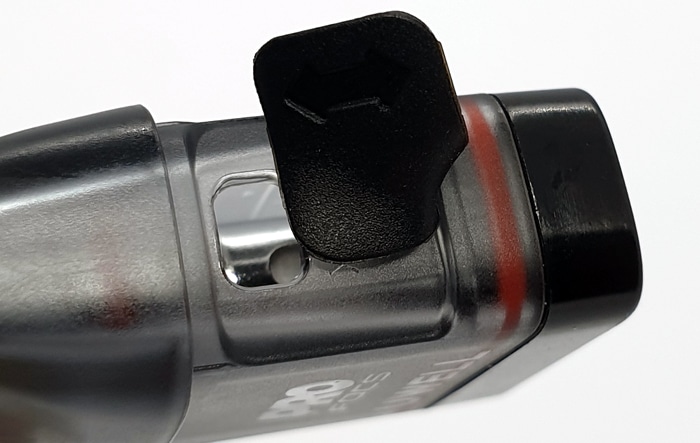
Filling is taken care of with the side fill port. The port has a Silicone cover with arrows marking the point where you lift it to access the port.
It is easy to lift but I did find it was a bit fiddly to close the port as you need to align the cover exactly. Also the cover does not rotate out of the way very easily for filling.
The port is a Rectangle shape and measures approx 5x4mm and I found it worked well and I didn’t get any airlocks when filling. I used 30ml and 120ml bottles and there were no problems at all.
Top Fill Pods
You can recognise the top fill pods as they have a Black mouthpiece rather than the fully transparent pod with the side fill port.
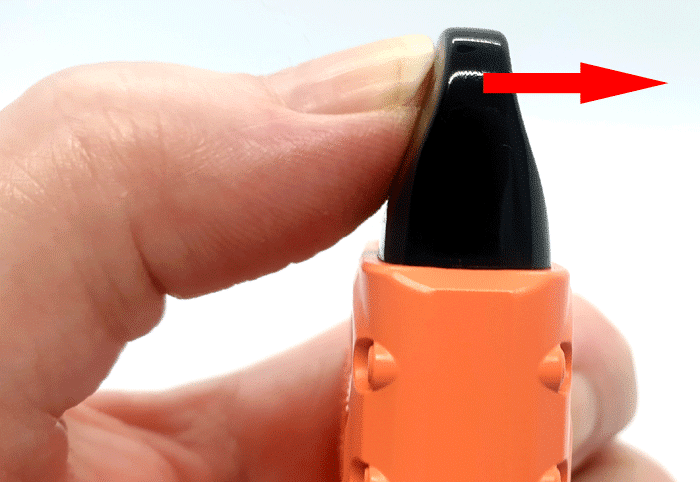
The top fill is accessed by “snapping” off the mouthpiece. I found this difficult, but it is easier to keep the pod in the mod and push the mouthpiece across to remove it.
Sadly I resorted to biting it to remove it – hence you might see some teeth marks in my photos – sorry!
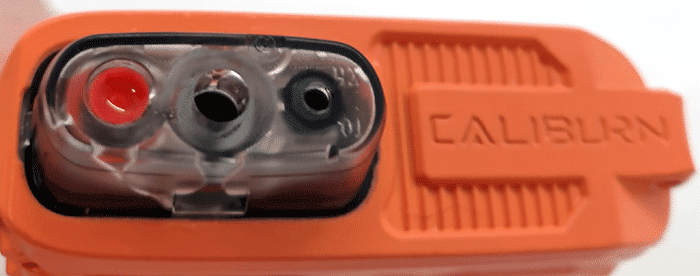
With the mouthpiece removed you are faced with what looks like 3 ports! The Red port is the fill port, the Black port is the air vent and the central port is where the vapour comes out.
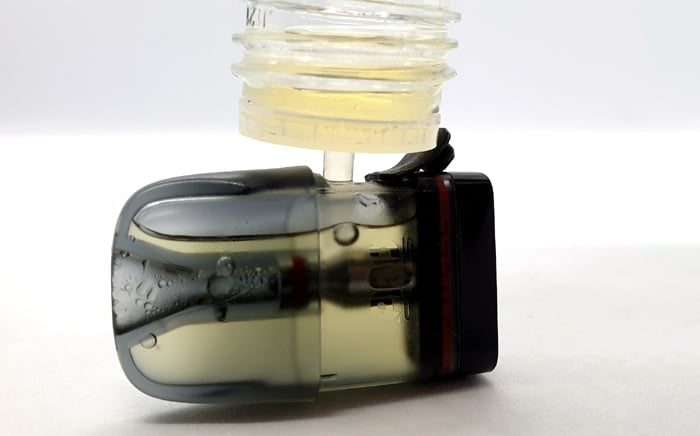
To fill you need to use the bottle nozzle to press down on the valve in the Red fill port. This is very clever as it also opens the vent port allowing air to escape and prevent air locks when filling. When you remove the bottle nozzle both ports close. A very very good design which resulted in zero air locks!
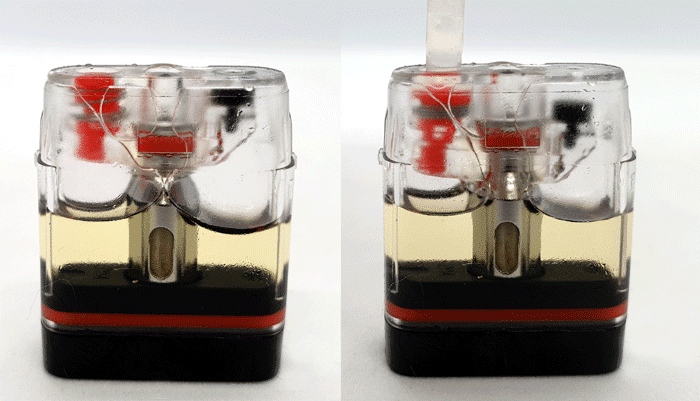
The rest of the pod which is not covered by the mouthpiece is transparent and not tinted which means the view from the window in the mod is excellent.
On the base of the pod you will see the “G3” logo, pod resistance and recommended power. But this is quite difficult to see as it is lightly etched into the Black plastic of the base.
As with the side fill pod this has 2 bottom airflow holes – one is bigger than the other so you can rotate the pod 180° for 2 different airflow settings.
The pod base also features 2 magnets and 2 electrical connections.
Quick Start Guide
As this is such a simple device you only need to fill the pod, charge if required and set the airflow.
Also after filling the pod you will need to remove the isolator sticker from the base of the pod. This is there to prevent an electrical connection whilst in transit or until the pod is filled with e-liquid. Firing an empty pod will result in pod damage due to the coil burning out.
I will guide you through the steps below!
Basic Operation
- Power On/Off = Press the fire button 5 times.
- Vaping = This is an “auto draw” device – simply inhale on the mouthpiece and it will fire.
- Battery indicator = The ring around the operation button is the indicator. It lights up when vaping – Green = Over 60% charge remaining, Blue = 30-60% and Red = less than 30%.
- Battery indicator when charging = When you connect the charging cable the device will vibrate twice. When fully charged the decorative light panel will stay on in a solid Green colour and the same with the LED indicator around the button.
- Airflow = There are two airflow settings. To change setting remove the pod and rotate it 180°. When the large airflow hole is on the right with the fire button facing you it will be the less restricted airflow. And vice versa with the small hole on the right – more restricted airflow.
- Turn off lighting effect = Press the button 3 times in 2 seconds. The LED indicator will flash Red 3 times if you have turned the lights off and in Green 3 times to indicate you have turned the lights on.
Protections
- Open circuit: When no pod is installed or if there is an open circuit the LED indicator will flash Blue 3 times and the device will vibrate once. Install a pod or clean all contacts. Failing that replace with a new pod.
- Low Voltage: When the battery charge is too low for the device to operate the LED indicator will flash Red 10 times. The device will vibrate three times and stop working until it has been charged.
- Short circuit: The LED indicator will flash Red 3 times, the device will vibrate twice and the output will cut out. Clean all contacts, replace pod.
- Over time protection: If vaping for longer than 8 seconds the firing will cut out to prevent damage or overheating. The LED indicator will flash Green 5 times and vibrate twice. Carry on vaping as normal.
- Inserting / removing pod: The device will vibrate once when you remove or insert a pod. The LED indicator will flash 3 times – Green when inserting pod or Blue when removing pod.
How To Charge The Battery
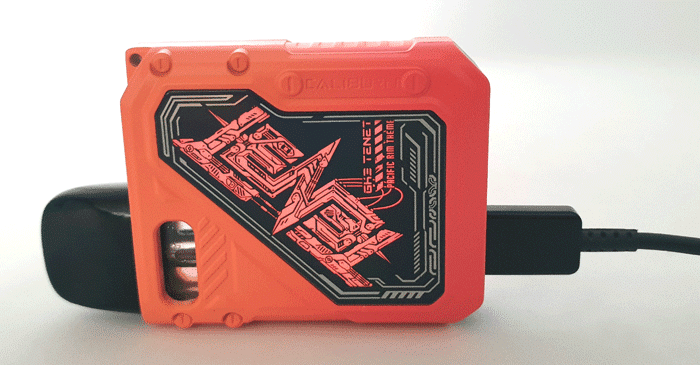
The charging rate is specified as 2A.
The device will vibrate twice when connected to or disconnected from the charger – just in case you were worried what it was doing!
- Using a USB type C cable, connect the small end into the USB port on the mod.
- Connect the large end of the cable into a suitable USB outlet.
- The LED around the button will change colour – Red when first charging.
- The LED will display a solid green and then vibrate when fully charged.
I found it took around 55 minutes to fully charge.
How To Fill the Pod
If a new pod leave to stand for 5-10 minutes after first fill to allow the coil to saturate with e-liquid.
Make sure to fill when the e-liquid level is above the minimum marking on the side of the pod.
Side Fill Pod
- Remove the pod from the mod.
- Tip the pod onto its side and lift up the fill port cover.
- Add e-liquid and watch the level through the side of the pod.
- Replace the fill port cover firmly.
- Insert the pod back into the mod.
Top Fill Pod
- You do not need to remove the pod for filling.
- Snap off the mouthpiece by pushing it to the side.
- Push down on the Red port with e-liquid nozzle.
Left = Valves closed, Right = Valves open - Fill whilst observing the e-liquid level through the side of the pod.
- Replace mouthpiece.
How Does the Uwell Caliburn GK3 Tenet Perform?
I tested this with my DIY Bubblegum e-liquid made from 50/50 VG/PG and IVG Bubblegum Concentrate. There is around 6mg nicotine salt added.
If any of these terms are over your head – have a read of our handy guides below!
- MTL V DTL V RDL – A Guide To Vape Styles
- VG and PG in E-liquid – all you need to know
- Beginners guide to E-liquid
- Nic Salt E-liquid
0.6ohm Caliburn G3 Pod
This pod should be able to cope with 50/50 and up to around 70/30 e-liquid ratios as it is just on the cusp of being a MTL / RDL / DTL pod at 0.6ohms!
This gives an excellent flavour, is quite warm and a great throat hit even with only 6mg nicotine strength. If you are using a higher nic strength you might find this pod a bit too harsh and would be better off using the 0.9ohm.
There was a slight dryness to the vape – on the G3 I did knock the power down slightly, but unfortunately you cannot do this on the GK3 Tenet. But I still really enjoyed using this pod, I would have just knocked it down 1W.
After 9 refills the pod flavour is still going strong!
0.9ohm Caliburn G3 Pod
The flavour is absolutely perfect – no complaints at all and I got all the rounded flavours that make up my Bubblegum e-liquid.
As for vapour this is average, exactly what you would expect from this kind of device.
I don’t get much throat hit as I only use 6mg nicotine – but I would imagine that you get a decent rasp at the back of the throat with higher nic strengths.
The first 2ml of e-liquid had a slightly strange taste in the background, but this soon cleared with the second filling.
I have refilled this 8 times and the flavour is still ace!
Excellent pod!
Airflow
For both pods I preferred to use the more open (less restricted) airflow settings.
To help rate how restricted the airflow is, I use a scale – where 0 = fully closed, no airflow up to 10 = breathing fresh air.
So you only have 2 airflow settings to choose from – adjusted by rotating the pod 180° when inserting into the mod.
With the 0.9ohm pod the airflow on the largest setting was around 4 which is a loose MTL or ideal RDL restriction. On the small airflow setting this reduces to around a 2.5 which is great for a true MTL. In the more restricted setting the vapour does get quite hot so I preferred the more open setting.
The airflow on the 0.6ohm pod was around 3 on the smallest setting which did get a bit hot. I would say it is around 5 on the larger setting. This is more RDL than DTL territory.
Mod Performance
I had zero issues and the auto draw fire was super quick and responsive with no stuttering or missfires.
I will say that when the Red LED illuminates to indicate the battery charge is running out the output does suffer a bit. After a while it does become quite weak – but this is pretty normal.
Leaks
I did get some slight misting of condensation with both pods – easily dealt with but no leaks at all!
Battery Life
This will always vary according to the power output selected, pod used and your own vaping habits. As a guide I got the following (with the panel lights in use I may add!)…
With the 0.9ohm pod I got around 8.5 hours and 4 (2ml) refills to one charge.
For the 0.6ohm pod it was still around 6-7 hours and 3-4 refills.
Pros
- Excellent build quality
- E-liquid window has cut outs on both sides of mod so has plenty of light to see clearly
- Vibration alerts are handy
- The light up front panel is super shiny
- Love the light ring around the operation button
- Excellent MTL and RDL airflow settings
- Great battery life
- The flavour is just epic!
Cons
- Lack of full airflow adjustment – it only caters for MTL and RDL – too restricted for DTL.
- Fixed coil rather than replaceable coil
- Not compatible with pods / coils of previous Caliburn G kits
- Slightly unusual appearance (subjective) – the fake screws and mouldings cheapen the finish
- I still find the top fill mouthpiece hard to remove – resorting to biting it!
Uwell Caliburn GK3 Tenet Final Review Verdict
The only real downside of this device is its appearance.
I love a bit of industrial design and really liked the original Tenet.
But with the GK3 there is just a bit too much “fakeness”. Fake mouldings of screws and dials is a bit off putting. All this still wouldn’t stop me buying it as the performance is as wonderful as you would expect from a Caliburn.
Another slight negative is the fact there are only 2 airflow settings. I much prefer a full airflow adjustment. Saying that it does cater well to those who like a tight MTL and a looser MTL/RDL airflow.
I am not sure if it is my useless hands or if the mouthpiece is a nightmare to remove on the top fill pods. I would much prefer the side fill pods.
Performance wise I cannot fault this and it is super simple for even beginners to enjoy!
Another solid Caliburn to add to the range!
Have you tried the Uwell Caliburn GK3 Tenet? If so let me know your thoughts in the comments below!
