The Latest in the Caliburn G range has dropped – time for the Uwell Caliburn G3!
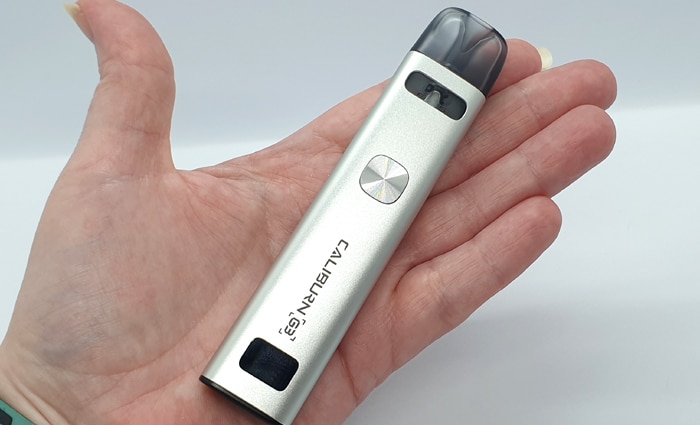
The Caliburn range are split into the A series and the G Series. So far the G series have given us the original Caliburn G, G2, GK2, GZ2 and the Tenet.
Of course the brand name Uwell will be familiar to most vapers – not only due to the Caliburn series but also the Crown, Valyrian and Nunchaku ranges.
So let’s see what the new G3 has to offer and whether it is worth upgrading from previous models!
What To Expect From The Uwell Caliburn G3 …
This is quite a big upgrade from the previous Caliburn G’s!
Improvements include (according to Uwell):
“Stronger anti-leakage, better experience; 25% increase in e-liquid capacity, 20% increase in battery capacity, more durable life, lower resistance, higher output power, more intense flavour and vaping experience, adjustable power output, more accurate and rich vaping experience, Better interactivity with screen, intuitive and visual operation.”
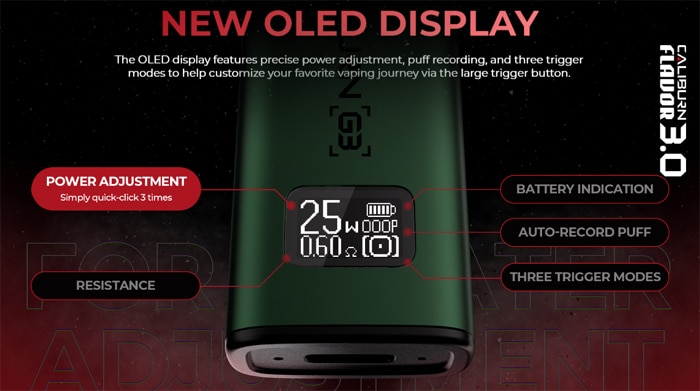
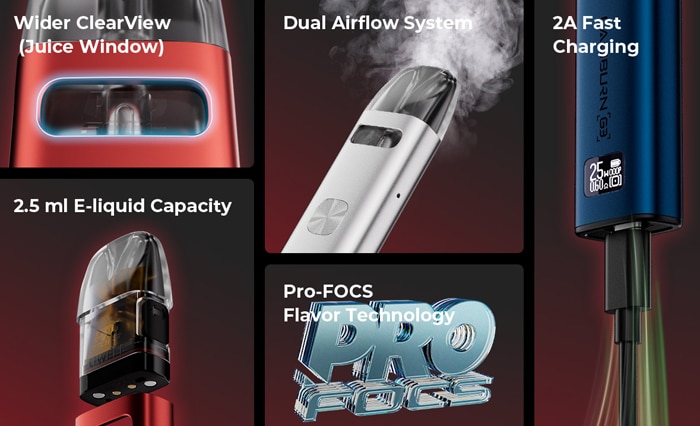
One of the first major updates is the addition of a screen and Variable Wattage (up to 25W max) adjustment!
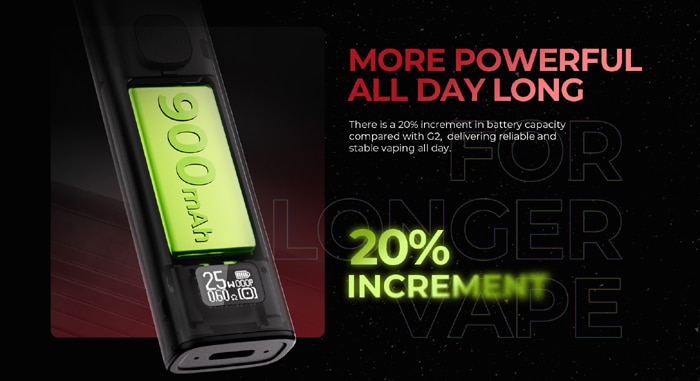
Secondly there has been an increase to battery capacity – from the 750mAh of the G2 to a 900mAh capacity for the G3.
2A USB Type C fast charging means you should be back in operation quickly.
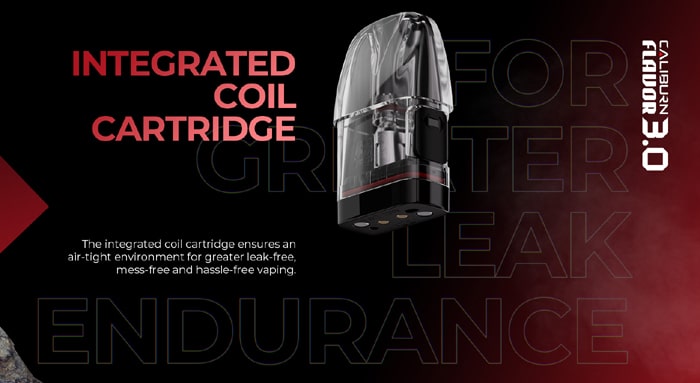
The third big change is to the pods. All the previous Caliburn G devices used removable coils which were compatible with others in the range.
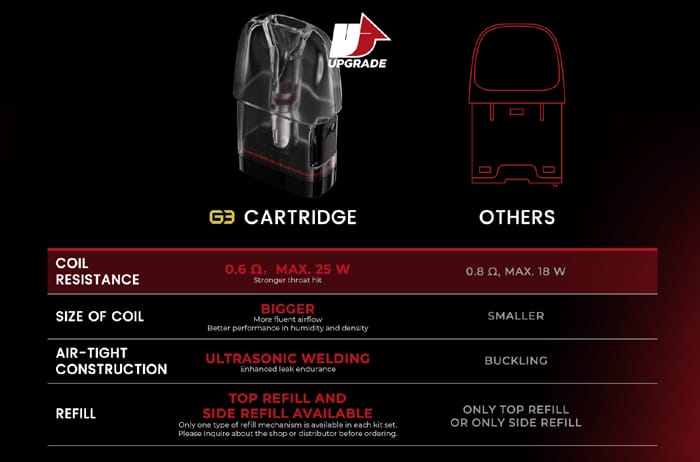
But now Uwell have decided on fixed coil pods – where the coil is not removable and you discard the whole pod. From what I can tell these are not backwards compatible with previous G pods.
There are 3 pod resistances to choose from – 0.6ohm, 0.9ohm (both included in kit) and a new 1.2ohm which promises to be on the way soon.
Apparently the new pods have bigger coils and improved flavour output.
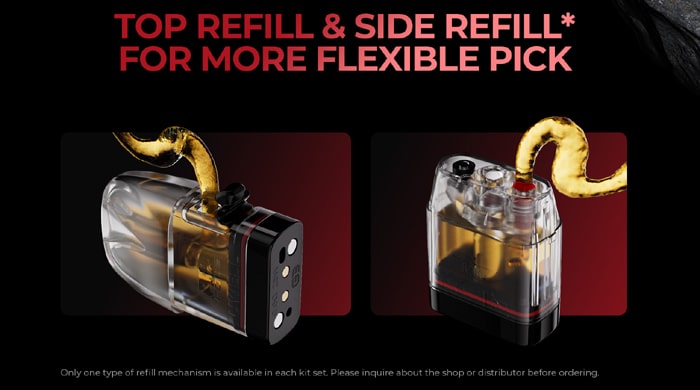
When it comes to filling there will be two options. For the 2.5ml standard versions these will have a side refill port. For the 2ml TPD regulated areas this will be a top fill which is also designed to be Child Resistant (CRC).
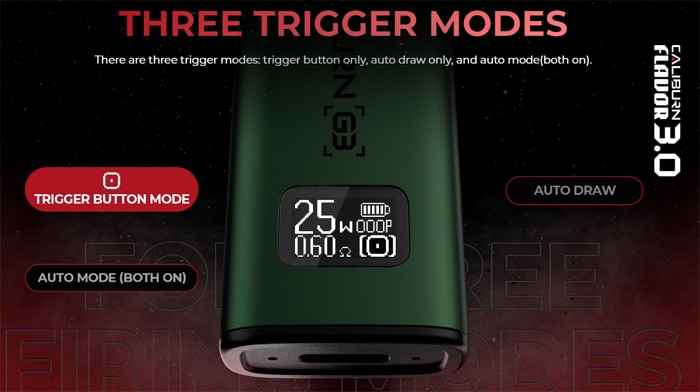
When it comes to firing you have more options, you can choose from button firing, auto draw firing or even select both.
As for airflow it appears you can adjust this by rotating the pod 180° in the mod – which seems a slight backward step compared to the excellent little Red adjustment wheel on previous Caliburn G pods.
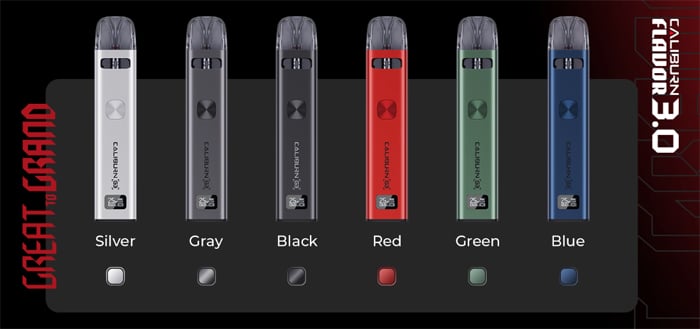
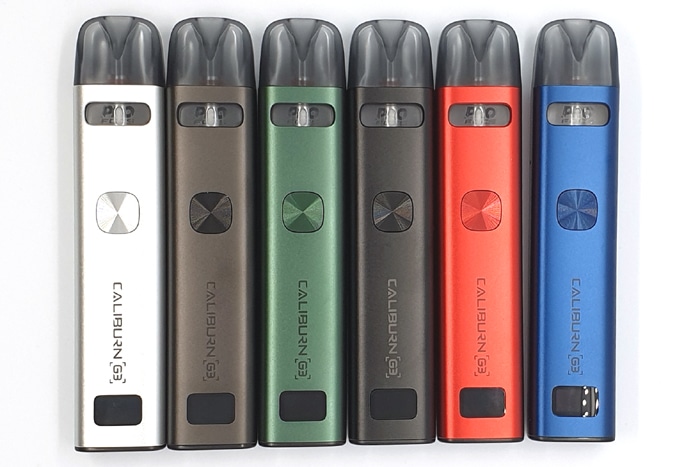
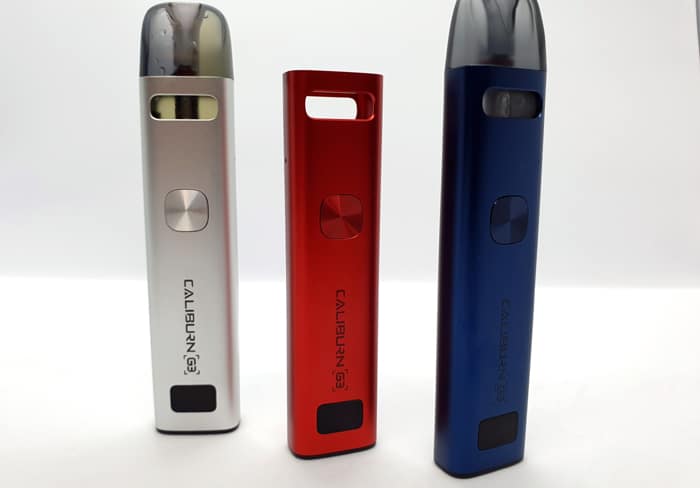
There are 6 colours to choose from: Silver, Grey, Black, Red, Green and Blue.
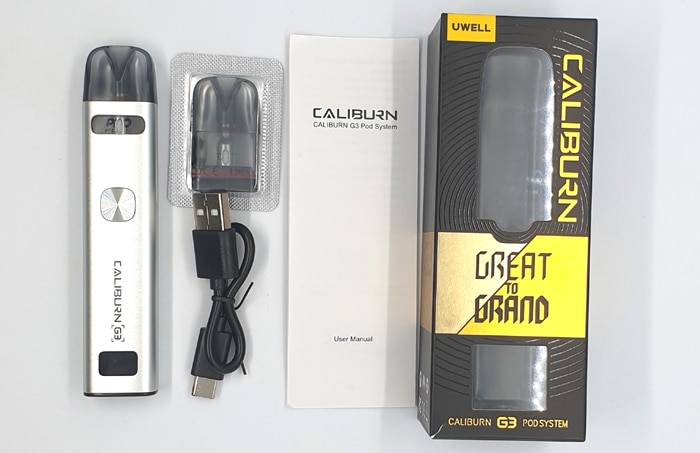
Kit Includes
- Uwell Caliburn G3 device
- 0.6ohm G3 Pod
- 0.9ohm G3 pod
- USB Type C cable
- User manuals
Uwell Caliburn G3 Specs
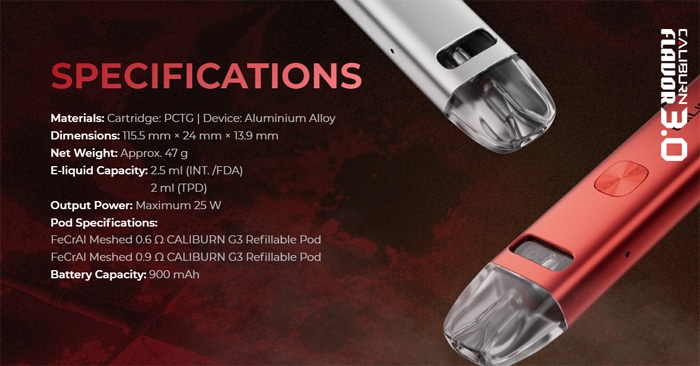
- Size: 115.5x24x13.9mm
- Battery: 900mAh (internal)
- Display: OLED screen
- Output: 25W Max – Variable Wattage
- Type C USB charging – 2A charge rate
- Resistance range: Not specified
- Capacity: 2.5ml (standard) / 2ml (TPD)
- Pods: Refillable, fixed coil
- Compatible with: Caliburn G3 pods only
- 2 airflow settings
- Side fill (2.5ml pod) / Top fill (2ml TPD CRC Pod)
- Fire modes – Button fire only, Auto Draw fire only or both
Uwell Caliburn G3 Design and Build Quality
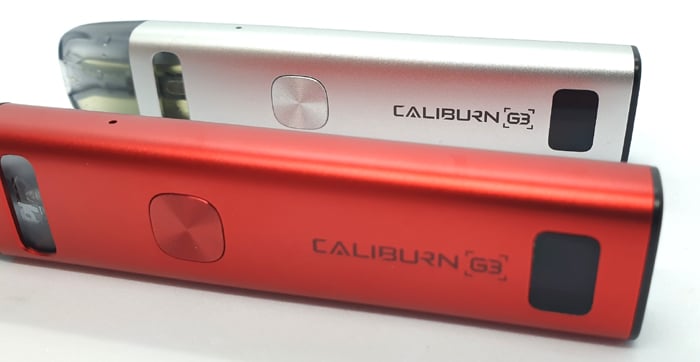
I received the full set of colours (6 devices in total) in the standard 2.5ml versions plus two Caliburn G2 devices to allow me to compare the updates! This is excellent as I didn’t review the G2 and have not used one!
I have found the instructions to be excellent – plus you can download PDF versions here. I like to read them on screen as it is easier to zoom in if you are struggling with tiny writing!
Uwell Caliburn G3 Mod
This does look very similar to previous Caliburn A devices – in fact the Caliburn A2 looks closer to this than any of the previous G models.
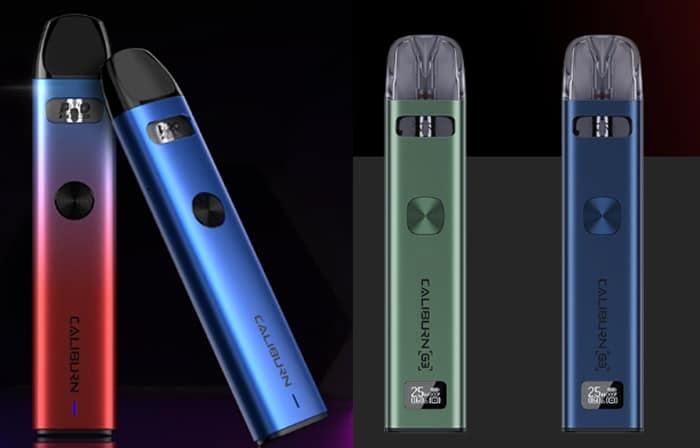
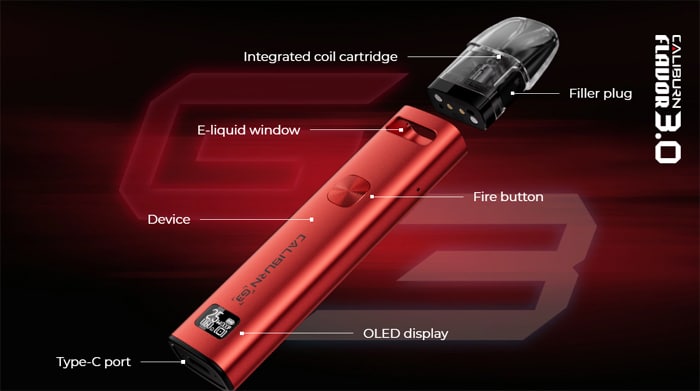
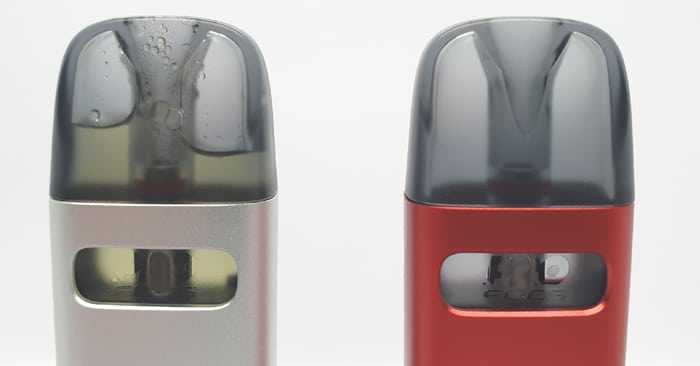
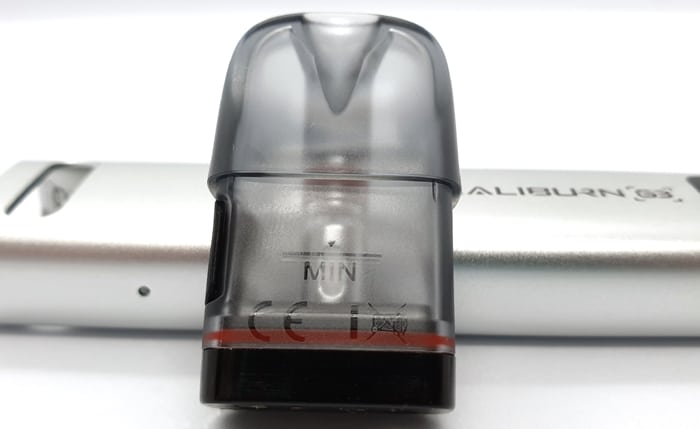
As you can see it has the same e-liquid window at the top of the front, which thankfully is cut out from both sides of the mod so it works extremely well. You can even see the minimum level marking on the pod.
I will discuss the rest of the front of the mod further on in the “Workface” section.
The main body is an Aluminium Alloy with a metallic finish.
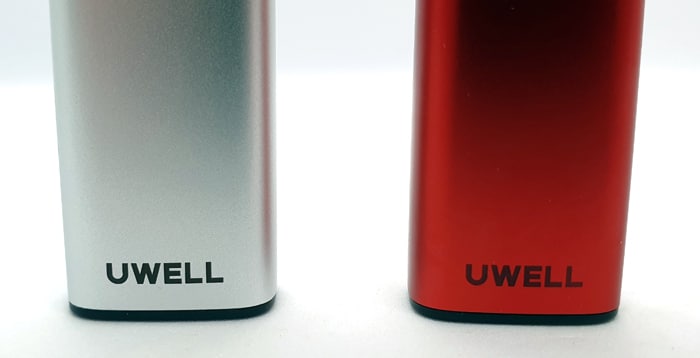
Apart from the front, the only other branding is on the rear where you will find the “Uwell” logo printed on.
On the sides are the pinhole airflow inlet holes and otherwise they are plain.
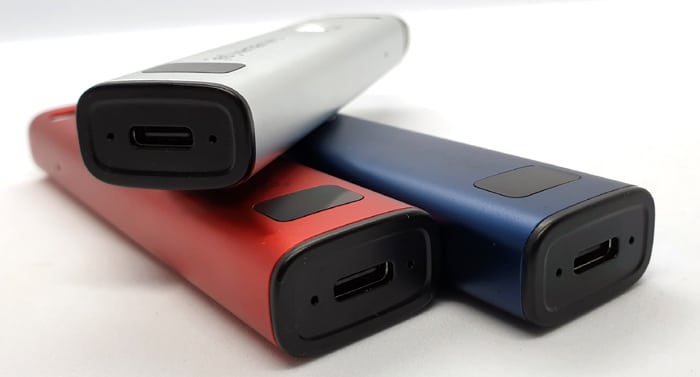
The base of the mod is a Black plastic and has a slight indent where the USB Type C port lives, which should help protect the outer edges of the port from damage.
It will also stand up fine but it is very slim and light so won’t need much persuading to fall over!
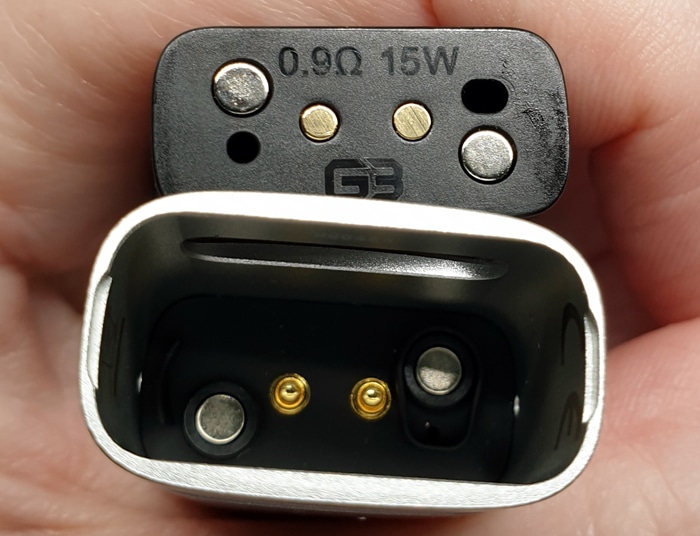
This has a deep pod compartment which may cause difficulty when cleaning the contacts, you will need a cotton bud to get to reach them.
There are 2 Gold coloured spring loaded contacts and 2 magnets inside the pod compartment. The pod only needs to be slightly pushed into the mod and the magnets pull it in quickly with a reassuring snap. There is no wobbly wobbly at all and the pod is held in well.
The device does not rattle and gives off an air of an excellent build quality. It also looks pretty classy although possibly slightly “Boring” to me.
Workface
Below the above mentioned e-liquid viewing window is the fire button. It is a rounded edge Square which measures around 11x11mm and it does only protrude from the mod body around 1mm so less likelihood of accidental operation.
There is a “Record Groove” texture engraved into the button and it is nice and clicky.
Below that is the Caliburn G3 logo printed on vertically.
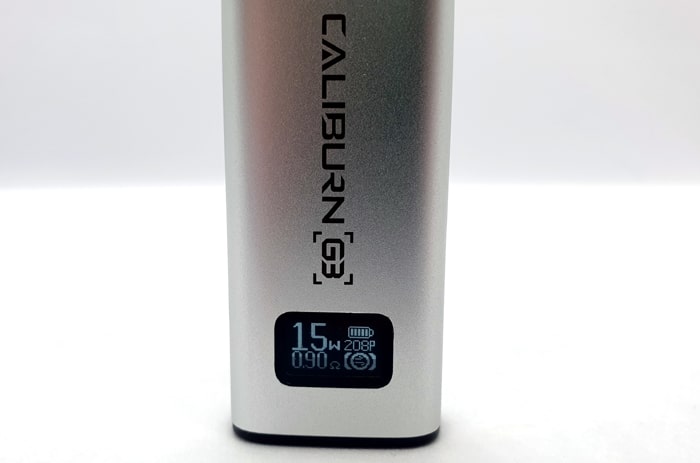
Then you will find the screen area which measures around 13mmx8mm.
It is a simple Black and White display and there is a lot of info squeezed into there but it works OK.
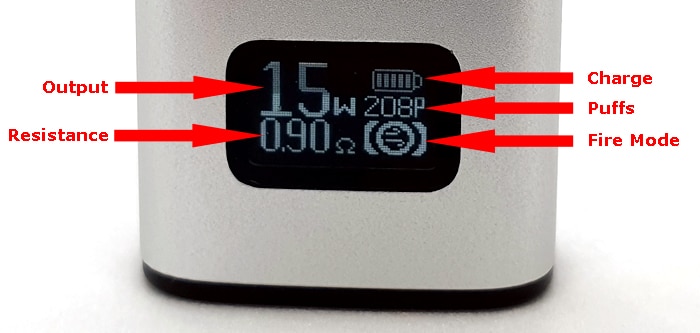
On the top left you get the output value selected followed by the “W” symbol – which denotes “Watts” the unit of measurement of the output.
Below that is the coil resistance of the inserted pod followed by the “Ω” symbol – which denotes “ohm” – the unit of measurement of resistance.
Top right is the battery icon which shows in bar graduations the battery charge remaining.
Then underneath is the puff counter followed by a “p” for puffs.
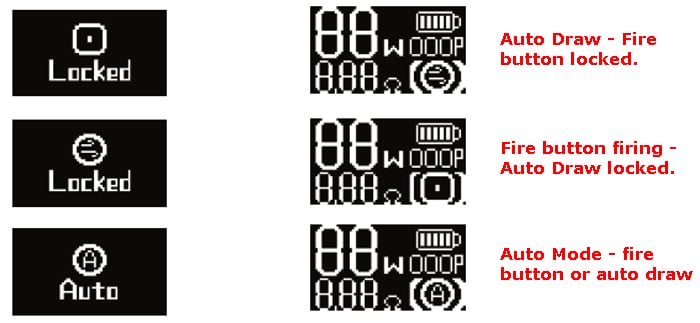
Finally in the bottom right corner there is an icon which displays which firing method is selected. I will tell you more about this in the Quick Start section.
Over all it is pretty clear and bright but some may find the amount of info in a small space looks a bit crowded.
Uwell Caliburn G3 Pod
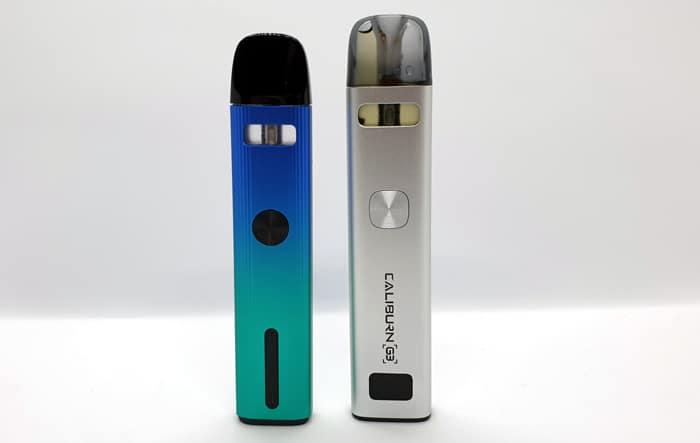
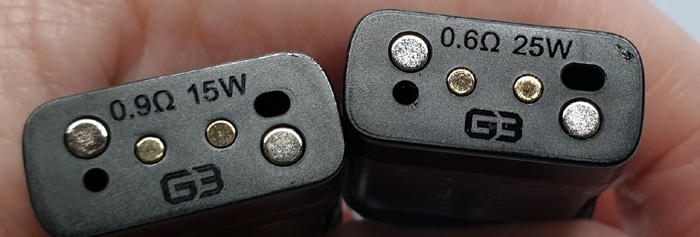
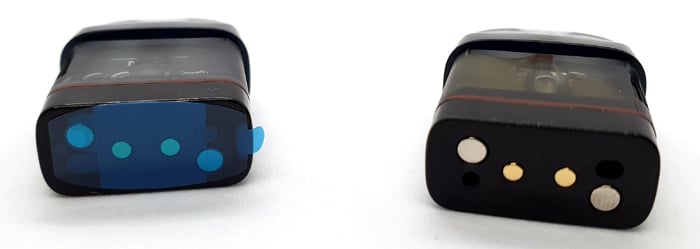
Sadly the G3 pod is not interchangeable with the G/G2 pod. They just do not fit in the others device. You can see the two pods side by side in the image below.
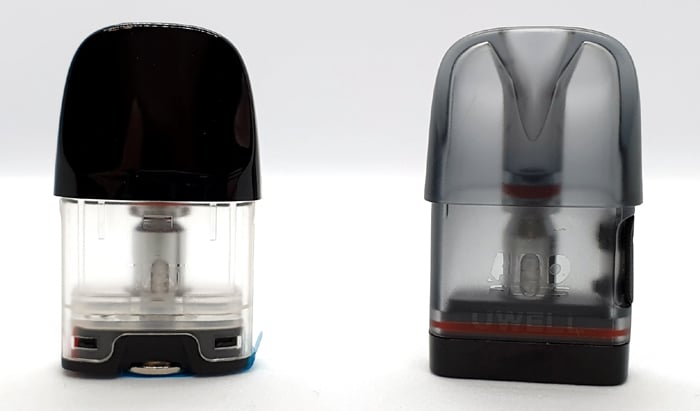
I have only been supplied with the 2.5ml side fill pods – so sadly I am unable to comment on the 2ml top fill pods.
Anyway these are a tinted Black colour all over but the e-liquid level is still nice and easy to see as the tinting is not too dark.
The mouthpiece is a very very smooth design and is super comfortable to use. The size of the pod width decreases with a small step below the mouthpiece area.
In the lower half of the pod you will find the minimum mark etched in plus the “Uwell”, “Pro-FOCS” and required legal logos. They are very faint so they do not look garish.
The base of the pod appears to be made from solid Black plastic which has a Red O-ring to seal between the outer pod and base.
On the bottom of the pod you will find the coil resistance and optimum power level etched in along with the “G3” logo.
There are 2 Gold coloured electrical contacts and 2 magnets to connect the pod to the mod.
On the outer edges of this face are the 2 airflow inlet holes. They are 2 different sizes, the smaller hole when selected will give a more restricted airflow and the larger hole will give a less restricted airflow.
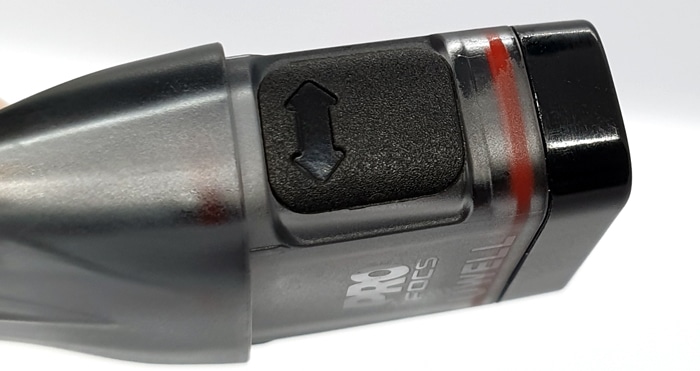
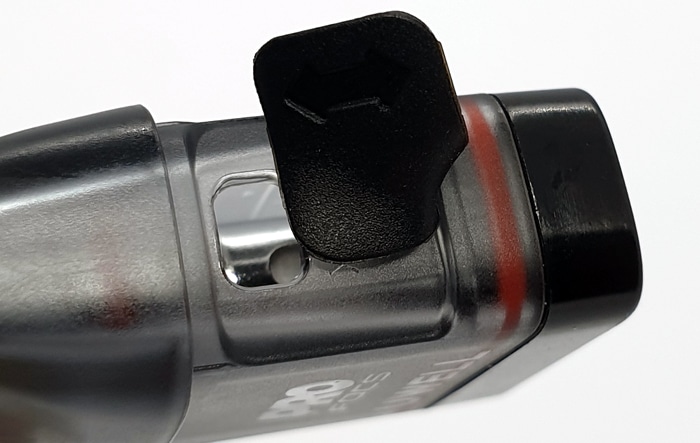
Filling is taken care of with the side fill port. The port has a Silicone cover with arrows marking the point where you lift it to access the port.
It is easy to lift but I did find it was a bit fiddly to close the port as you need to align the cover exactly. Also the cover does not rotate out of the way very easily for filling.
The port is a Rectangle shape and measures approx 5x4mm and I found it worked well and I didn’t get any airlocks when filling. I used 30ml and 120ml bottles and there were no problems at all.
Quick Start Guide
You will need to fill the pod, charge up the battery and also make a few settings to get started.
Also after filling the pod you will need to remove the isolator sticker from the base of the pod. This is there to prevent an electrical connection whilst in transit or until the pod is filled with e-liquid. Firing an empty pod will result in pod damage due to the coil burning out.
This may seem to be a more complicated device – which I do understand as it does have more adjustments than previous models. But once you have set up the power level and airflow to your preference you should not need to adjust again.
I will cover all the details on how to work this kit below!
Basic Operation
- Power On/Off = Press the fire button 5 times. When switching on the screen will display “Uwell” and when switching off it will say “Goodbye”.
- Vaping = You can either use the fire button, auto draw or both to operate depending on the fire mode selected.
- Fire Mode = To switch between fire modes press the fire button twice. This will then cycle through the auto mode (button and draw firing), auto draw only or fire button only. Stop cycling through when the mode you require is displayed.
- Battery indicator = The battery icon on the top right of the display has a number of bars which display the battery charge remaining. 5 bars = over 80%, 4 bars = 60-80%, 3 bars = 40-60%, 2 bars = 20-40% and 1 bar = less than 20%.
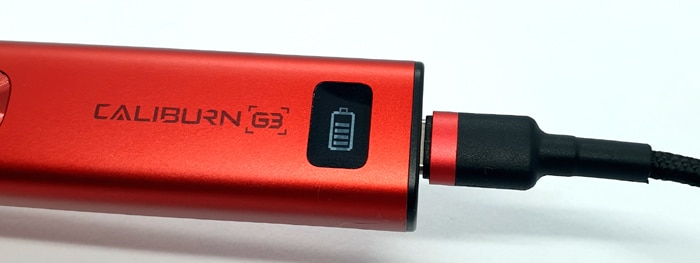
- Battery indicator when charging = The device will vibrate twice when connected to the charger. The screen icon will display the battery charge progress according to the description above. When fully charged it will vibrate and the screen will turn off. It will vibrate twice when disconnecting the charger cable.
- Airflow = There are two airflow settings. To change setting remove the pod and rotate it 180°. When the large airflow hole is on the right with the fire button facing you it will be the less restricted airflow. And vice versa with the small hole on the right – more restricted airflow.
- Adjust output = Press the fire button 3 times to enter adjustment mode. Press the fire button to increase the output. Hold the button down to scroll quickly. When you reach the maximum output for the pod installed it will return to the minimum. Once the required output is selected leave the device for 3 seconds.
- Lock fire button = When the auto draw mode is selected the fire button will be locked.
- Clear puff counter = Press the fire button 4 times to clear the puff counter. Once the puff counter reaches 999 it will return to Zero again.
Protections
- No Atomiser / Open circuit: When no pod is installed or if there is an open circuit the screen will display “No Atomiser” and the device will vibrate twice. Install a pod or clean all contacts. Failing that replace with a new pod.
- Low Battery: When the battery charge is too low for the device to operate the screen will display “Low Battery!” The device will vibrate twice and stop working until it has been charged.
- Short circuit: The screen will display “Atomizer short”, the device will vibrate 4 times and output will stop until fault is rectified. Clean all contacts, replace pod.
- Over time protection: If vaping for longer than 8 seconds the firing will cut out to prevent damage or overheating. The screen will display “Over 8s” and device will vibrate twice. Carry on vaping as normal.
How To Charge The Battery
The charging rate is specified as 2A.
The device will vibrate twice when connected to or disconnected from the charger – just in case you were worried what it was doing!
- Using a USB type C cable, connect the small end into the USB port on the mod.
- Connect the large end of the cable into a suitable USB outlet.
- The screen will display the charging progress then vibrate and turn off when fully charged.
I found it took around 40 to 45 minutes to fully charge which is great.
How To Fill the Pod
If a new pod leave to stand for 5-10 minutes after first fill to allow the coil to saturate with e-liquid.
Make sure to fill when the e-liquid level is above the minimum marking on the side of the pod.
- Remove the pod from the mod.
- Tip the pod onto its side and lift up the fill port cover.
- Add e-liquid and watch the level through the side of the pod.
- Replace the fill port cover firmly.
- Insert the pod back into the mod.
How Does the Uwell Caliburn G3 Perform?
As there are different styles of pod included in the kit, I will choose different types of e-liquid to suit.
If any of these terms are over your head – have a read of our handy guides below!
- MTL V DTL V RDL – A Guide To Vape Styles
- VG and PG in E-liquid – all you need to know
- Beginners guide to E-liquid
- Nic Salt E-liquid
0.6ohm Caliburn G3 Pod
This pod should be able to cope with 50/50 and up to around 70/30 e-liquid ratios as it is just on the cusp of being a MTL / RDL / DTL pod at 0.6ohms!
The base of the pod states that 25W is the optimum power level and the mod automatically sets the output to this figure.
50/50 E-liquid
I first tested this with my DIY Bubblegum e-liquid made from 50/50 VG/PG and IVG Bubblegum Concentrate. There is around 6mg nicotine salt added.
This gives an excellent flavour, is quite warm and a great throat hit even with only 6mg nicotine strength. If you are using a higher nic strength you might find this pod a bit too harsh and would be better off using the 0.9ohm.
There was a slight dryness to the vape so I tried knocking the power down slightly. I found just dropping to 24W took the dry edge away.
It kicks out enough vapour for the coil resistance and low power this device runs at. It would not compete with a sub ohm tank by any means but of course it is not designed to!
64/36 E-liquid
I used the Choppa Vapes Blue Slush shortfill e-liquid to test this pod with a slightly thicker mixture. It is 64% VG and 36% PG. I do not add Nic shots as I like the purer flavour.
This e-liquid is not much thicker than the 50/50 but I still thought it was worth a bash!
I am happy to report it worked perfectly and the sweetness from the extra VG really added another beautiful dimension to the excellent flavour this pod chucks at you!
Delicious!
0.9ohm Caliburn G3 Pod
For this pod I used my 50% PG / 50% VG Bubblegum e-liquid with 6mg nicotine salt. I mix this myself from the IVG concentrate.
The mod suggested 15W as the output and I found this was great but there was a slight dry edge to the vape.
I preferred to use this pod at 14W and there was a nice warmth without feeling dry. Most vapers will be scared of a “Dry Hit” – especially with Mesh coils – so if I get that dry edge I tend to drop the power!
The flavour is absolutely perfect – no complaints at all and I got all the rounded flavours that make up my Bubblegum e-liquid.
As for vapour this is average, exactly what you would expect from this kind of device.
I don’t get much throat hit as I only use 6mg nicotine – but I would imagine that you get a decent rasp at the back of the throat with higher nic strengths.
After 10 refills (2.5ml pod remember) the flavour is still banging!
All in all a perfect MTL coil in this pod! I flipping love it!!
Airflow
To help rate how restricted the airflow is, I use a scale – where 0 = fully closed, no airflow up to 10 = breathing fresh air.
So you only have 2 airflow settings to choose from – adjusted by rotating the pod 180° when inserting into the mod.
With the 0.9ohm pod the airflow on the largest setting was around 4 which is a loose MTL or ideal RDL restriction. On the small airflow setting this reduces to around a 2.5 which is great for a true MTL. In the more restricted setting the vapour does get quite hot so I preferred the more open setting.
The airflow on the 0.6ohm pod was around 3 on the smallest setting which did get a bit hot. I would say it is around 5 on the larger setting. This is more RDL than DTL territory.
Mod Performance
The auto draw fire was excellent and instant as was the button fire. I do like being able to lock the fire button and rely on auto draw.
As for performance, the output seemed to be consistent until the last 5 vapes – which is normal.
Leaks
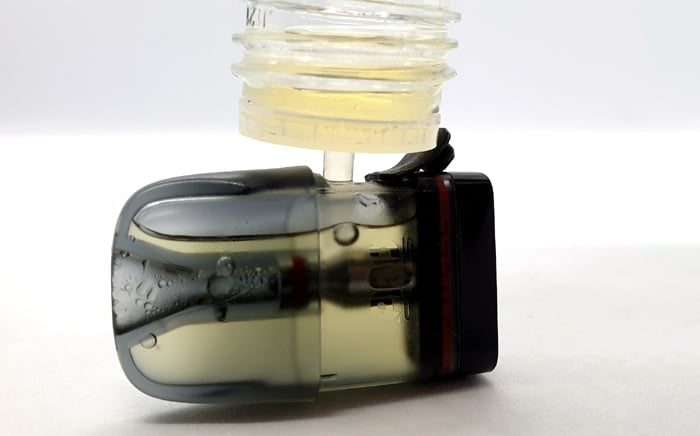
I did get a bit of flooding (where the airflow gets e-liquid inside) after filling, but it is easily cleared by removing the pod and blowing through the mouthpiece.
The only other e-liquid that was not in the tank was due to slight overflowing when I was filling – total human error!
Otherwise the pod bases and pod compartment were dryer than a bath towel in the desert.
Battery Life
This will always vary according to the power output selected, pod used and your own vaping habits. As a guide I got the following…
At 15W with the 0.9ohm coil I got around 5 hours (208 puffs). I dropped to 14W and got a whopping 7 hours (250 puffs).
For the 0.6ohm coil I got around 5 hours and 170 puffs at 24W.
Pros
- Excellent build quality
- Classy looks
- E-liquid window has cut outs on both sides of mod so has plenty of light to see clearly
- Vibration alerts are handy
- Adjustable output and a screen make this more versatile
- 0.9ohm pod is absolute perfection!
- 0.6ohm pod was happy with both 50/50 and 64/36 PG/VG e-liquid
- 40 minute charge time
- Excellent MTL and RDL airflow settings
- Very lightweight compared to other similar pod kits
- The flavour is just epic!
Cons
- Lack of full airflow adjustment – it only caters for MTL and RDL – too restricted for DTL.
- Fixed coil rather than replaceable coil
- Not compatible with pods / coils of previous Caliburn G kits
- Slightly “Boring” appearance (subjective)
- Screen is small and could be classed as being a bit cramped.
- One button for all adjustments – not intuitive – you have to study the instructions
Uwell Caliburn G3 Final Review Verdict
This is a very classy looking device which is wonderful to use.
I was absolutely blown away with the incredible flavour of the 0.9ohm pod. I did have to drop it down to 14W but after that it was absolute perfection!
The same goes for the 0.6ohm pod – with 1W drop of power it performed excellently.
I would say this is more for MTL and RDL vapers. The two airflow options on each pod do work well. However both are too restricted for DTL fans.
The design and ease of use have dropped a couple of marks due to there being a lot of modes and adjustments to get your head around. A single button for all adjustments does mean you need to study the instructions as it is not intuitive. Also it may be off-putting for a technophobe or newbie. If you do struggle with tech I recommend the previous G models or something from the Caliburn A range.
As I was sent 6 of these, I gave two away to friends. Both love it! The one is over the moon with the 0.6ohm pod and is using 70/30 e-liquid in it.
I feel this is an absolute bargain for such a well made kit. I have used more expensive kits that did not have this build quality and performance.
Which features of the Uwell Caliburn G3 have caught your eye? Let us know in the comments below!
By the way! Uwell are currently running a giveaway for a chance to win an iPhone 15 and other prizes. Click here to spin the wheel!




Very nice and thorough review! My G3 is top-filling for some reason…I’m at 268 puffs using a 0.6 ohm coil at 25W and the battery meter is at 2 bars. Quite impressive. Though there is no airflow control I find the draw resistance just perfect for me.