The Starss Romeo Pod System is the latest Pod from the Shenzhen based company.
Their entire range comprises of 5 tanks (including an RDA), 4 mods/kits and 4 pod systems. They have been around since 2016.
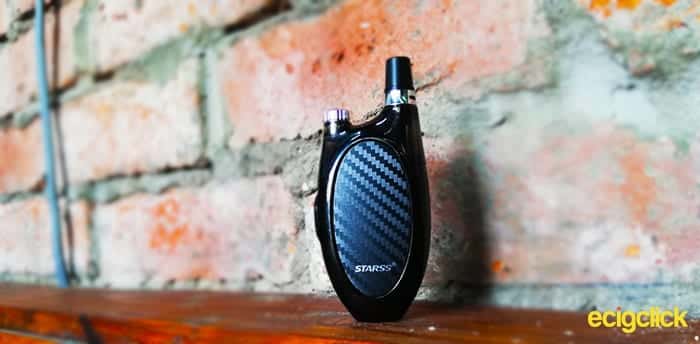
It’s not only their Pod system shapes that are unique, Starss have “many independent innovation patents” and they claim to be at the forefront of e-cigarette product innovation.
Well, I’m all for innovation, let’s take a look of the Romeo Pod System.
What Can We Expect From The Starss Romeo Kit?
Starss have stuck with the unique system design idea. The Romeo pod system closely resembles a walkie talkie. Although it is down to personal preference, I think it looks quite cool… Yes, I admit, I have pretended to use it as a walkie-talkie.
Carrying an impressive 1200mAh lithium ion battery, the system has 3 different output power settings and a maximum output of 25W.
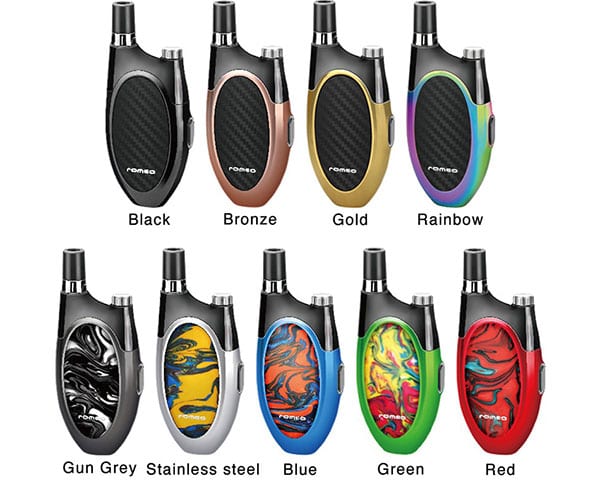
Starss make the system in 9 different colours:
This device was sent for the purposes of review by Vaporl, thankyou, as always my views are my own.
See The Starss Romeo Pod System In Action
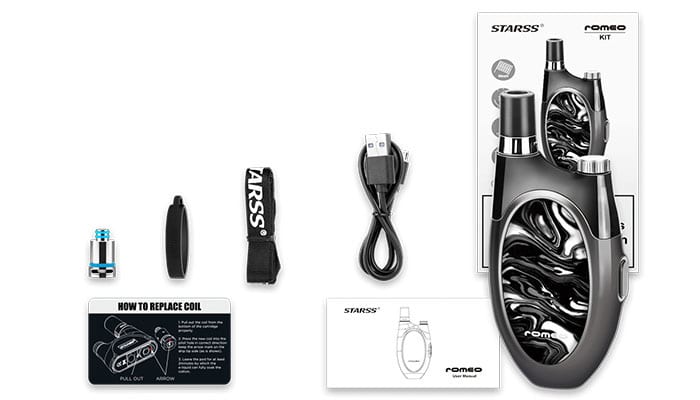
In The Box
- 1× STARSS Romeo Device
- 1× Refillable Romeo Pod
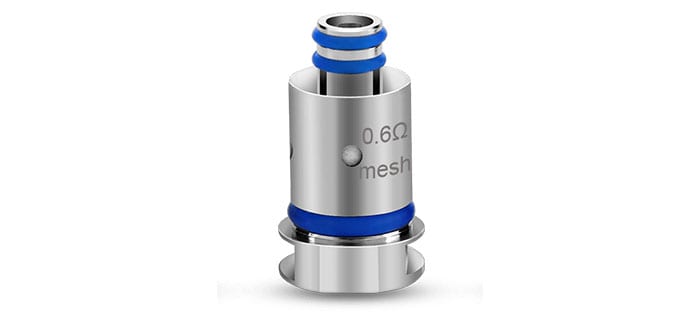
- 1× 0.6Ω Mesh Coil Pre-installed (14-18W)
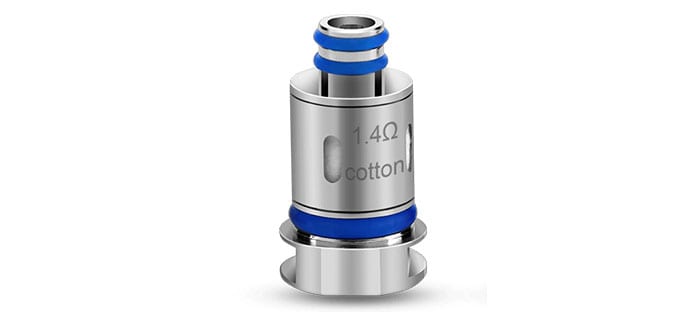
- 1× 1.4Ω Regular Cotton Coil (8-12W)
- Micro USB Cable
- Lanyard (and attachment band)
- User Manual
- Warning Card
Specs
- Dimensions: 46 x 20 x 105mm
- Weight: 114g
- E-liquid Capacity: 2ml
- Battery Capacity: 1200mAh
- Charging: 1A Micro USB
- Output Voltage: 3~3.5V
- Material: Zinc Alloy (Pod: PTCG)
Features
- Variable Voltage
- Top Fill
- Adjustable Airflow
- Strong Magnetic Connection
- LED Indicator
- Pass through Charging (can still be used while charging)
- Short Circuit Protection
- Time Out Protection – 8 Seconds
- Low Voltage Protection
Design & Build Quality
Overall, the system feels well built and durable.
The Mod/Battery
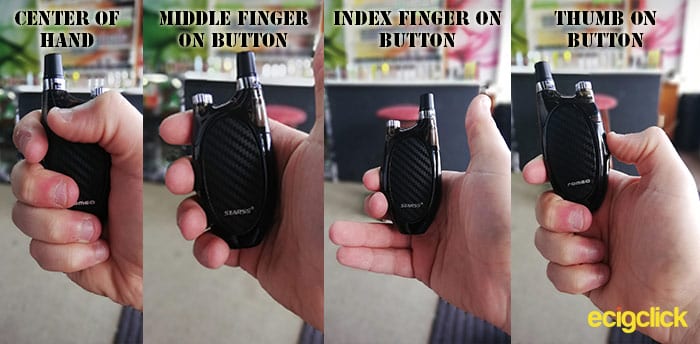
Something I’m not quite keen on is the location of the button. The shape of the device is quite nice and fits the hand well, but to have the system in the centre of your hand your middle finger is on the button.
So you raise it up enough to use your index finger, then it’s quite high in your hand and the finger doesn’t quite sit right.
I personally would rather use my thumb to fire devices. In order to do that, the pod has to sit right at the top of the hand or solely on the fingers.
I should probably mention.
The button couldn’t be any higher on the device unless the entire system was made to be longer.
The bottom of the device is flat, which is good, I like my devices to be able to stand up.
Something I didn’t notice straight away is the lack of features. The Romeo system doesn’t indicate if there is no pod/atomiser detected.
It also doesn’t have the ability to check the current battery level. Although these may only seem like little features, I think they make a big difference. And they are features you would expect from a company that boasts about innovation.
LED Indicator
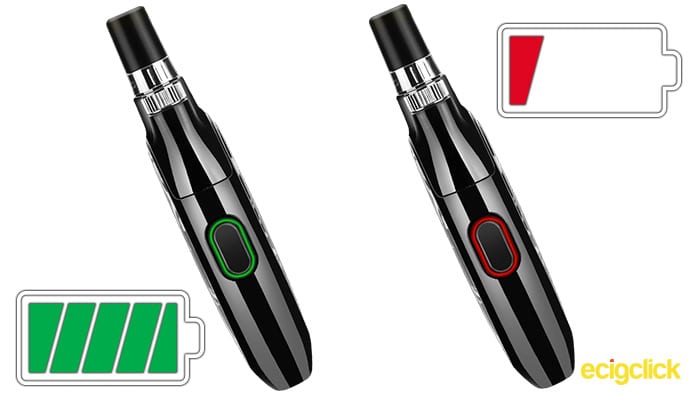
The LED indicator surrounds the button. It suits the device pretty well and is easy to see even in direct sunlight.
The Pod
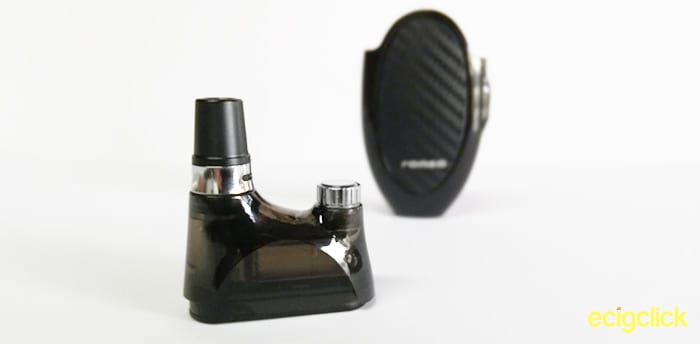
As I’ve already mentioned the entire kit looks like walkie-talkie, especially in black, which is the colour I received. The Fill hole looks like the radio channel dial and the mouthpiece looks like the aerial. I think that design works quite well.
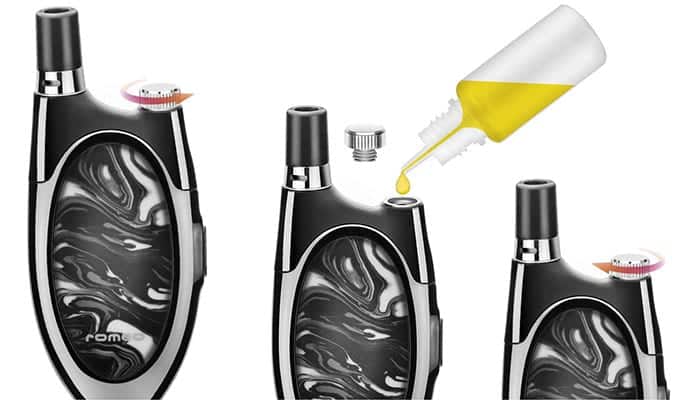
The fill hole cap screws off and quite typically the coils just push in to the bottom/base of the pod.
Airflow
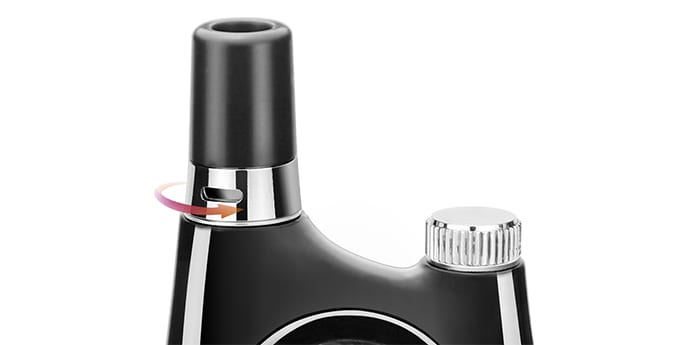
You’ve noticed the silver band at the bottom of the mouthpiece, right?
That right there, is the adjustable airflow, I love this idea.
Although, the Romeo isn’t the first pod system to have variable airflow, there has been so many pod systems (like the Snowwolf Exilis) that I thought would have been improved drastically by having this kind of airlfow.
The band consists of 2 holes, one on either side.
It is quite hard to see the plastic underneath the airflow band which itself is free to continuously turn, so I thought it was quite hard to set/change the airflow.
Until I realised the air holes are positioned at the front and back of the device. So if a hole is facing you, the airflow is fully open.
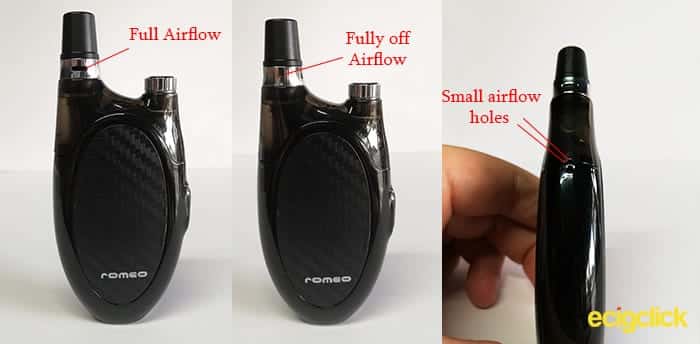
Having said that, the band it is smooth, with no ridges, so I suppose there is a very fine line between too loose and too stiff.
There is also 2 small holes at the bottom of the pod, so if you are a true Mouth to Lung MTL vaper, turn the airflow “fully off”, this will restrict the airflow to the 2 small holes and give you a true MTL experience.
If you do so, please ensure you change the power to the lowest setting (green light) to prevent the coil being too harsh, and possibly burning the coil out.
Charging Port
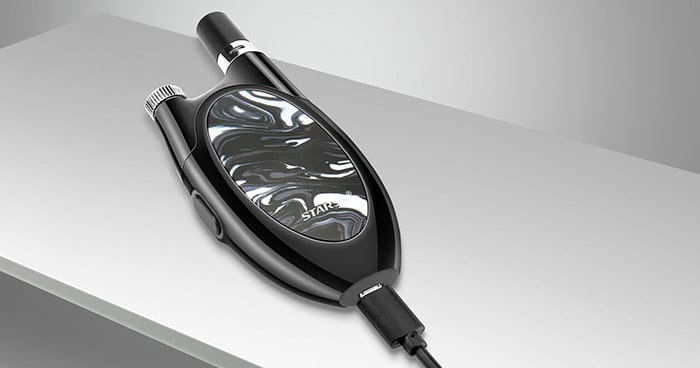
The system charges with Micro USB, which annoys me. In my opinion is should use the latest USB technology (USB-C).
Pod Connection
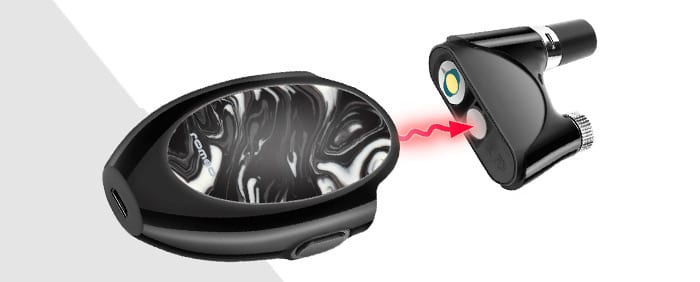
Without any ridges for the pods to clip onto, the Romeo system has an impressively strong magnet that holds the pods into place.
The pods only fit into the battery one way, which is quite obvious when you realise coil the is on one side of the device (not centre), but don’t worry the pods don’t fit the wrong way.
Due to the strong magnet I have developed a habit of constantly tipping the pod off of the device with my thumb, much like flipping the cap of a windproof lighter (Zippo?).
Lanyard
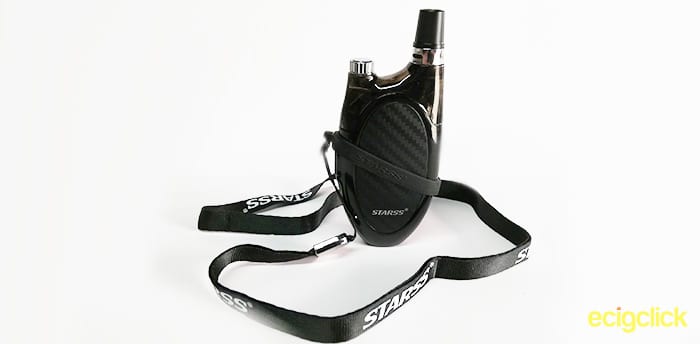
The Romeos Lanyard is interesting, instead of having a hole where you thread the lanyard through, it comes with a rubber band; much like a standard “Vape Band” but bigger and with a protruding hole.
You then attach the lanyards hook clasp to the protruding hole on the band.
Using The System
Like most pods the Starss Romeo is nice and simple to use.
How To Fill The Starss Romeo Pods
So you’ve got the device, the 0.6ohm mesh coil is already installed. Now you need to put your e-liquid in.
- It doesn’t matter if your pod is on the battery or not.
- Unscrew the silver cap.
- Pour your e-liquid into the hole.
- Screw the cap back on.
How To Change The Coil
- Remove the pod from the battery.
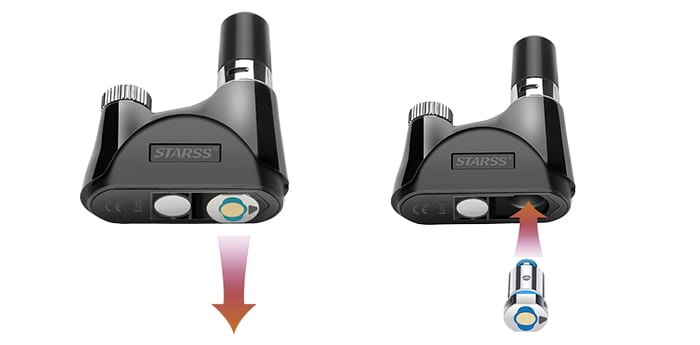
- Pull out the coil from the bottom on the pod.
- Press the new coil into the hole, ensuring the little arrow on the coil oil is pointing towards the little arrow on the bottom of the pod.
 The pod does not have an anti-leaking system, so when you remove the coil, the e-liquid will pour out.
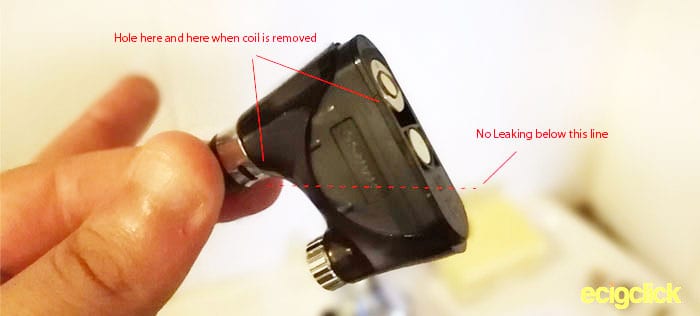
Changing The Coil
Turn On/Off
Press the button 5 times quickly to turn the device on or off.
The LED indicator will flash white (3 times) to indicator the device has been turned on, or off.
Adjusting Output Voltage
Press the button 3 times quickly to circle though the voltage settings.
The LED indicator will flash once, with a colour that represents the voltage setting.
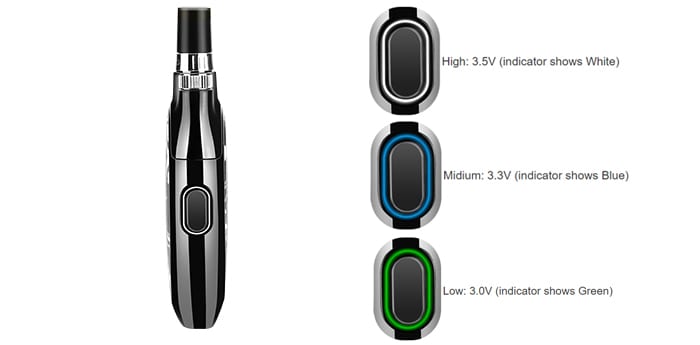
LED Indicator Prompts
Blue light / 3 flashes = Pod has just been removed.
- Red light constant = Device is charging
- Blue light constant = Device is connected to charger and is fully charged
- Red light / 1 flash = Low battery – device will then stop working until charged
- Red light / 3 flashes = Short circuit detected.
How Does the Starss Romeo Perform?
Starss currently make 3 coils for the Romeo :
- Regular 1.4ohm (best for nic-salt over 20mg)
- Mesh 0.6ohm (best for nic-salt under 35mg)
- DC 1.3ohm (best flavour)
Out of the 3, I have only tested the Regular 1.4ohm and Mesh 0.6ohm coils, as they’re the coils that come with the system.
Mesh 0.6ohm coil
Starss Recommend using this coil at 14-18W.
Using Ohms law calculations, the wattage produced from each power setting are approximately:
- 3.0V = 15w
- 3.3V = 18.1w
- 3.5V = 20.4w
As you can see this coils don’t quite match up to Starss usage suggestions. Even the middle setting pushes the wattage above the recommended usage.
In my experience, this is even more important with mesh coils, regular coils seem to be a little bit more flexible when it comes to suggested wattage use, than mesh coils do.
In a hurry to get started, without checking which coil was pre-installed, I grabbed the closet liquid to me and chucked it in. It was the Got Salts Peachy Promise; a peach and passion fruit 20mg Nic-Salt (50VG/50PG).
I filled and left it for about 5-10 minutes.
I set the system to the lowest power setting (green light – 3V) and found it to be incredibly harsh on the throat… How strange.
I gave it the benefit of the doubt, left it for another 5 minutes, presuming the coil might not have wicked properly. Nope still too harsh.
That’s when I realised I was using the 0.6ohm coil, a mix of the low resistance, higher PG and Nicotine could be what’s causing it to be harsh.
Although I think that is a lame excuse, I emptied the pod full of liquid and filled it with one of my favourite 70VG/30PG liquids; which is Strawberry CushMan by Nasty Juice ( a great Strawberry, Mango, low menthol juice – made to be 3mg).
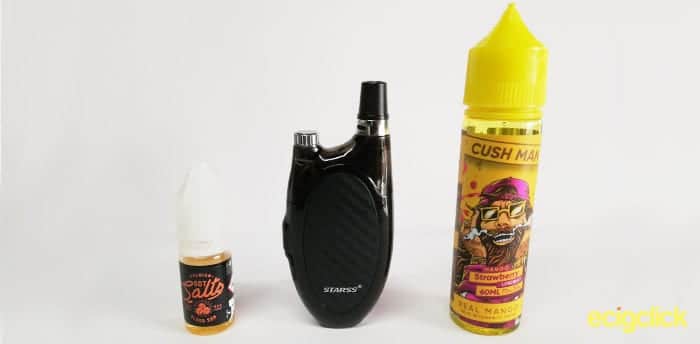
No Mango, no Strawberry, no Menthol. On every power setting with fully open airflow and fully closed airflow. Gutted.
Not prepared to write the coil off just yet, I gave it the benefit of doubt one last time.
Although 20mg Nic-salts don’t provide the harsh throat hit that standard freebase nicotine does, I was desperate to find the light at the end of the tunnel.
So, I vaped the full pod of Cushman and then filled it up with Oasis NRG (3mg 50/50) and left it for a few minutes to make proper contact with the coil, then vaped off the excess Cushman.
Still nothing… OK on full power, with the airflow turned right down, there is a very subtle hint of flavour, but I am genuinely very disappointed.
Regular 1.4ohm
Starss Recommend using this coil at 8-12W.
Using Ohms law calculations, the wattage produced from each power setting are approximately:
- 3.0V = 6w
- 3.3V = 7.8w
- 3.5V = 8.75w
Again you can see the recommended wattage doesn’t quite sync with what wattage the system is expected to provide.
I’ve come to the conclusion, if you are from the USA and this is your go to device, a flavour ban won’t affect you.
Harsh, but true.
I’m being serious. I’ve gone straight in with the Got Salt Peach and Passion Fruit at full voltage, full airflow and now I’ve lost all hope. There is a very subtle hint of flavour but it’s barely even recognisable.
At least this coil, isn’t harsh on the throat!
Closed the airflow, Still nothing.
Tried mouth to lung with closed airflow, still nothing.
Against all sense I turned the voltage down, still nothing. Put some Cushman 70/30 in… still nothing.
Coil Summary
Sigh… Both coils produce an amazing amount of vapour and smooth vapour too, with exception to the 0.6ohm coil with Nic-Salts for some reason.
Throughout my time using the system I didn’t get a single dry hit with either coil.
Despite using premium and prominent flavour liquids I didn’t get any noticeable flavour…
I have noticed there is a bit of flavour if you leave the system for 15-20 minutes but then after 4-5 puffs it’s gone again.
Sorry but the flavour production has ruined the entire experience for me. Which is even more disappointing because I had such high hopes for the system.
Coil Life
I’ve used both coils for about 5 days each and as expected they’re both still vaping on without any dry hits or burnt tastes.
Battery Life | Charging
The battery life of the Starss Romeo is really impressive due to the different power settings and coils, the battery life has a huge range, see the expected output below:
Mesh 0.6ohm coil
- 3V / 15W = 540 x 2 second puffs
- 3.3V / 18.1W = 450 x 2 second puffs
- 3.5V / 20.4W = 390 x 2 second puffs
Regular 1.4ohm coil
- 3V / 6W = 1,320 x 2 second puffs
- 3.3V / 7.8W = 1,020 x 2 second puffs
- 3.5V / 8.75W = 900 x 2 second puffs
In reality the actual output will be a little bit less, due to energy efficiency. However the above does demonstrate how varied the battery life can be.
The 0.6ohm coil on full power lasted me about 10 hours between charging. However the 1.4ohm coil on full power far outlasted me on an 18 hour day.
The 1200mAh battery charges in a less impressive, 1 hour 40 minutes. You should expect
somewhere between 1.5 – 2 hours.
Leaking
Every pod I’ve ever used (which is a fair few) leaks a little bit out of the bottom of the coil on to the connection. It is expected especially considering that’s where the airflow is located.
Although the Romeo gets the most of its airflow from the holes at the bottom of the mouthpiece that airflow still enters the coil from the bottom of the coil.
Pros
- Huge vapour production
- Prominent LED Indicator
- Variable Voltage & Adjustable Airflow
- Top fill
- Decent Battery size and Life
- Strong Magnetic Connection
Cons
- Lacks battery level indictor
- Doesn’t detect ‘no pod’
- Little to no flavour
- Micro USB (not USB-C)
Final Verdict
I had great expectations for this kit and to be fair it would be perfect, if you could get any
flavour from it.
The Adjustable airflow makes it a great kit for both DTL and MTL. The battery…
Look there are many things that make this kit great but I believe everybody that vapes wants some flavour, even if they aren’t flavour chases.
This pod system is unbelievably poor at providing flavour. Such a shame. If Starss can correct this they will have a near perfect pod system.
Have you used the Starss Romeo kit? Did you struggle with the flavour? Let us know your thoughts in the comments below.
