The Smoant Pasito is one of a new generation of Pod Mod kits – offering more than just stock coils…
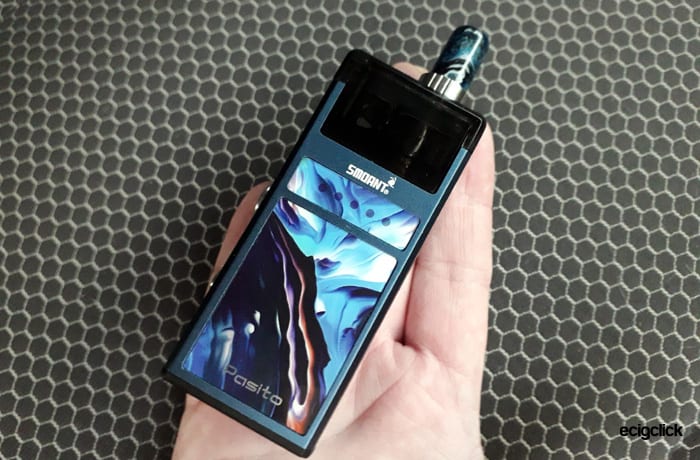
We like Smoant vape gear here at Ecigclick with releases such as the Cylon, Charon Mini and the… let’s say ‘interesting’ Campbel kit. So we have high hopes for this innovative pod system.
What Can We Expect From The Smoant Pasito Kit?
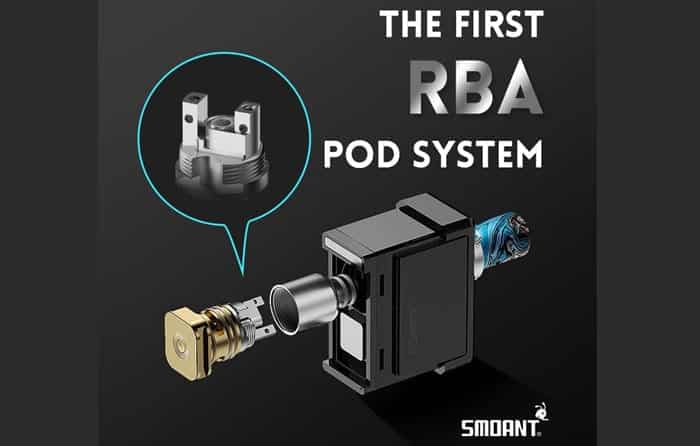
Well the Smoant Pasito has one huge benefit over most other pod mods in that you have the option of a rebuildable (RBA) coil system. That is right – this takes stock coils which have a simple push in installation plus you can buy a rebuildable coil.
Another device offering this function is the Vapefly Jester and I imagine in the very near future a lot more kits will follow suit.
Not being able to rebuild the coil in a pod mod has put a lot of more experienced vapers off these devices. The thought of chucking away pods and coils disgusts some people so hopefully the rebuildable option will attract those who love to tinker!
Inside the body of the device is a 1100mAh battery and it will output from 10-25W in 5 increments which you can adjust yourself.
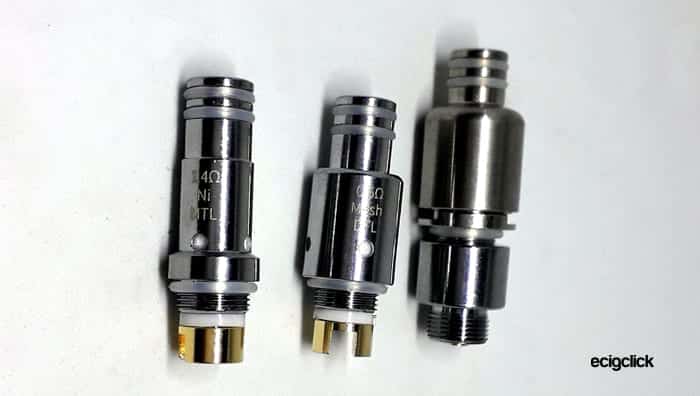
The main kit includes two stock coils:
- 1.4ohm Ni80 coil – this is best for Mouth to lung (MTL) vapers and high nicotine / nic salts e-liquid.
- 0.6ohm Mesh coil – best for Direct to lung (DTL) vapers and lower nicotine strengths. However you might get away with higher nic liquid in here.
We tell you more in the Guide to MTL and DTL vaping styles…
You can also adjust the airflow to your preference and refill the pods from the top!
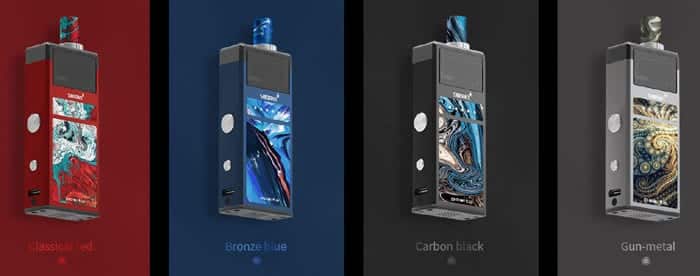
There are 4 colours to choose from – Classical Red, Bronze Blue, Carbon Black and Gun-metal.
I received the Smoant Pasito Kit free of charge for review purposes but as always I will report back honestly on my findings!
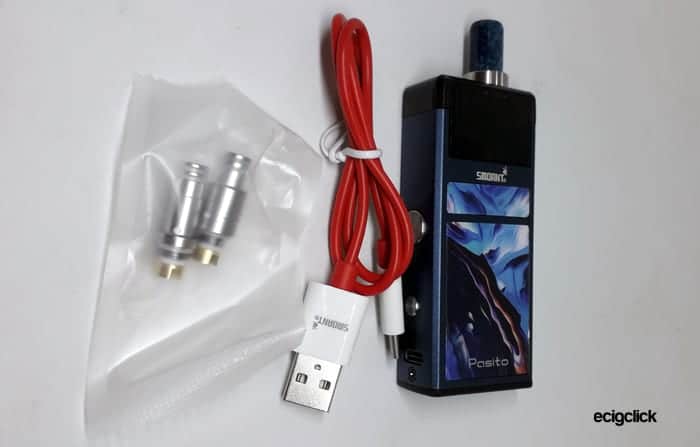
What’s In The Box
- Smoant Pasito device
- Pasito pod
- 1xMTL 1.4ohm coil
- 1xDTL 0.6ohm coil
- USB Cable – Type C
- User manual
In a separate bag I also received the RBA coil – which you will have to purchase separately.
I think the RBA also comes with some accessories such as wire, screws and a screwdriver.
Sadly I didn’t get any of these just the RBA coil assembly.
Pasito Features
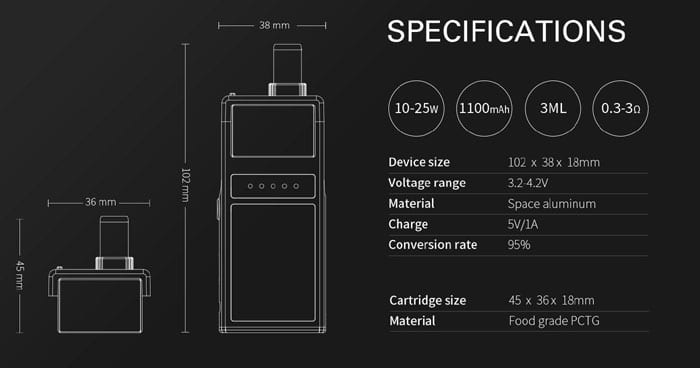
- Size: 102x38x18mm
- Battery: 1100mAh internal
- E-liquid capacity: 3ml refillable
- Resistance limits: 0.3-3ohm
- Coils: Replaceable – Single coil RBA deck (available separately), MTL 1.4ohm and DTL 0.6ohm
- Output: 10-25W
- Battery / power indicators
- Material: space aluminium
- Top refill
- Adjustable airflow
- ANT constant output chip
- Type C USB port
Build Quality & Design
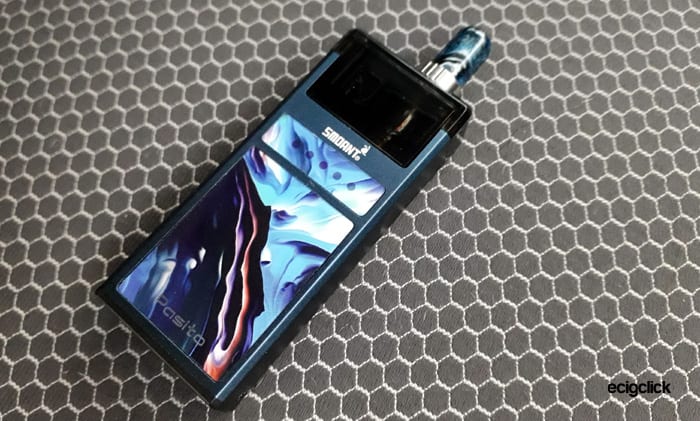
I received the Smoant Pasito kit in the Bronze Blue colour.
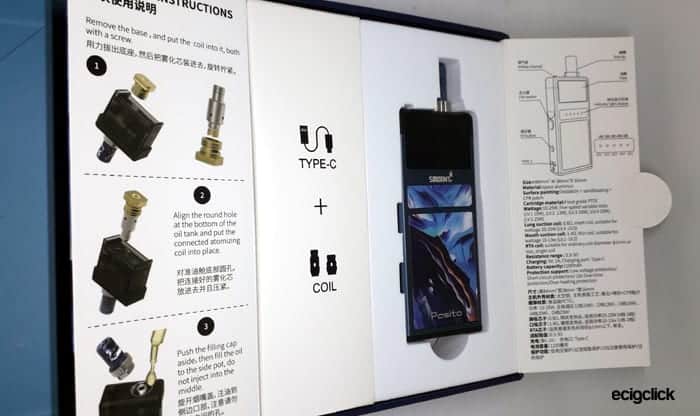
My first impressions were really good – the packaging is great!
The box has a magnetic lid which then opens to reveal a set of “doors” which you open to access the device.
The instructions are basically printed on the rear of the doors.
The patterned panels also had cellophane protectors so make sure to remove those!
Device
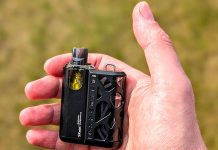
This is a very cute device – lovely size and the metallic body makes it feel well made.
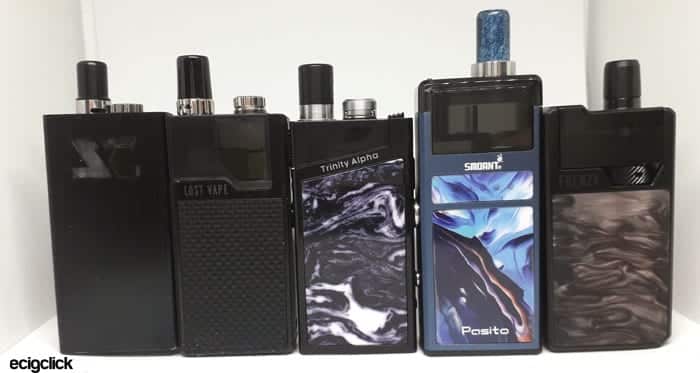
The Smoant Pasito is thinner and taller than other similar pod devices (I will be doing a Box Pod comparison in the near future so keep an eye out for it!).
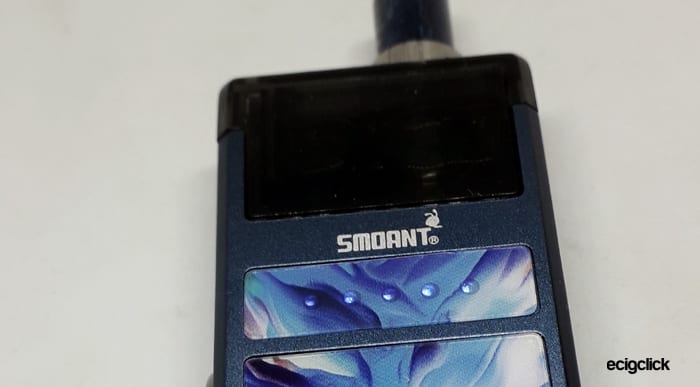
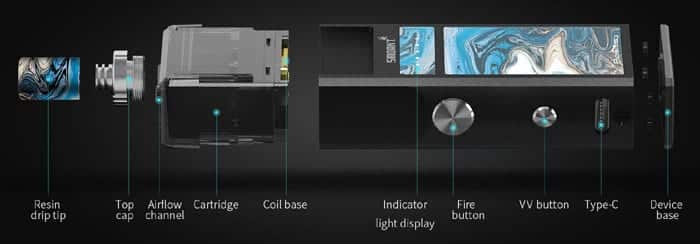
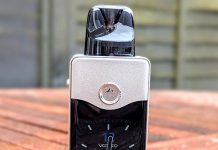
The front of the device has the Smoant and Pasito branding clearly displayed and the same pattern panels are present on the front and rear. The panels are smooth so they appear to be like a printed finish with a laminated coating.
Apart from the pattern panels the body has a metallic blue finish which looks lovely.
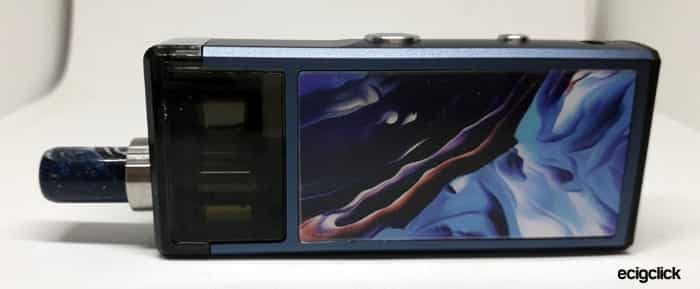
On the one side there is the fire button, power adjustment button and USB C port. The buttons have the “Record groove” style circular texture pattern.
Both buttons are lovely and clicky and respond quickly.
The opposite side is just plain. However it might be worth noting that both sides and the base have exposed screw heads. If you are someone who hates that this might bother you!
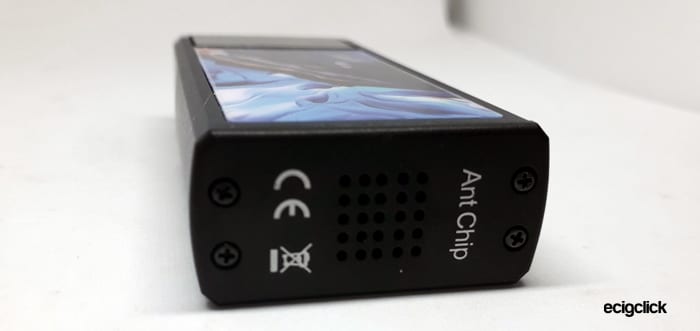
The base of the device has a square pattern of vent holes, the legal logos and “Ant Chip” text.
LED Indicators
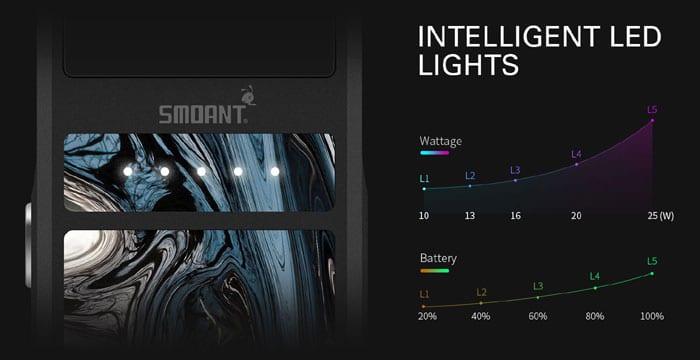
There are 5 LED indicators on the front of the device these have a code which I explain in the Quick Set-up part of the review.
The LEDs will display the battery capacity, power mode and fault conditions.
Pod
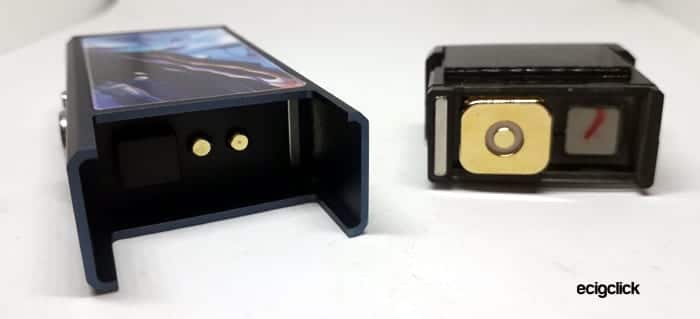
The pod sits firmly in the device – with rails either side on the battery component to hold it in place.
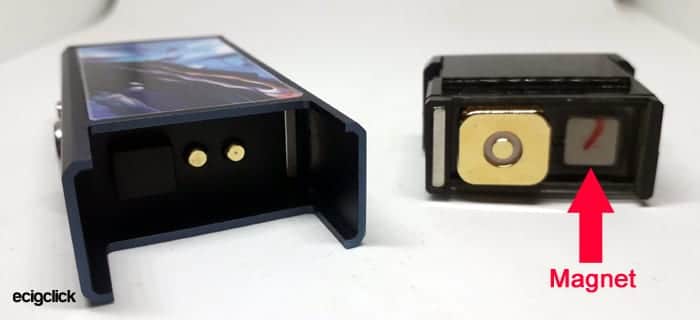
Plus the magnet retains the pod and is nice and strong but you can remove the pod easily with the magnetic restriction. No pod wobbles here!
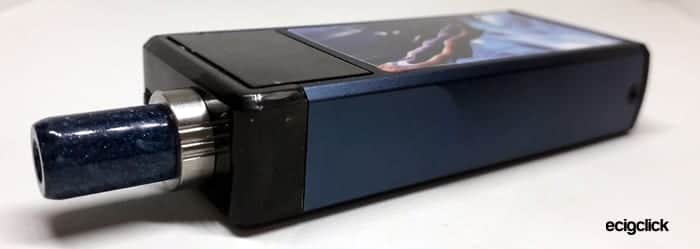
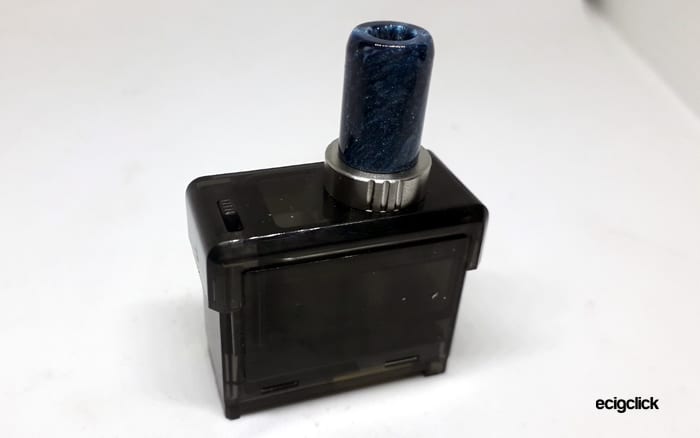
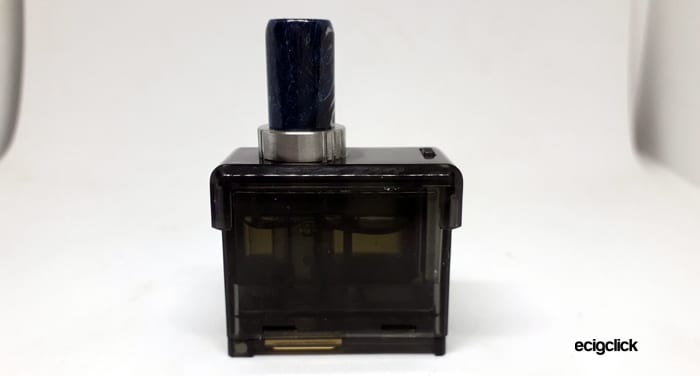
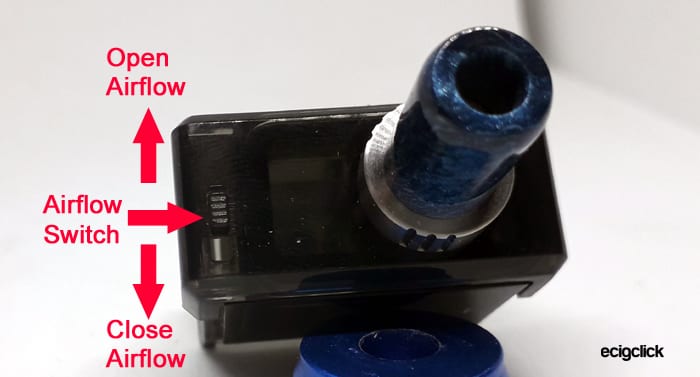
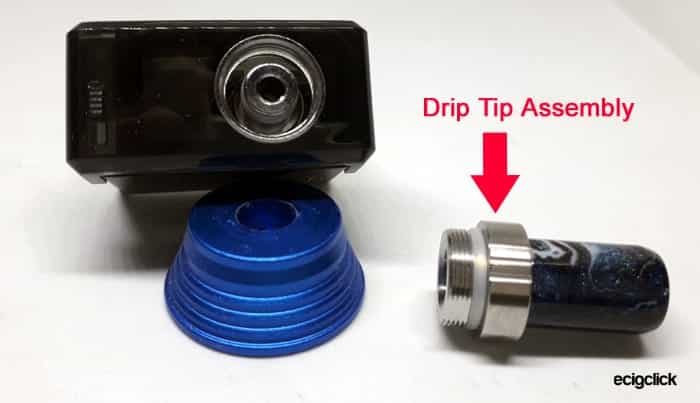
On top of the pod is the airflow switch plus the drip tip assembly which you need to unscrew to access the fill port.
The resin drip tip is nice but I think it does spoil the look of the device a bit – like you have lost the original drip tip and just stuck a generic resin replacement on!
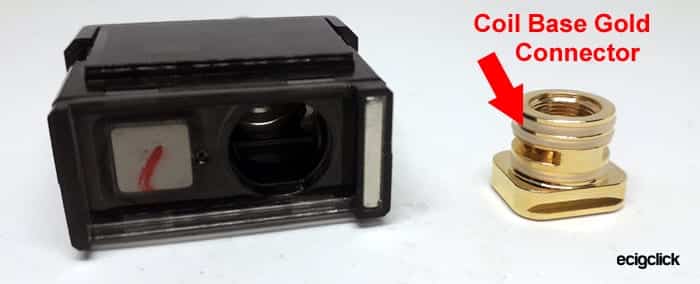
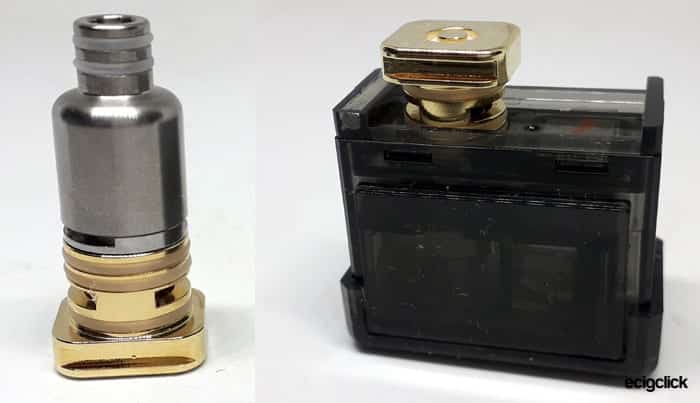
The base of the pod houses the magnet and the gold connector which you have to pull out to change the coil.
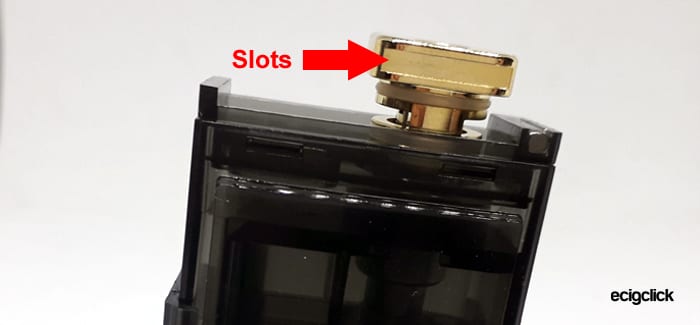
There are cut out slots to enable you to use a nail to pull the connector out but it is a bit tricky and I did break a nail doing so.
Although it is a dark coloured pod you can just about see the e-liquid level – you might have to hold it up to the light.
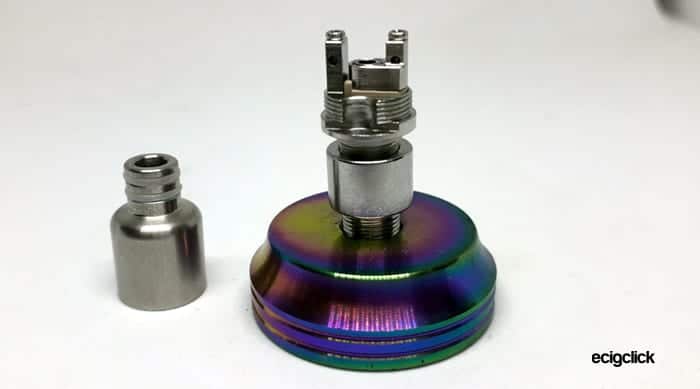
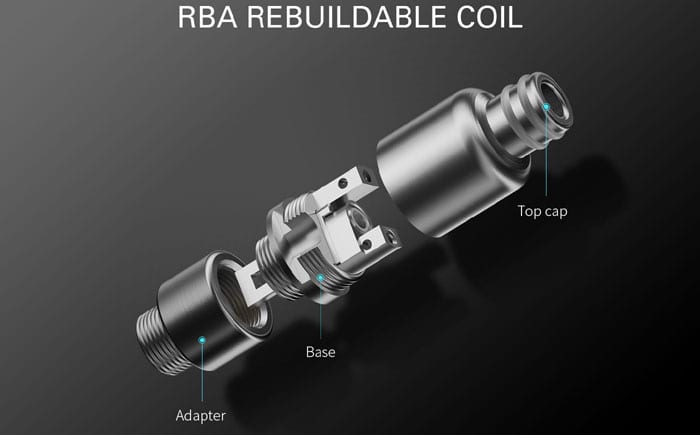
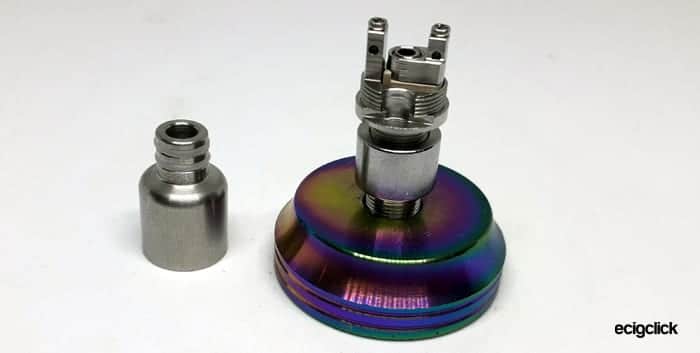
 Smoant Pasito RBA Coil
As an optional extra you can buy an RBA coil system.
Basically this is a deck where you can add a coil and wicking of your own.
It is pretty tiny so I will really have fun building this!
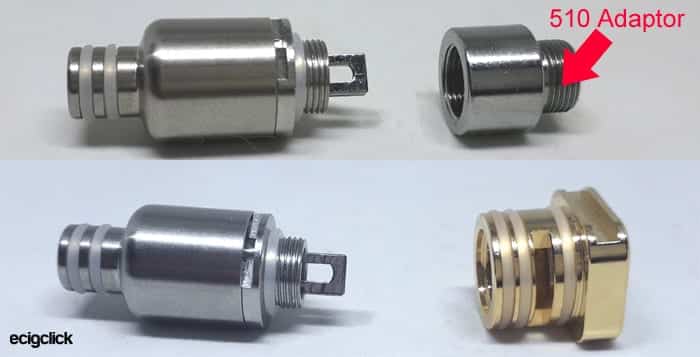
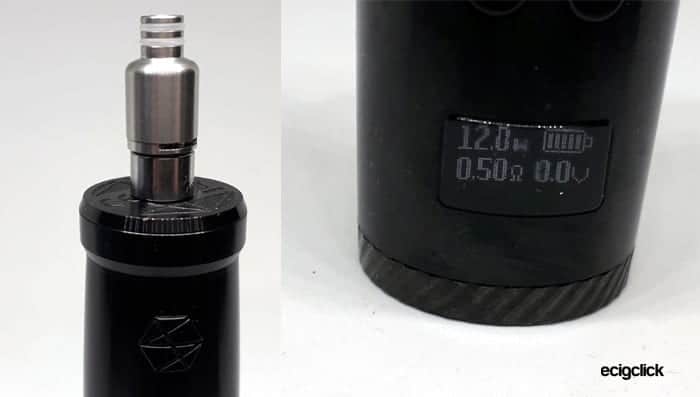
I will go more into the building of this below – but one nice touch is the fact you get a 510 adaptor attached to the base of the RBA. This means you can use this on a resistance tester and also on a mod to do a dry burn to clean the coil and remove hot spots.
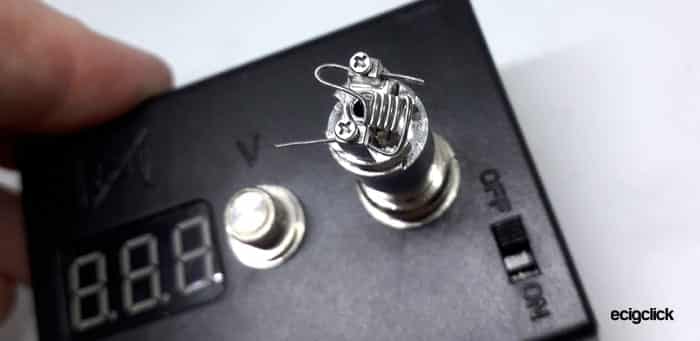
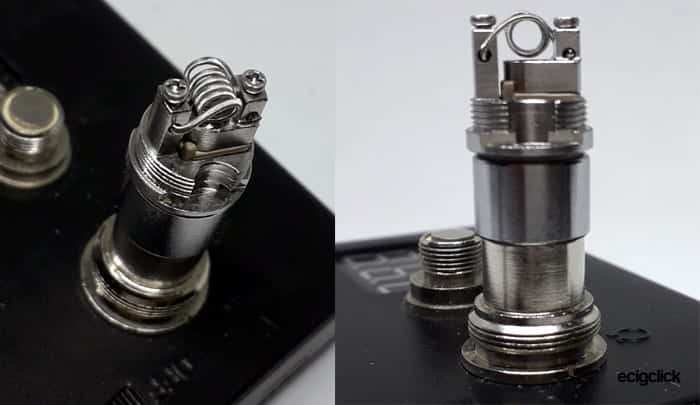
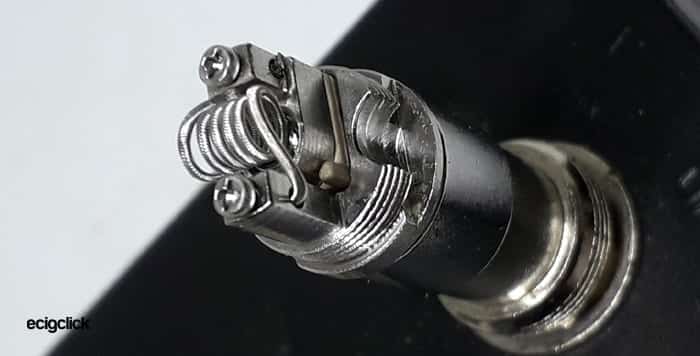
There are a few flaws with this deck though. The main one being the size and layout of the holes in the posts.
There are no clamp holes on the inside of the posts – where the airflow hole is – which is where you would expect them to be.
Nope – you have to have the coil legs coming across the outside of the post – in a kind of “S” shape?
You can’t just put the coil legs under the screw heads either as it makes the screws too high and touch the top cap when it is installed! So you have to put the legs through the very misplaced holes in the sides of the posts!
Secondly replacing the top cap often makes the clamp screws come undone.
Thirdly this is too small really to make any meaningful coils fit properly. Even with small diameter coils. Remember you will still need to be able to wick them so you can’t make them too small.
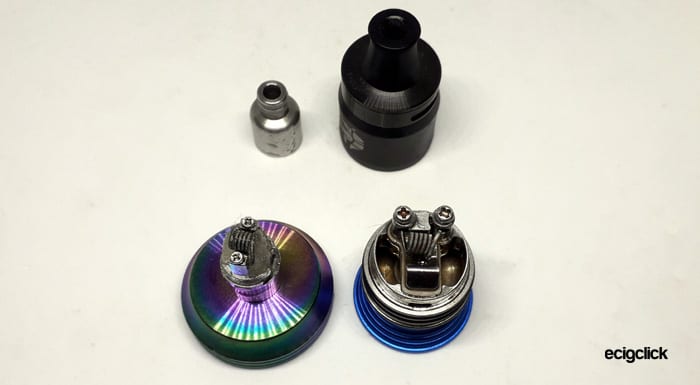
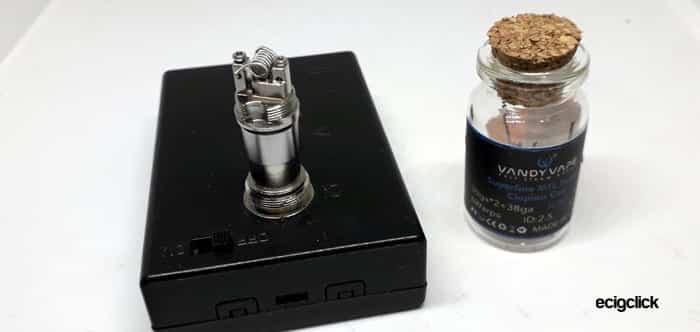
Shown below is the RBA Pasito deck in comparison with the Geekvape Ammit MTL RDA deck which is still quite small at 22mm diameter and you can see what I mean!
Airflow
This is controlled via a switch type lever on the top of the pod – it is very small.
Plus adjusting this is quite a task you either get fully open, fully closed or something in the middle. As the switch is tiny it is hard to move it in smaller increments to really tailor the airflow.
Quick Set-up Guide
The Smoant Pasito kit arrives without any coils installed so before you start vaping you will have to install a coil, fill up the pod, make sure the device is charged and set your power levels.
If all that sounds a bit complicated – don’t worry I will guide you through it all below!
 Basic operation
- Turn On/Off = press fire button 5 times quickly
- To vape = press fire button
- Airflow adjustment = move switch on top of the pod to open and close the airflow.
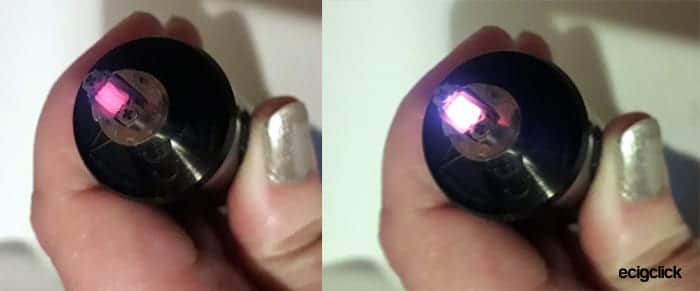
Battery capacity remaining
The battery capacity remaining is shown when you press fire.
- 1 light = 3.2-3.4V (lowest capacity remaining)
- 2 lights = 3.4-3.6V
- 3 lights = 3.6-3.8V
- 4 lights = 3.8-4V
- 5 lights = 4V and above (full charge)
Power Modes
To check which power mode you are in press the power adjustment button once and the lights will display the mode selected.
To change power mode simply press the mode button again to move to the next power level. Repeat to move through the levels and each light will light up according to the power mode.
Once you have reached the end of the levels it will return to the lowest power level again.
Power Indicator Light Key:
- 1 light = 10W
- 2 lights = 13W
- 3 lights = 16W
- 4 lights = 20W
- 5 lights = 25W
Protections
- No pod connected or short circuit = all five lights flash 3 times when you press fire.
- Pod inserted correctly = all five lights light up.
- 10 second maximum fire time = after 10 seconds of holding down fire the operation will stop and all lights flash.
- Overheat protection = all lights flash 10 times
- Low voltage protection = single light flashes 5 times
How To Remove The Pod
- The pod simply pulls away from the device.
- A magnet holds the pod with slight resistance so just pull the pod out.
- Install the pod by pushing it back in and the magnet will retain it.
- You can install the pod the wrong way around and it will not fully push in. So remove the pod, turn it around and replace.
How To Fill The Smoant Pasito Pod
- Remove the drip tip by unscrewing the metal part from the pod.
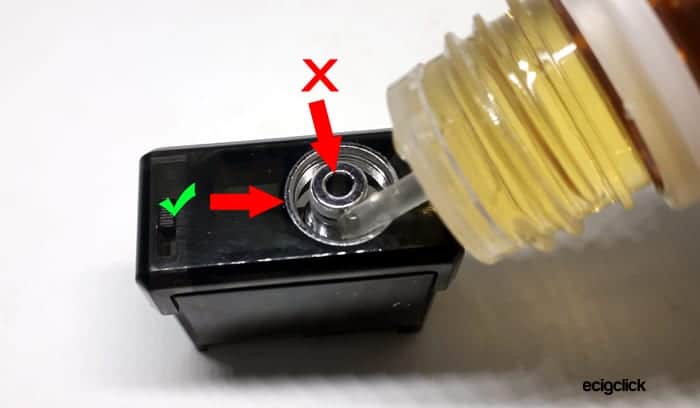
- Add e-liquid into the port avoiding the central part of the coil. Fill around the edge.
- Watch the e-liquid level through the side of the pod.
- Screw the drip tip assembly back onto the pod.
As a side note be careful to not push on the top of the coil with your e-liquid nozzle if the pod is not installed in the device. I did this and it pushed the coil out of the bottom of the pod and covered me and the desk in e-liquid!
How To Change The Coil
If you have any e-liquid in the pod sadly removing the coil will expel the lot of it. So you will need to have an empty pod or plenty of tissue. Even with the pod upside down the removal of the coil leaves an open path straight through the drip tip!
- Remove the pod from the device.
- Turn the pod upside down and pull the gold square connector out from the pod. There are slots on the side of the connector to put a finger nail in to.
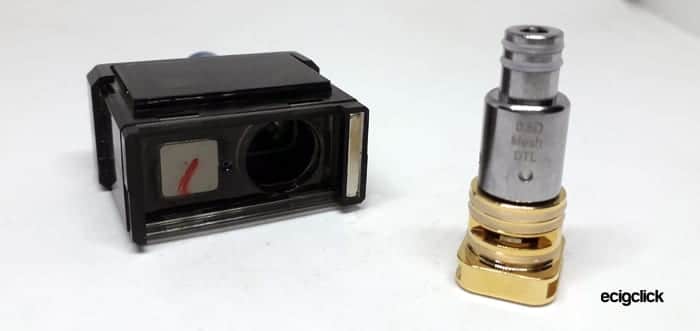
- Unscrew the coil from the gold connector.
- Screw a new coil onto the base connector.
- Push the connector back into the pod. Make sure that the slots in the side are at the side of the pod as shown.
How To Charge The Battery
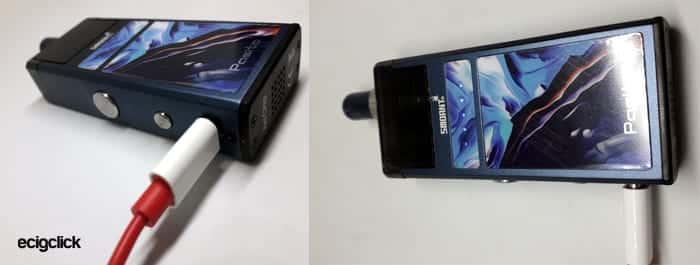
- Using the included cable install the small end into the USB C port of the device. Only USB C cables can be used.
- Install the large end of the cable into a suitable USB outlet.
- The indicator lights light up in turn as the battery charge level increases.
- When fully charged all 5 indicator lights will stay lit solidly.
I found it took 55 minutes to charge from empty – which is pretty ace!
How To Build The Smoant Pasito RBA Coil
I am not going to lie this took me multiple attempts!
I have poor grip in my fingers so this was a struggle.
First attempt I wound a 2mm diameter coil – which turned out to be too low resistance.
Second attempt the coil was good but it kept catching on the top cap – so I moved it down and broke the coil.
Third attempt wasn’t at all pretty – so I was ashamed and took it out.
Fourth attempt I found some 2.5mm diameter MTL Vandy Vape coils so I thought sod it and tried one of these!
Again this really isn’t pretty – the directions you have to bend the coil legs will distort even the neatest of coils! I didn’t even make this coil and it looks like spaghetti after installation.
- Choose a coil which will fit inside the space between the two posts and will not sit above the post height either. If the coil diameter is larger it will catch on the top cap when you install it! I found 2.5mm was about the largest diameter as 3mm would be touching the deck and the top cap.
- You have to install the coil initially in kind of an “S” shape to fit between the posts. Then pull the legs through the posts and clamp up with the screws.
- Before replacing the top cap check the resistance to make sure there are no shorts.
- Install the top cap and again check the resistance. The top cap may touch the coil or screws so check this before you wick the coil.
- I then installed the coil deck on my Nunchaku mod and did a couple of dry burns to check for hot spots and clean off any impurities.
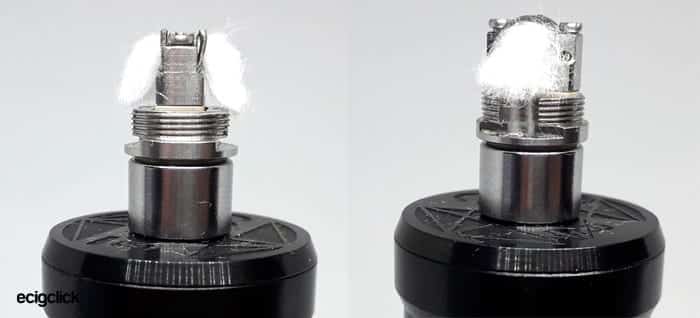
- When cool install the wicking. I used Cotton Bacon Prime and made it just thick enough to pull through the coil with slight resistance. Initially I did install the cotton so it sat in the cut outs below the deck. However if you do this the top cap will not screw on.
- So cut the wicking just before the screw threads for the cap. The e-liquid will come through the cut outs to reach the wicking.
- Remove the 510 adaptor and install the coil head into the gold connector.
- Install the gold connector and RBA into the pod.
- Fill the pod and leave to stand for 5-10 mins for the wicking to absorb the e-liquid.
How Does the Smoant Pasito Kit Perform?
As this has different coil options I will have to choose the e-liquid to suit.
The 0.6ohm Mesh coil I will be using a higher VG e-liquid and lower nicotine level – as high nic might be a bit harsh.
The 1.4ohm coil is more suited for thinner e-liquid. I will be using a 50%VG / 50%PG higher nicotine liquid for this.
As for the RBA coil you will build this to the resistance you want but from the size of the deck it looks like you will be somewhere between the resistance of the two stock coils. So I will be looking to try and get a highish resistance to enable me to use 50/50 nic salt liquid.
Further reading:
0.6ohm Mesh Coil
I used a 70%VG e-liquid in here – the beautiful Bubblegum from IVG E-liquids.
Airflow wise – wide open is very wide open and closed is quite restricted but not extremely tight – so you cannot adjust the airflow to be fully closed.
I kind of set the airflow nearer the closed position for a slightly restricted airflow. Even fully closed this is not as restricted as the Innokin EQ for instance.
The middle position was similar for me to my Smok Nord with the 1.4ohm coil installed.
The airflow is quite noisy too – not like a whistle but can hear the incoming air.
10-16W
At this level the coil performs poorly. Plenty of vapour but virtually no flavour or throat hit. I only realised I was pressing the fire button when I exhaled a plume of vapour!
20W
Aha this is more like it! I can just taste the liquid now – plus a faint throat hit. Also a lot more warmth.
25W
This is much better – below this setting I wasn’t really getting the performance I expected.
However now there is warmth, flavour and some throat hit. Really nice vape now!
The vapour production is still excellent and I did close the airflow down more.
0.6ohm coil conclusion:
Under 20W this coil doesn’t really perform with high VG e-liquid. At 25W this is a nice vape.
The more I use this coil the more I love it! After 3 refills the flavour is really bursting now!
So much so I have ordered some more of these coils! They cope perfectly with thicker e-liquid, no leaks or dry hits either!
1.4ohm Coil
For this coil I will be using a 50/50 Nicotine Salt e-liquid from the excellent Apollo Salt Nic range. This is 20mg nicotine strength and ideal for low power pod devices.
I really had close the airflow off to almost the minimum as this does feel very “airy” for an MTL set up?
10W
Not much happening really – some vapour and that is it!
13W
This is more like it now – plenty of throat hit and vapour. Surprisingly warm vape too. Flavour is ok -not amazing but can taste my e-liquid.
16W
A nice crackling sound tells me the power is there now. This is similar performance to my Smok Nord with the 1.4ohm coil – so pretty decent it has to be said! I would say 16W is slightly warmer than the Nord kicks out so this is really nice!
20-25W
As expected 20-25W was a lot warmer and there was a faint feeling this was getting a bit too warm and could be in dry hit territory. I really didn’t like this coil at 25W!
1.4ohm coil conclusion:
Above 13W and it shines for a while! However at the higher power levels this feels like the coil could burn out with long or frequent vaping.
After a few days of use the flavour dropped off a lot sadly – so not as impressed with this coil as I was. Much prefer the 0.6ohm!
RBA Coil
So I ended up using a Vandy Vape Superfine MTL Ni80 Fused Clapton Coil.
The Nunchaku measured the resistance at 0.7ohm. Which was still a bit low really. But my attempts to wind a suitable coil just looked appalling!
So with this in mind I have opted to use the same 50/50 nicotine salt e-liquid I used with the 1.4ohm coil.
On the low power levels this was performing OK, I am not sure my wicking is 100% though. Tons of vapour coming through but slight cottony taste really. I got no dry hits though which is a surprise!
Also this didn’t leak either so I did get something right!
Moving up the power levels the heat and flavour did ramp up a bit and still got no dry hits but it just was a dry vape.
Again the performance of the RBA is down to your own build. So don’t rely too heavily on the performance I got as I haven’t made the best job of building this due to the struggles I had. But even with my crap building skills it performed really well – which was a surprise really!
RBA coil conclusion:
OK the theory behind the rebuildable deck was excellent. I thought it would be fiddly – as all stock coil replacement RBA’s generally are. This was way more tricky than I thought and the post hole design is terrible. The deck design badly needs amending!
I found this performed a lot better than I was expecting. But to me the hassle of building this isn’t worth it. The stock coils are cheap enough really and you won’t get amazing performance with a tiny deck like this.
Battery Life
The coil installed, power levels and your own vaping habits will impact the battery life.
However to give you a guide using the 0.6ohm coil at the highest power level (25W) I got 5 hours of vaping.
Pros
- Rebuildable coil will be a huge pro for some
- Able to change coil without having to discard the pod
- Device feels excellent quality
- Lovely metallic paint finish
- Good range of power levels to choose from
- Excellent and impressive packaging
- Pack of 3 coils is way cheaper than other brands!
- Empty to full charge in 55mins from my old PC USB outlet!
- After a lot of hassle the RBA deck did work quite well! No dry hits and no leaks and plenty of vapour.
- 0.6ohm coil great for flavour!
Cons
- For me USB C cables are a con – as all my vape devices and phone use Micro USB and I tend to use cables I leave plugged in all the time on my desk, car and downstairs. With USB C I only have the one cable and need to move it around various locations.
- The slots on the gold coil base connector are a bit hard to grip if you have dodgy hands like me
- RBA coil does not come in kit you have to buy separately
- Some setting up is required as the coils are not installed from new
- Refilling is a bit fiddly, not much space to squeeze liquid into plus you need to make sure to only add liquid around the coil not directly into it.
- Post design on RBA deck is frankly appalling!
- 1.4ohm coil flavour dropped off massively after only 2 days
Final Review Verdict
The Smoant Pasito isn’t perfect sadly.
Refilling to me seems like a bit of an afterthought. You have to remove the drip tip and I found you haven’t much space around the coil to fill with.
The RBA deck was a great idea but has failed terribly in its execution. The post hole design is ridiculous – making all coils (however beautiful to start with) end up looking like unraveled knitting.
Saying that though the RBA did outperform what I was expecting even with my appalling building skills!
I don’t think this is the easiest of pod mods to get to grips with. I think about someone like my Mom who was petrified of anything too technical and the Pasito might have scared her.
This device sort of sits just above beginner level. But don’t buy this for the RBA – it isn’t great to build on but when you manage it the performance is quite good!
I wouldn’t recommend this with the 1.4ohm coil as the flavour dropped dramatically after only 2 days. The 0.6ohm mesh coil with high VG e-liquid is where this device really shines.
Have you purchased the Smoant Pasito? Let us know how you got on in the comments below.


 Smoant Pasito RBA Coil
 Basic operation




RDA – Vertical coils for me 1ohm 100% pure pharmaceutical grade VG with a drop of VG benzoic nic. Basic kanthal coil about 6/7 wraps (dia 1.5mm) cotton around, test for juice bubbles on the first few vapes. My devices are aging(& me) and I am looking at keeping the RDA, it’s been tricky finding the pasito II adaptor for the pasito 2 in the UK as the Knight 80 is very similar. Nice to know I can continue using me RDA though, I have 2 and they are in immaculate condition to say they are now pre 2020, kudos Smoant!
My device uses a lot of juice. I do not vape the whole day, but it’s like the pod is drinking the juice, my setting is on 3? Plz help, am I doing something wrong. I do use the leaf nick salts
Very nice review, Michelle. I’m using the 1.4ohm coil for two weeks. I think you destroyed it using it with more than 13w. As you can see in instructions, is only suitable for 10-13w. I use nic salts with it and fresh citrus flavours, and the taste is really good. I’ll try tobacco flavours on it next week.
One very important disadvantage is the pod lose power when battery reach the 20% of battery. Impossible to use the 0,6ohm coil because it performs at 25w like when fully charged at 10W. Didn’t you have this issue in your Pasito unit?
Thanks for the review. I really found your oppinions and advices helpful. But I have to give you some advice – if you wish to rebuild an old school styled rba base like this one, you need a plain wire, 28, 26 gauge etc. I would recommend ss316l or kanthal wire, 26 gauge being for d2l or restricted d2l and 28 kanthal for m2l. That way it can fit easily, legs can be bent and put through holes with less hassle.
Anyway, great and thorough review, thanks.
I cannot charge it!!! Anyone ever be like this? It’s blink one light and keeping hotter
I got this maybe a week ago, and i REALLY like the airflow settings on this one. Never thought id say that a pod is my favorite vape, but this one is really good – and i love the RBA section. Never was a sucker for paying $8 for new coils every week…
That little RBA deck is pretty surprising isn’t it, I did struggle to build on it so didnt expect much in the way of performance but it worked a treat!
I just purchased the Pasito and the RBA. I am not an experienced coil builder but I followed a YouTube video by Wendy Vapes and managed to build a very decent coil. I am a MTL Vaper that must use 100% VG and this Pod Mod at 16 watts is hitting better than my Aspire tanks.
I am thinking of re-wicking my RBA and trying it with some lovely 70%VG e-liquid as I love the 0.6ohm coil with this liquid at the moment – cant put the Pasito down!
Glad you managed to build the deck well – my hands are poor and my grip is bad but even saying that it out performed what I was expecting. I just need to play with the wicking a bit – it didn’t leak or dry hit but tasted a bit cottony.
Shell
Looking at that deck I can’t help but think it might be easier to wrap the legs around the screws and just ignore the post holes completely… But that probably comes from building on some really weird and fiddly old things!
Sadly you cant as the screw heads will contact the top cap then – I did consider that at first – not a great design is it! The best idea would be to have the post holes in the posts facing the centre of the deck that would make life a bit easier or perhaps slotted posts?
Shell
Gah, that’s irritating! Still, whilst smoant may *just* have been the first. Looks like there’s a few rebuildable pods hitting the market soon!
I have just received the Smoant Pasito. I was very excited for the RBA deck, installed a 0.75ohm coil which I tried with nicotine salts and the nicotine hit was immense!
I tried the 0.6ohm DTL coil like my Nord so filled it with nicotine salts the same as I use with my nord. I wouldn’t recommend at all! The coil tastes burnt already after less than one month. Definitely not a great purchase
Really I would say a month out of a coil is pretty good going – I only got 2-3 days out of the MTL coil – was very dissapointing! Am still using the original DTL coil about a week so far and still amazing flavour so it is doing great!
But I still do pick up my Nord for MTL!