The OXVA Xlim Pro 2 is the update to the excellent Xlim Pro which I loved.
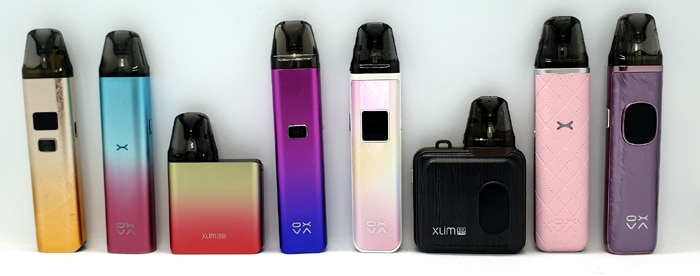
 I am a huge OXVA Xlim fan girl – I have every model made from the original Xlim V1/V2, Xlim SE, Xlim SQ, Xlim C, Xlim Pro, Xlim SQ Pro and the most recent Xlim Go.
For me the Xlim kits just keep getting better and better! Let’s hope the OXVA Xlim Pro 2 follows that trend!
Thank you to OXVA for sending this over for review. My opinions are based on the device in my possession. My experience may differ from yours as sometimes we get “Sample” devices compared to full retail versions.
What To Expect From The OXVA Xlim Pro 2?
As mentioned above this is an update to the Xlim Pro – so what is new?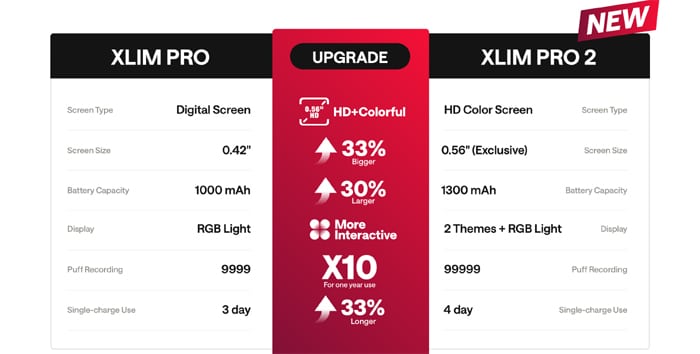
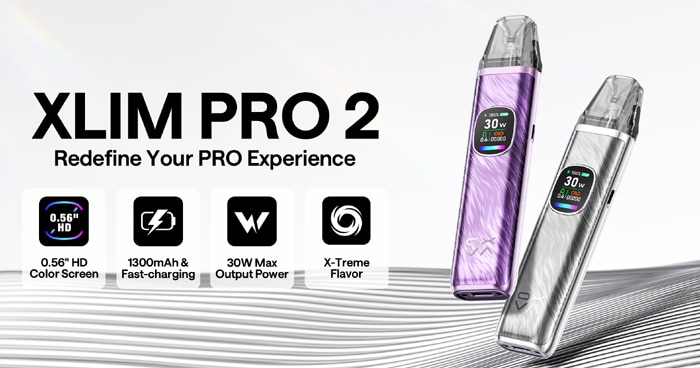
For a start the battery has increased from the 1000mAh of the Xlim Pro to a whopping 1300mAh! A Type C USB port is provided for 2A quick charging.
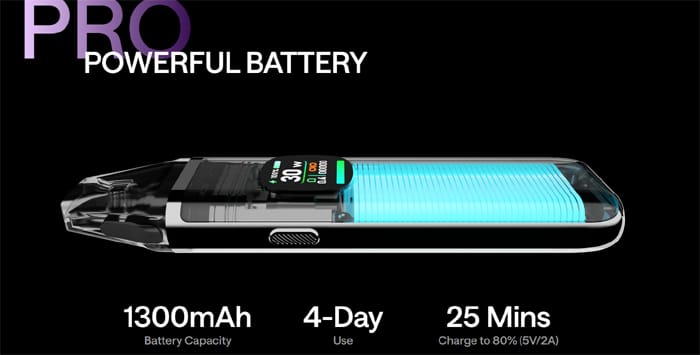
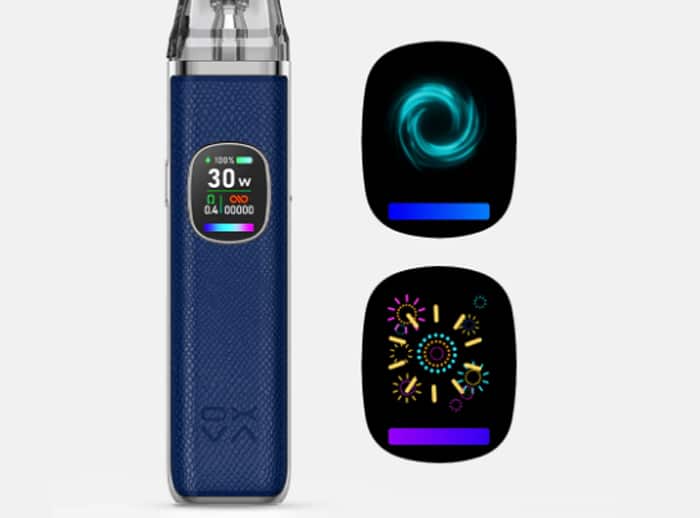
The other main update is the screen! This has a 0.56 inch HD colour screen which is super clear.

It also has the familiar RGB light bar LED indicator on the bottom of the screen to display faults.
You can choose from the main screen or 2 animations to display when vaping.
Plus you can also view operating instructions at a single push of the button.
This has an auto draw activation only – meaning you inhale on the mouthpiece and it will fire up.
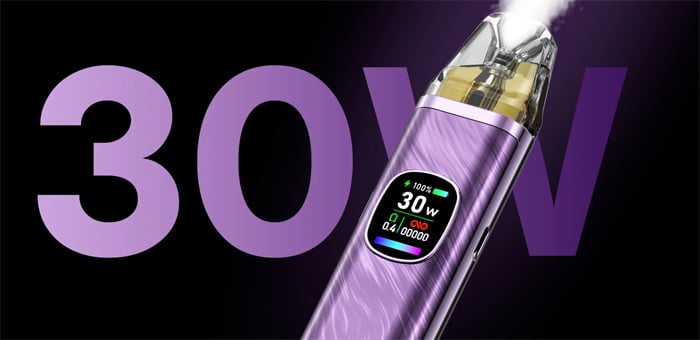
Output wise this is adjustable from 5 to 30W and you can manually adjust this or trust the device to select the correct output itself with the automatic smart feature.
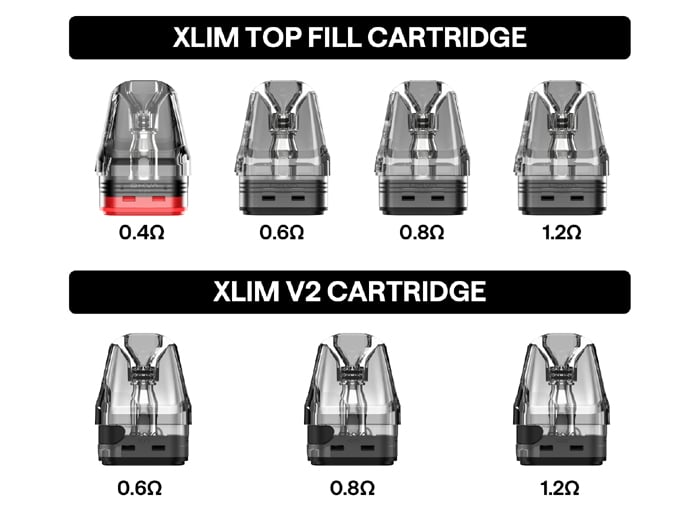
This comes with the newest (V3) Top Fill pods. These pods are compatible with all of the previous Xlim devices (apart from the Xlim C).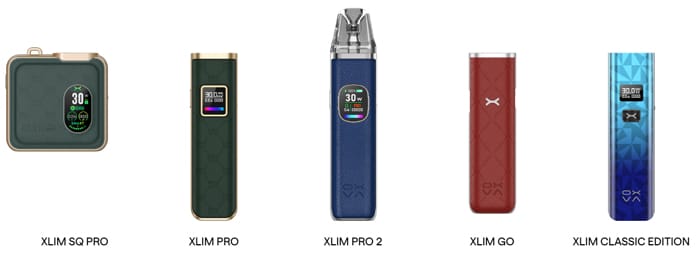
The coils are fixed meaning no messy coil changes – you discard the pod when the coil performance has deteriorated or tastes burnt. From previous experience you will be getting a very long pod life!
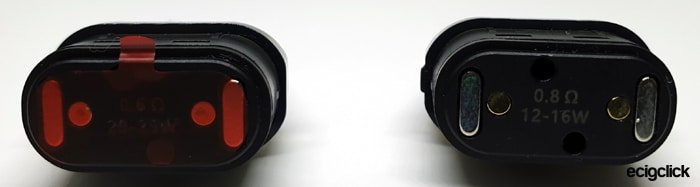
There are 4 resistance options of the pods – 0.4ohm, 0.6ohm (included in kit), 0.8ohm (included in kit) and 1.2ohm.
If you want ultra simplicity – you can use the pre-filled Xlim pods. Makes vaping as easy as using a disposable vape but in a more environmentally and wallet friendly way!
Here is an introduction video from the OXVA Official YouTube channel.
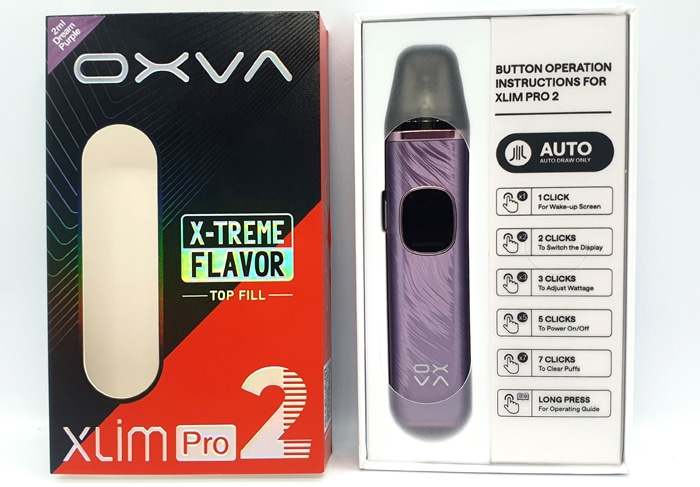
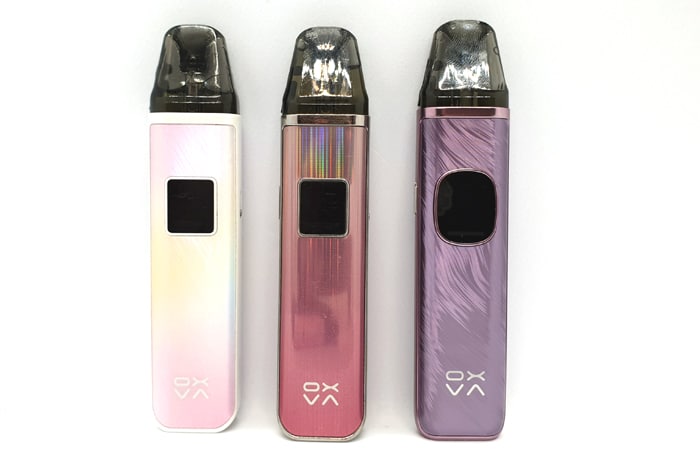
You can choose from 8 colours: Black Carbon, Silver Carbon, Dream Purple, Platinum Grey, Coral Pink, Green Python, Blue Python and Brown Python.
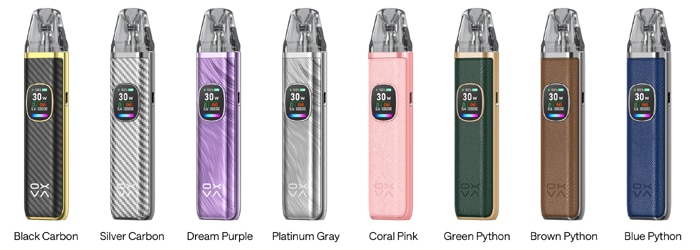
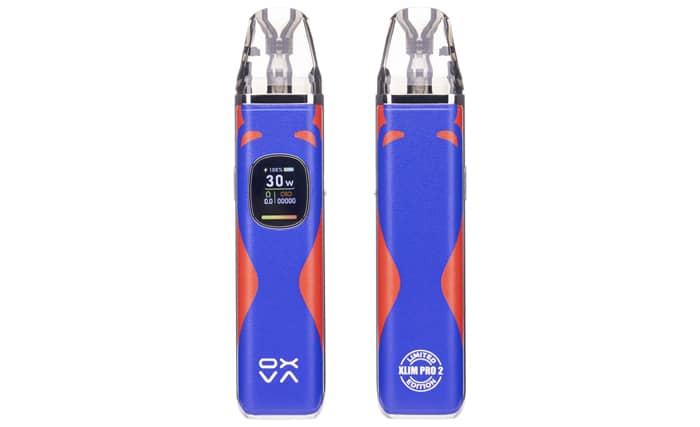
Plus there will be a limited edition Blue and Red version on the way at some point!
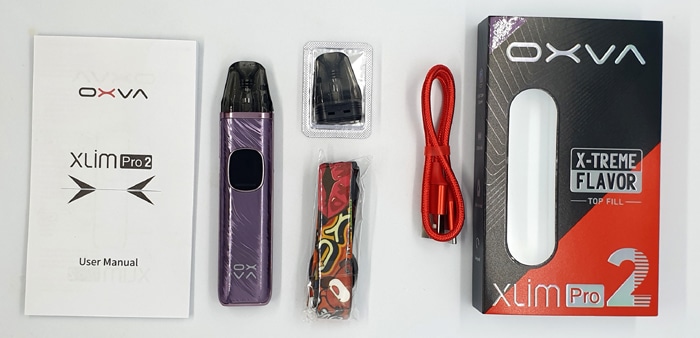
Inside the Box
- OXVA Xlim Pro 2 device
- 0.6ohm pod
- 0.8ohm pod
- USB Type C cable
- Lanyard
- User manual
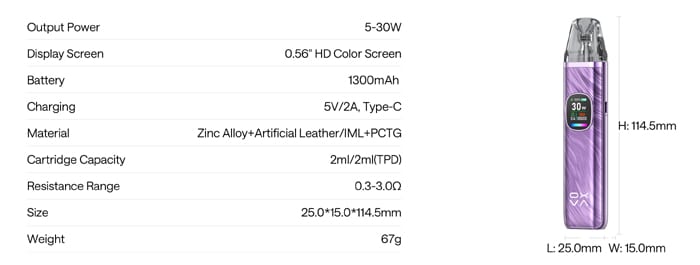
OXVA Xlim Pro 2 Specs
- Size: 114.5x15x25mm
- Battery: 1300mAh (internal)
- Display: 0.56in HD colour screen
- Output: 5-30W
- Type C USB charging – 2A charge rate
- Resistance range: 0.3-3ohm
- Capacity: 2ml
- Compatibility: Compatible with OXVA Xlim fixed coil pods (not Xlim C) & Xlim Pre-filled pods
- Side adjustable airflow
- Top fill
- Materials: Zinc Alloy, Artificial Leather / IML and PCTG
OXVA Xlim Pro 2 Design and Build Quality
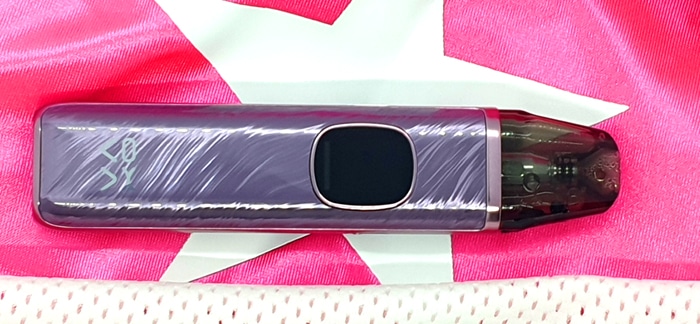
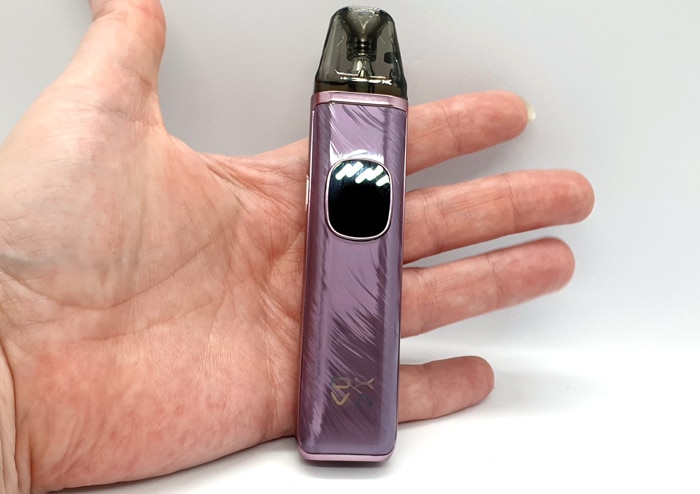
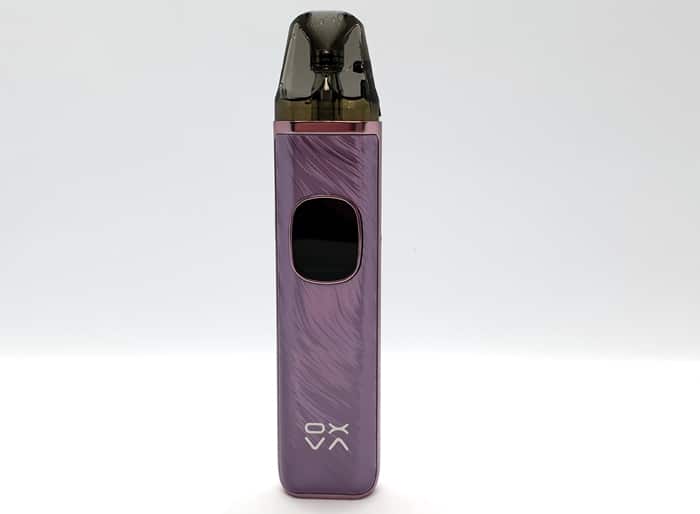
I received the Dream Purple version.
The packaging is a similar size to the Xlim Pro box. You slide the inner tray out and you are greeted with a plastic overlay which shows all the button operations simply laid out.
The instructions are OK, they tell you pretty much what you need to know apart from information on charging.
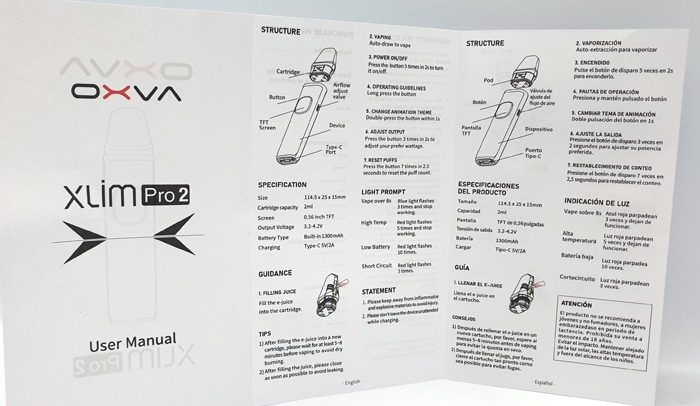
If you find the included instructions a bit small to read you can download a digital copy here.
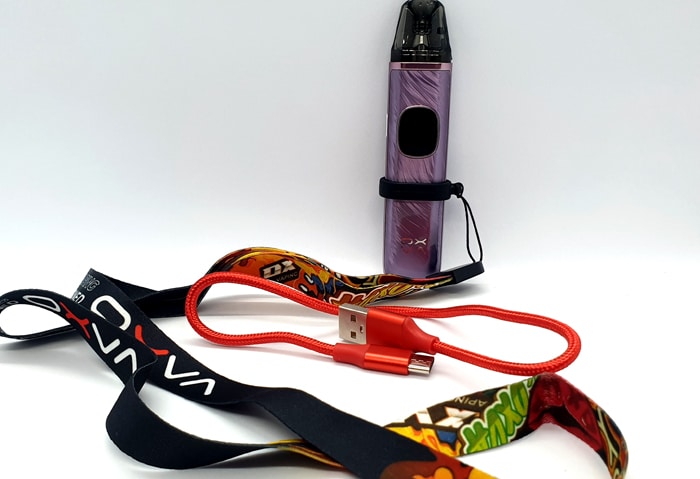
A nice little bonus is the excellent quality Lanyard and USB Cable. The cable is a bit short but has a lovely Red braided finish!
OXVA Xlim Pro 2 Mod
Obviously I will tend to compare this with the Xlim Pro as it is the predecessor!
This is only one gramme heavier at 67g than the Xlim Pro but has 300mAh more battery capacity!
Size wise it is pretty much the same – only being 3mm longer – which is not even noticeable.
As mine is the Dream Purple version it does not have the textured artificial Leather finish but instead it has an intricate IML (In Mould Labelling) finish.
Basically the IML allows intricate patterns to be applied in multiple layers and finished off with a moulded veneer style outer shell.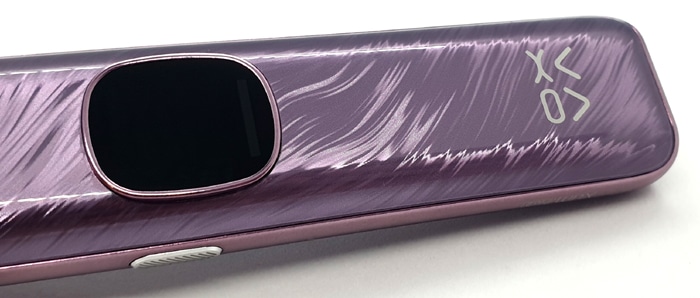
The patterns take the form of “swishes” like the texture of a paint brush and they catch the light beautifully.
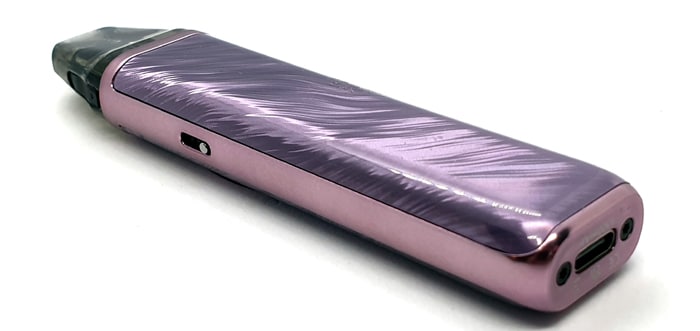
You will find the patterned panels on the front and back with a brushed finish frame running around the sides, top and bottom of the mod. On one side the “Xlim Pro 2” logo is etched in Silver.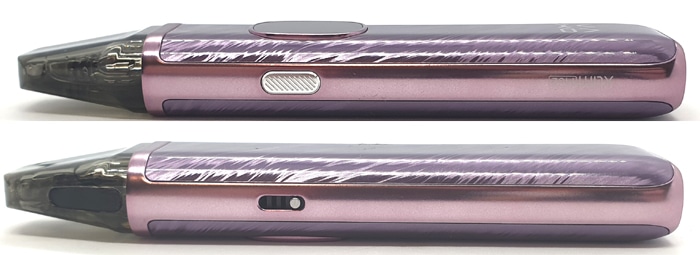
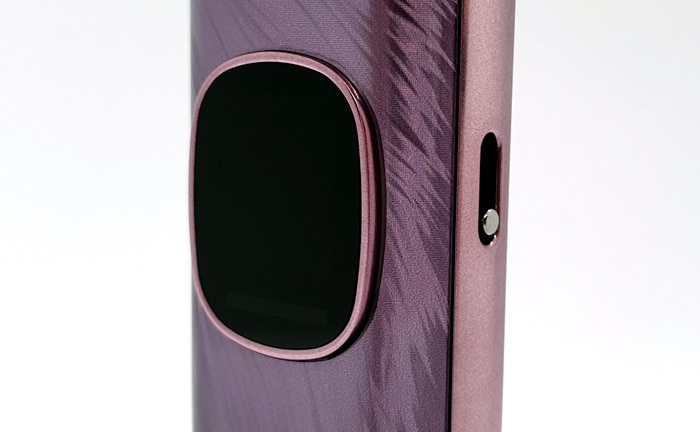
On the front of the mod you will find the rounded screen which we will discuss below and the OXVA logo in a shiny Silver finish.
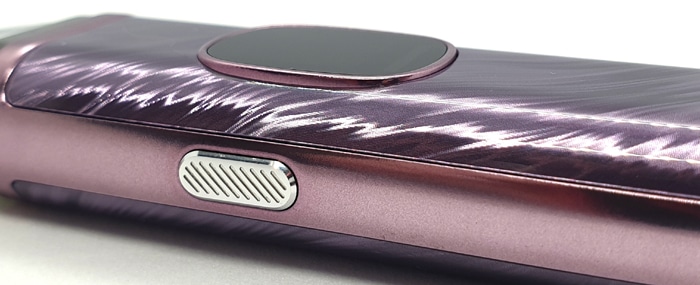
The right side of the device features the airflow adjustment slider which does have quite a strong resistance. You will need a thumbnail to push this. Thankfully the knob does not protrude far from the edge of the device so is unlikely to get hooked on anything when in a pocket or bag.
The base is made from the same metal as the frame and has the battery capacity and required legal logos etched in.
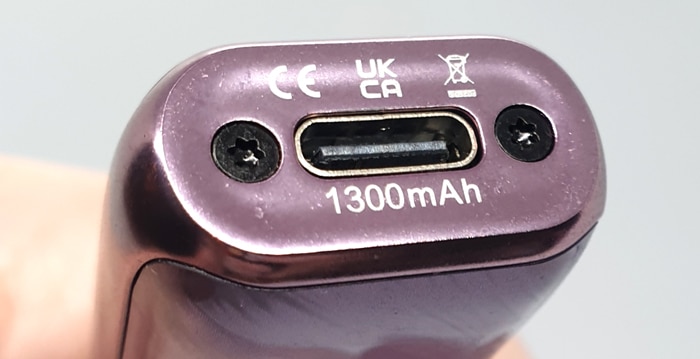
It is also home to the USB Type C port which worked perfectly and 2 Torx screw heads. This will stand upright but the base is smaller than the rest of the mod so it does easily topple over.
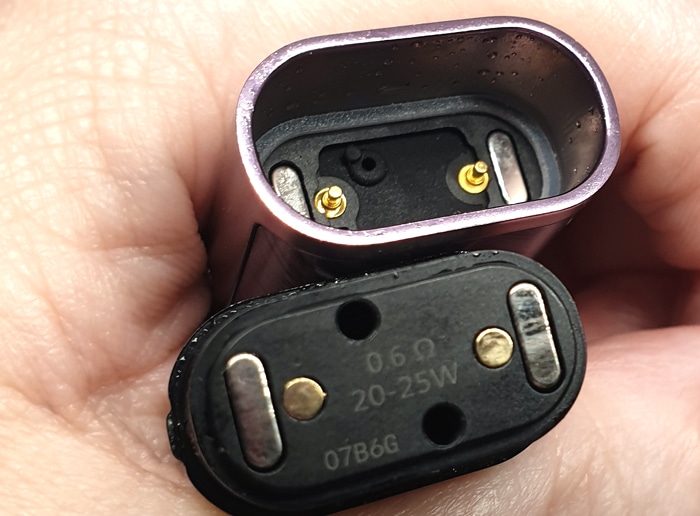
The pod compartment offers no surprises – it looks the same as the rest of the Xlim devices. There are 2 spring loaded connectors and 2 strong magnets. I do find these magnets to be stronger than previous Xlim mods which is great as the pod doesn’t fall out. But it can be a bit difficult to grip the pod to pull it out of the mod.
Work Face
The work face is a term we use to cover any display and operating buttons / switches.
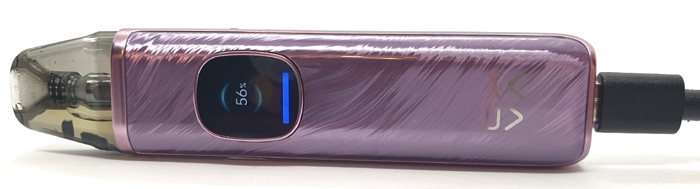
The screen is super bright and clear – you can really see how the HD display quality makes everything much clearer.
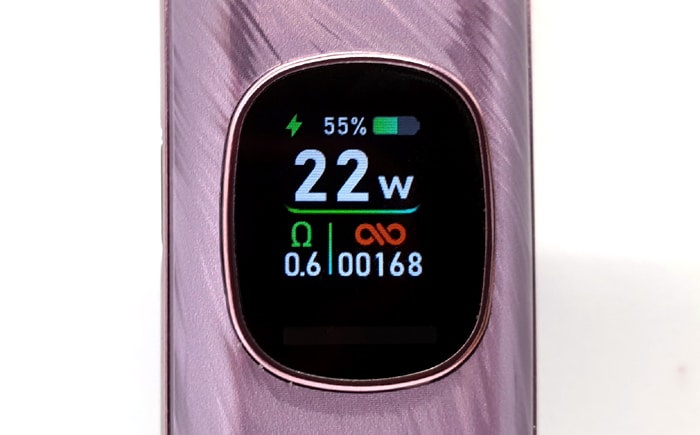
On the top row of the screen is the percentage of battery charge remaining and an icon depicting the battery charge.
Below that is the output value selected in Watts (W).
At the bottom left is the pod resistance which is denoted by the ohm (Ω) symbol.
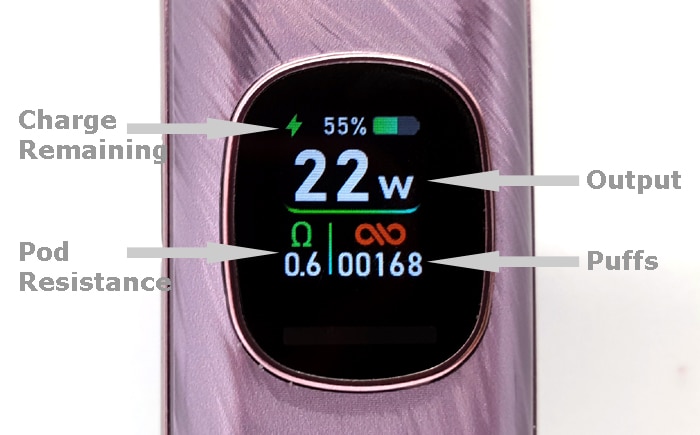
Finally the bottom right is the puff counter which goes up to 5 digits.
You can choose from 2 different animations when vaping – one looks like fireworks and the other is a circular Blue swirl. Or you can choose to show the home screen with the RGB light showing different colours. I have tried to capture these on the video below.
The fire button is located on the side of the mod and is a good size. It is very clicky and responsive too.
OXVA Xlim Top Fill Pod
I have copied and pasted this section from other reviews which use the same pod!
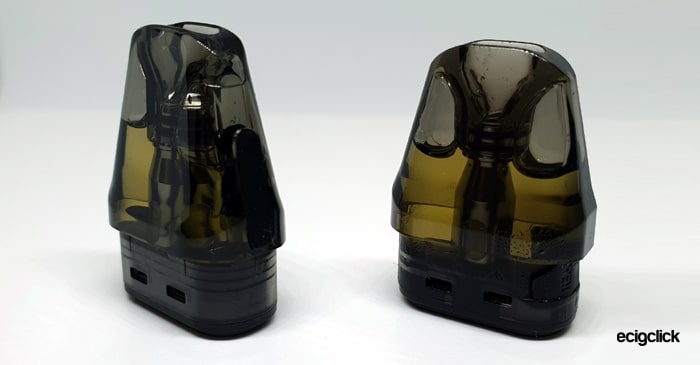
The base has 2 magnets and 2 contact areas. There are also 2 airflow holes which means the pod can be installed either way around. The pod resistance and recommended power levels are printed on the base too but in this case are very hard to see.

Although darkly tinted, the e-liquid level is always visible, in fact even when installed in the mod as the coil base sits level with the top of the mod.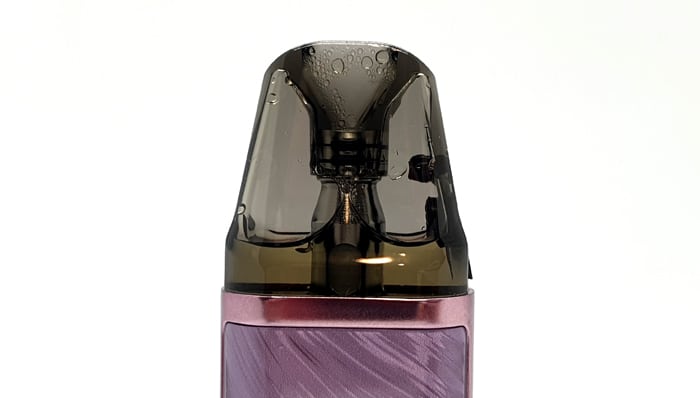
You get the same comfortable “Duck Bill” style mouthpiece which is always a pleasure to use.
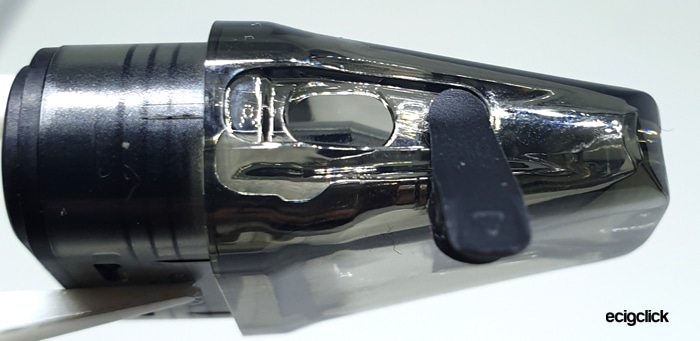
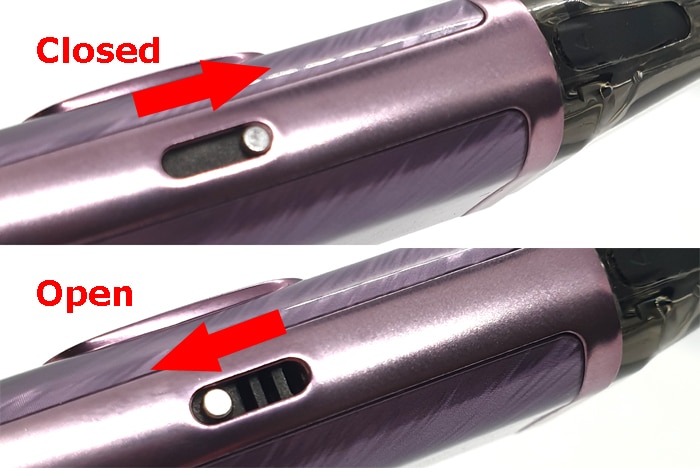
The fill port cover is located on the side of the pod and when you do your first fill it can be a bit of a puzzle as to how to access the port.
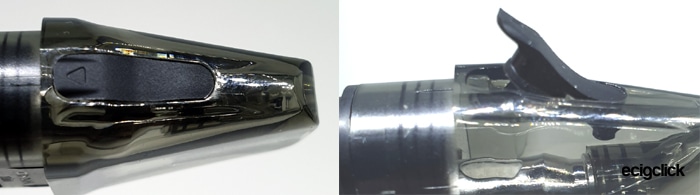
Simply lift up the bottom edge of the port cover and it will lift up to reveal the port. You can also swing the cover out of the way too.
It might be a bit fiddly to open if you have short fingernails as it is one you will need to prise up. But it is far easier to close than the V2 pods which I found sometimes leaked if you couldn’t push the cover fully in.
The fill port size is generous at 5mmx3mm and I had no issues with small bottle nozzles when filling.
OXVA Xlim Pro 2 Quick Start Guide
The kit comes with the 0.6ohm pod installed. Make sure to fill this before removing the isolator sticker at the base of the pod. If you vape before filling this will burn out the coil and the pod will need to be binned.
You will need to fill, charge and set up the device to get going – I will guide you through the steps below!
OXVA Xlim Pro 2 Basic Operation
- Power On/Off = Press the operation button 5 times to turn on or off.
- Vaping = Simply inhale on the mouthpiece to vape.
- Battery indicator = The screen displays a battery icon and battery percentage remaining
- Battery indicator when charging = The LED cycles through different colours and will turn off when fully charged.
- View operating instructions = Long press the button and the screen will display instructions. Short press to scroll through.

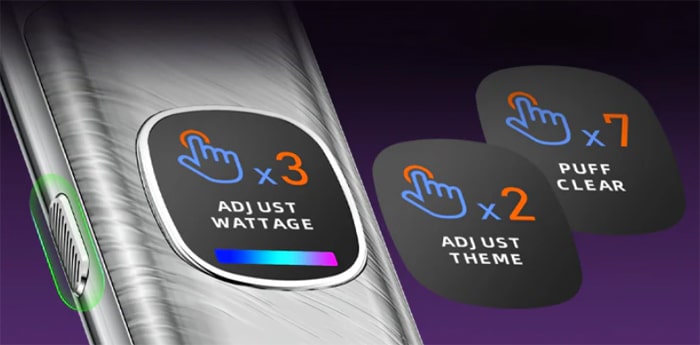
- Change animation theme = Press the button twice and short press to scroll through the 3 screen options
- Adjust output = Press the button 3 times until the output value flashes. Short press to increase the output. When the maximum output is displayed the next press will drop back to the lowest output and you can keep adjusting. Once the value on screen is the power you require simply leave the mod and the value will stop flashing or inhale on the mouthpiece.
- Puff counter reset = Press the button 7 times to reset the puff counter
- Adjust airflow = move the slide switch on the side of the mod to increase / decrease the incoming airflow to your preference.

OXVA Xlim Pro 2 Protections
- Low battery – The Red light will flash 10 times and the device will cut out until recharged.
- Short circuit / too low resistance – The Red light will flash 3 times. Clean pod and device connectors, or replace pod. If fault persists there may be an issue with the device itself.
- High temperature – The Red light will flash 5 times and the device will stop working until it has cooled down.
- Over time – if you vape for longer than 8 seconds the Blue light will flash 3 times and the fire will cut out. You can continue vaping by inhaling again.
How To Charge The Battery
The charging rate is specified as 2A.
- Using the included USB type C cable, connect the small end into the USB port on the mod.

- Connect the large end of the cable into a suitable USB outlet.
- The indicator light will pulse and go through the different colours (Red, Orange, Blue and then Green) to denote charge stage and will turn off when fully charged.
The charging time for me using a mains plug was around 52 minutes.
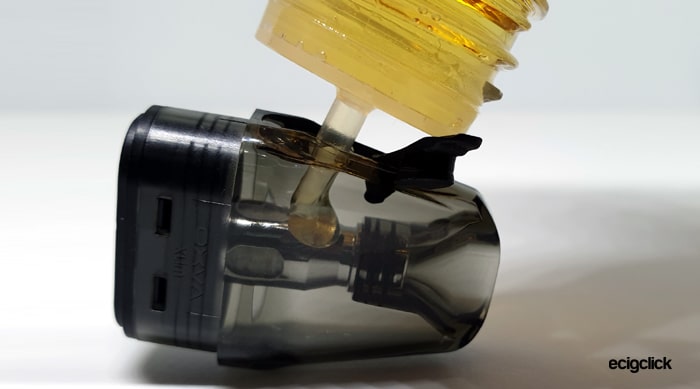
How To Fill the OXVA Xlim Top Fill Pod
- You don’t need to remove the pod to refill. I removed it to make it easier to take a photo!
- Lift up the cover of the fill port and add e-liquid through the port.

- Watch the e-liquid level through the clear side of the pod.

- Replace the fill port cover firmly.
- If this is the first fill allow the pod to stand for 10-15 mins to allow the e-liquid to soak into the coil. This is called Priming and is a very important step. If not fully primed you could burn the coil out and your throat lining in the process!
How Does the OXVA Xlim Pro 2 Perform?
I used my own e-liquid mix which is 50/50 PG/VG made from IVG Bubblegum Concentrate at 20% ratio. This is quite high a flavour ratio as I prefer plenty of flavour, but sadly this means it can be a coil killer sometimes. But the OXVA Xlim pods usually have no issues at all with it.
I add nic salt to approx 6mg strength.
If any of these terms are over your head – have a read of our handy guides below!
- MTL V DTL – A Guide To Vape Styles
- VG and PG in E-liquid – all you need to know
- Beginners guide to E-liquid
- Nic Salt E-liquid
OXVA Xlim 0.6ohm Pod
This is the more “fierce” of the two supplied pods and the device will automatically set the output to 22W.
You get a very warm vape which is uncomfortable with the airflow at anything less than fully open. So I would recommend wanging the airflow right open for this pod.
I felt a great throat hit with my 6mg nic salt strength so anything higher than that might be a bit harsh.
The power limits for this pod are 20-25W. For me 22W is high enough and I was almost tempted to knock it down slightly.
If the output feels a bit too strong you can of course knock down the power but don’t go below 20W or you run the risk of the e-liquid not fully vaporising and causing spitting and e-liquid coming back up through the mouthpiece.
This is 10/10 for flavour all day long!
OXVA Xlim 0.8ohm Pod
I love it!
I use this pod every single day on all my OXVA kits and I regularly get over 5000 puffs before the performance dies off.
So far I am at 1200 puffs and the flavour is still incredible – I will update how many puffs I get before I decide to change the pod!
The flavour at 16W (which is the automatic setting of the mod) is just perfection. It is warm but not hot meaning it brings out all the beautiful flavours of your e-liquid.
You can drop the output down if you want but again do not go below 12W or above 16W if you can help it as they are the recommended power limits.
This is 10/10 for flavour for me and I buy these pods regularly myself – so if that is not a thorough endorsement – I don’t know what is!
I test many many pod kits for Ecigclick and the 0.8ohm Xlim Pods are always the top of my list for performance. I have found nothing that beats them
Airflow
I use a rating system for airflow – 0= fully closed and 10= like breathing unrestricted fresh air!
The airflow to me is the same as the OXVA Xlim Go for the both 0.6ohm and 0.8ohm pods ranging from 1 (fully closed) to 4.5 (fully open).
Therefore this is capable of everything from a tight MTL airflow up to a restricted direct lung airflow.
Leaks?
Not a drop or a dribble at all from either pod! The top fill V3 port design eliminates the leak from the fill port you sometimes get on the V2 pods.
However on previous kits with the same pod I have had a bit of an issue with leaking.
With the pods included in this kit I had no leaks at all so hopefully there has been an upgrade. But I buy replacement pods a lot and some of those still have this problem.
I think this issue is caused when filling. If you push the nozzle into the fill port and aim the e-liquid at the coil I am sure it forces e-liquid back through the coil to cause the leak.
So my advice is to angle the nozzle away from the coil and make sure there is a gap in the fill port for any air to escape. Also add e-liquid slowly to avoid a jet of liquid pushing through the coil.
If you get a “gurgle” after filling, remove the pod, wrap in a tissue and blow through it to clear any sign of leaks.
If you have had a leak also put some tissue in the pod compartment of the mod and blow through the airflow inlet to clear any e-liquid inside the device.
Mod Performance
This performed perfectly with very quick auto draw firing.
As usual there was a slight tail off in performance for the last few puffs before the low battery warning was displayed. This is perfectly normal and only affected the last 3 or 4 puffs which is great performance.
Comparing the output with other OXVA Xlim kits, the 22W and 16W output levels I used felt realistic.
Battery Life
This will always rely on your own vaping habits and the pod selected. I am a very heavy vaper so this must be considered. For a guide these are my timings…
With the 0.8ohm pod I got around 8 to 8.5 hours and between 250-300 puffs per charge (approx 10ml of e-liquid – 5 refills).
With the 0.6ohm pod I got around 8 to 8.5 hours again and roughly 250 puffs (8ml of e-liquid – 4 refills) to one charge.
Pros
- Full of excellent features
- Amazing pod life – I regularly get over 5000 puffs
- Compatible with V2, V3 and pre-filled Xlim Pods
- If you hold down the operation button you will see a guide to main operations
- Incredible flavour
- Beautiful display and animations
- Adjustable airflow which caters for those who like a tight MTL up to an RDL style vape
- Increased battery capacity
- Quick charging at only around 50 minutes for 1300mAh battery!
Cons
- The pod resistance is etched into the pod base and is extremely hard to see.
- Cannot lock the operation button. It is not a fire button so no risk from that but you could knock your settings if device is in bag or pocket
Final Review Verdict
Again OXVA have knocked out an absolute corker!
This has taken all the good bits from the previous Xlim devices and added a super clear screen and a bigger battery.
The build quality is excellent and it is a stunning looking device.
But it is not all “aesthetics” as this has the same excellent performance as its predecessors and is compatible with the pods from the Xlim range too.
Is this worth buying? Well yes and no for me.
If you already have the Xlim Pro and it is working great then I would suggest that the Xlim Pro 2 does not really offer any difference in performance. But if you want the clearer display and bigger battery – then of course go for it.
If you are new to vaping or transitioning from a disposable vape this is a great place to start. However if you are not that technically minded I would suggest going for the much simpler and less expensive Xlim Go.
But if you like to be able to customise your vape you should definitely pick up one of these. It is one of the best pod vapes on the market today and you won’t be disappointed!
I usually add a rating for “Value for money” but sadly I am not seeing this stocked online yet – it is pre-order – so I have no ideal of the retail price as yet.
Have you tried the OXVA Xlim Pro 2 kit? Let us know your thoughts in the comments below!


