The OXVA Xlim Go is the newest version of this excellent range of pod kits!
I am a huge OXVA Xlim fan girl – I have every model made and use the Xlim Pro and Xlim SQ Pro devices daily. Prior to that it was the Xlim SE and Xlim V2!
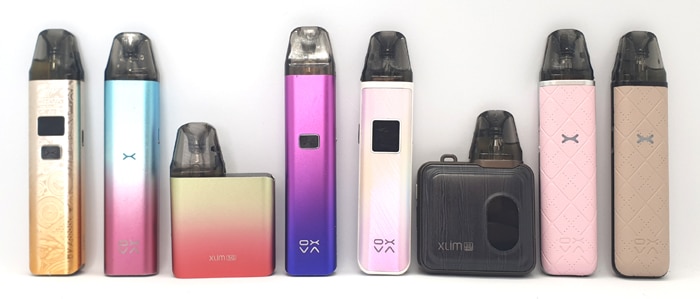
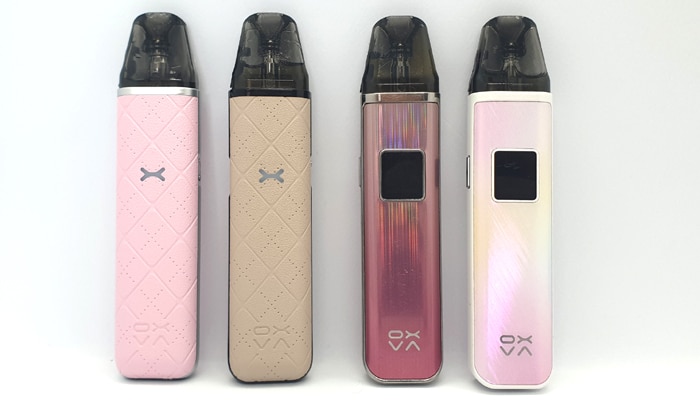
Below is some of my Xlim collection showing all models since release.
Thank you to OXVA for sending this over for review. My opinions are based on the device in my possession. My experience may differ from yours as sometimes we get “Sample” devices compared to full retail versions.
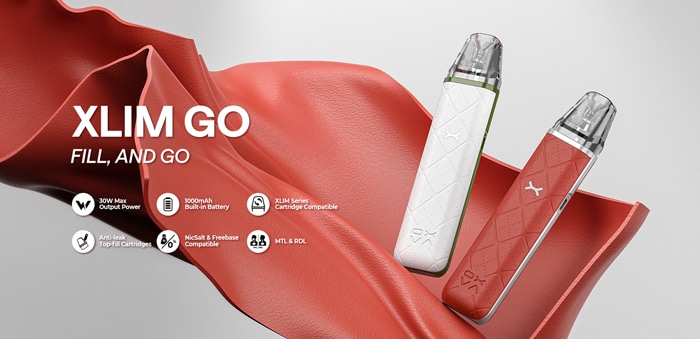
What Does The OXVA Xlim Go Promise?
This is very much the update to the Xlim SE – the simplest kit in the range. The Xlim SE 2 was a bit more complicated, whereas the Xlim Go provides an easy introduction to the range.
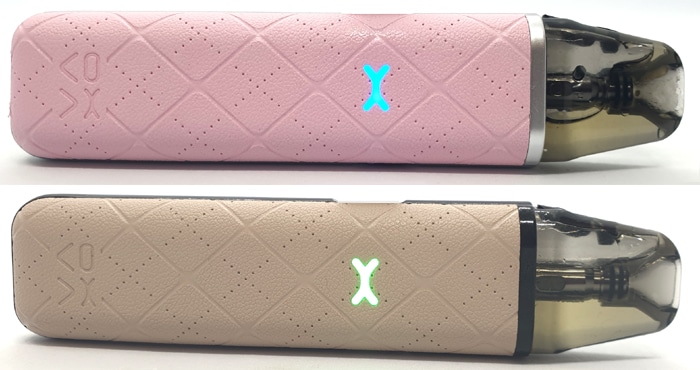
It even has the “X” shaped LED indicator we found on the SE.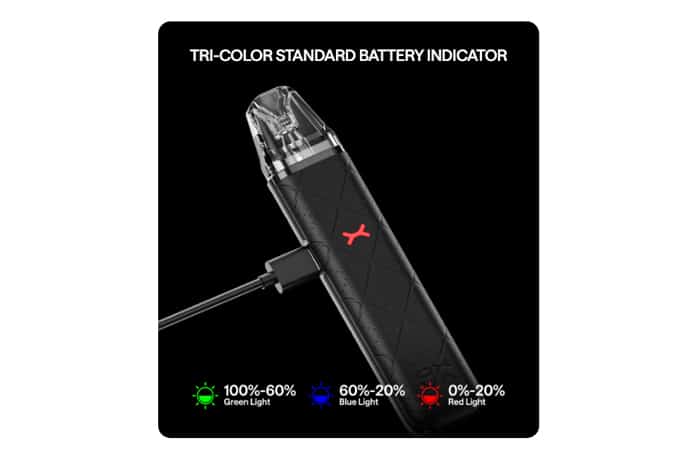
This time the exterior has had a bit of a makeover with an Artificial Leather finish which looks great on the marketing images.
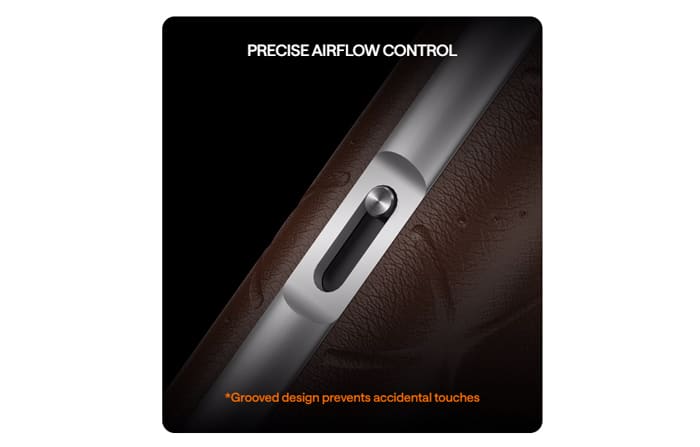
You still get the excellent side adjustable airflow which is very effective in previous models.
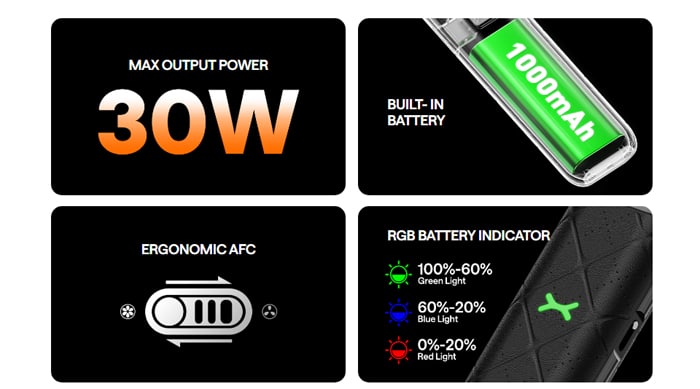
Again with simplicity in mind, this has no buttons or adjustments. Simply inhale on the mouthpiece to trigger the auto draw activation. The output will be automatically adjusted between 5-30W to suit the pod installed!
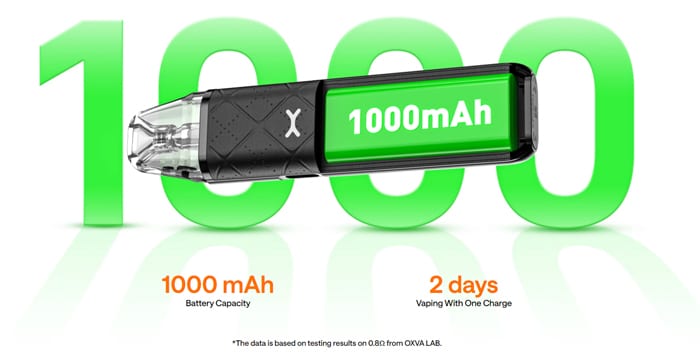
Inside the device is a 1000mAh battery which is charged via the USB Type C port at 1A. To keep the cost low there is no USB cable included in the kit. But I am sure the majority of us have one knocking about from other vapes or phones.
Another update from the SE model is the fact this comes with the new Top Fill pods. These pods are also found on the Xlim Pro, Xlim SQ Pro and Xlim SE 2. Instead of having to remove the pod for filling, there is a side (or top) fill port.
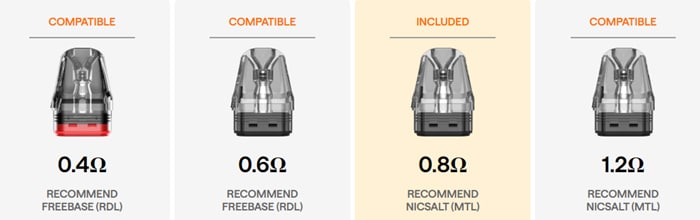
There are 4 resistance options of the pods – 0.4ohm, 0.6ohm, 0.8ohm (included in kit) and 1.2ohm.
You can also use the original bottom fill Xlim pods in here (apart from the removable coil Xlim C).
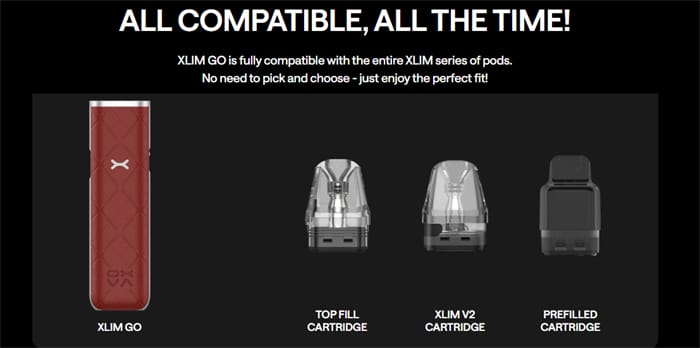
On top of that if you want ultra simplicity – you can use the pre-filled Xlim pods. Make life as easy as using a disposable vape but in a more environmentally and wallet friendly way!
Here is an introduction video from the OXVA Official YouTube channel.
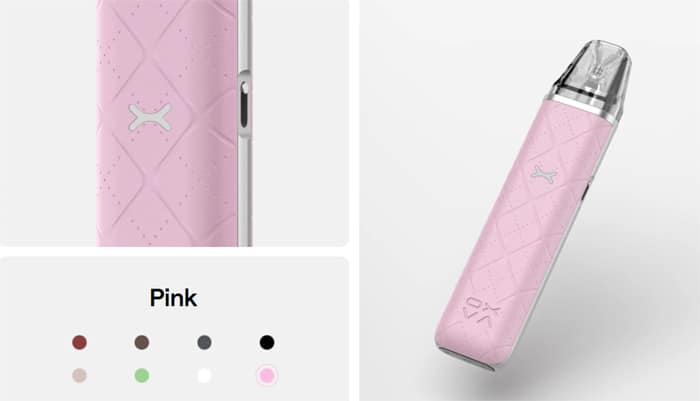
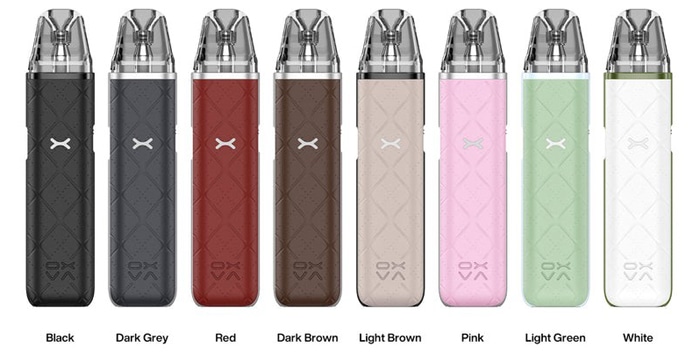
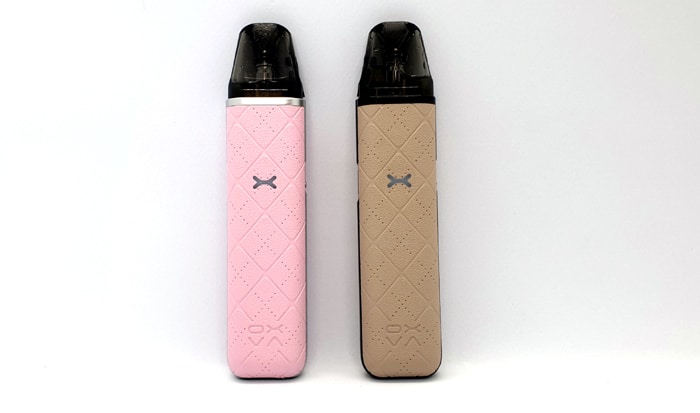
You can choose from 8 colours: Black, Dark Grey, Red, Dark Brown, Light Brown, Pink, Light Green and White.
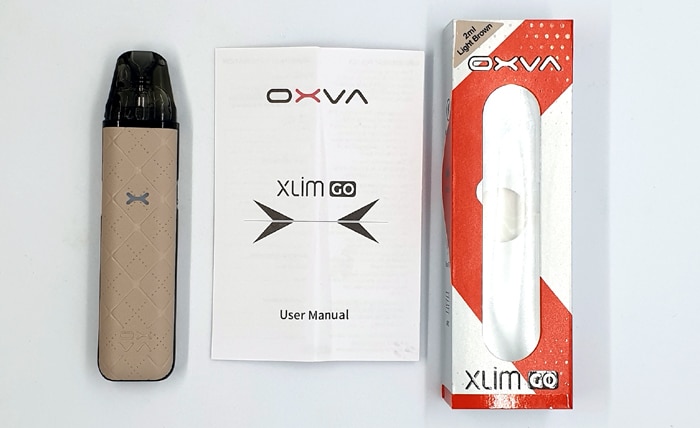
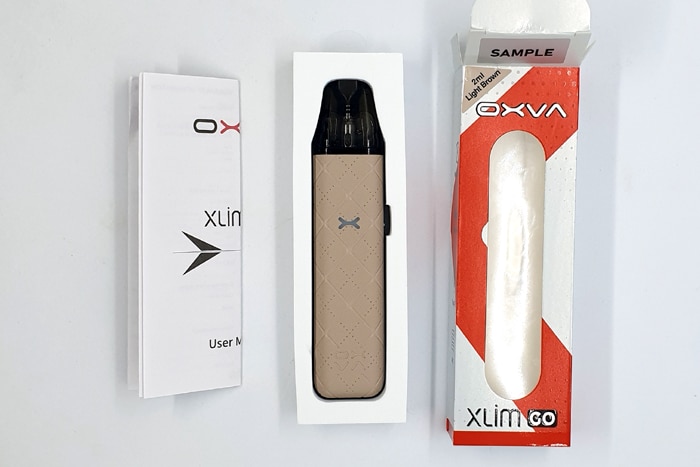
Inside the Box
- OXVA Xlim Go device
- 0.8ohm pod
- User manual
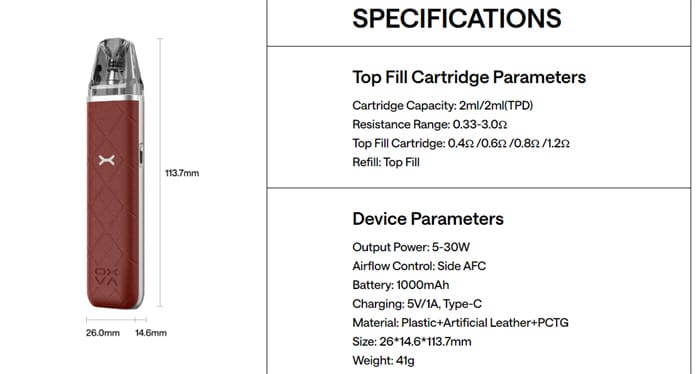
OXVA Xlim Go Specs
- Size: 113.7x26x14.6mm
- Battery: 1000mAh (internal)
- Display: RGB LED indicator
- Output: 5-30W
- Type C USB charging – 1A charge rate
- Resistance range: 0.33-3ohm
- Capacity: 2ml
- Compatibility: Compatible with OXVA Xlim fixed coil pods (not Xlim C) & Xlim Pre-filled pods
- Side adjustable airflow
- Top fill
- Materials: Plastic, Artificial Leather and PCTG
OXVA Xlim Go Design and Build Quality
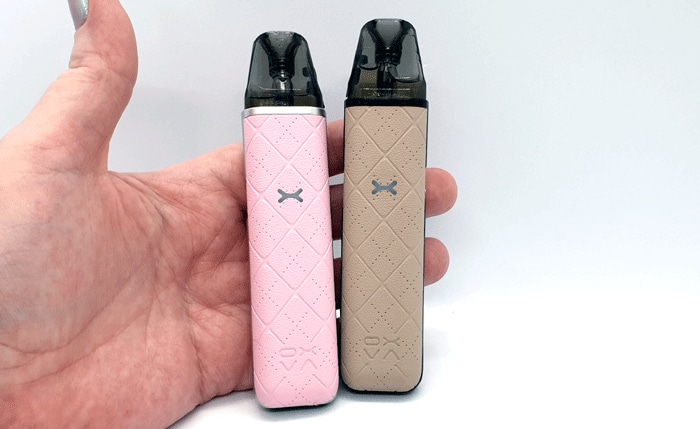
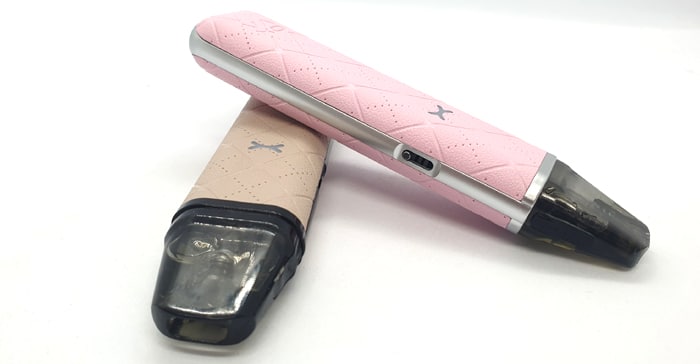
I received the Light Brown version. However I also bought myself the Pink version!
The packaging is extremely compact – which is not a surprise as you only get the device, 1 pod and instructions. There is no charging cable, spare pod or lanyard. Obviously this keeps the price low.
Thankfully this is a simple to use kit as the instructions are just about OK! Yes there are multiple pages – but only 1 page per language!
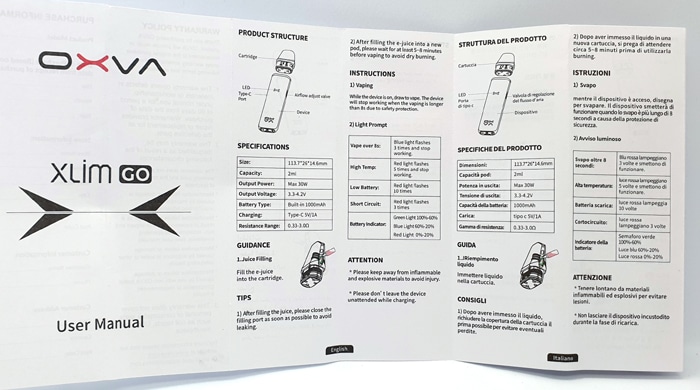
If you find the included instructions a bit small to read you can download a digital copy here.
OXVA Xlim Go Mod
Firstly I tend to compare this with the Xlim Pro as I am so used to using it.
Size wise they are pretty much the same, but the main difference is the weight!
On the OXVA website the Xlim Pro is listed as being 66g whereas the Xlim Go is only 41g. This weight difference is very noticeable in the hand! You would think the Xlim Go has a smaller battery – but it doesn’t – it is still 1000mAh same as the Pro!
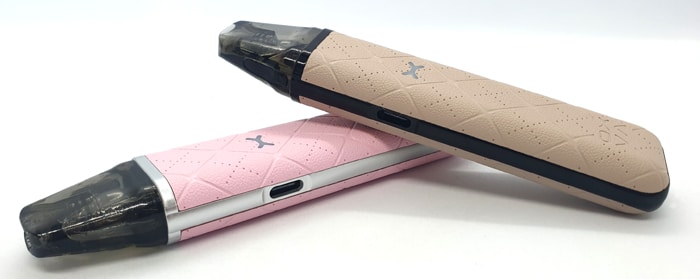
The Xlim Go has more of a “Plastic” quality with the Faux Leather exterior which surrounds a Black Plastic (I think?) frame (Silver frame on the Pink version). Compared to the all metal construction of the Xlim Pro.
Being a vegetarian I really applaud the use of faux Leather! Years ago it was deemed the cheapo version of the real thing, but now I prefer it!
Obviously there is no screen on this version so this might decrease the weight too.
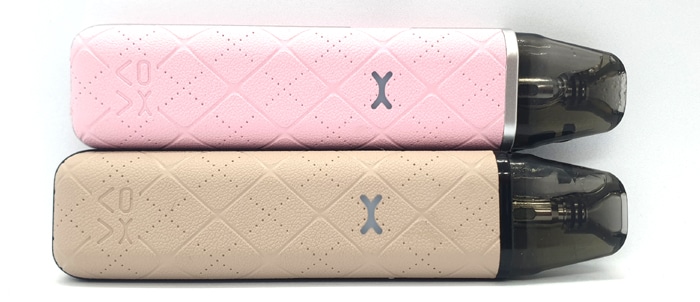
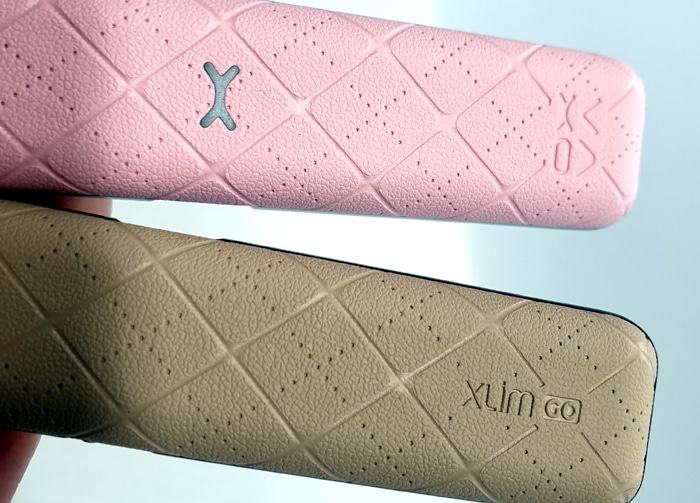
The device has a kind of quilted texture which looks beautiful but is not as soft and padded as I was expecting.
On the front is the “X” logo which is the bright LED indicator.
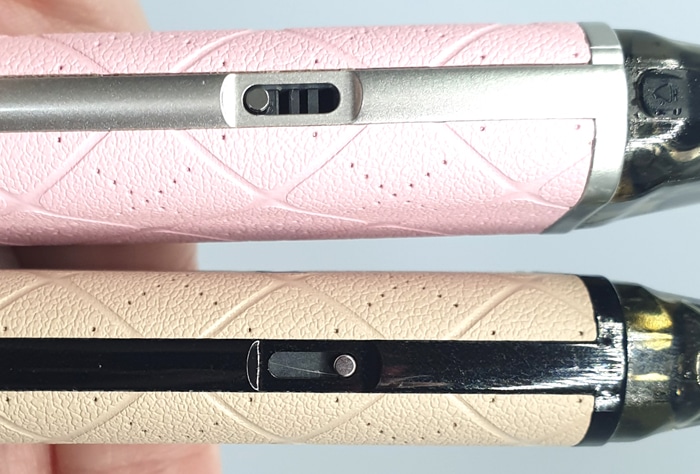
Each side has the Black frame (Brushed Silver on the Pink version), with one side being the USB port and the other the smooth airflow adjustment slider.
The knob of the slider barely protrudes outside of the footprint of the mod so is unlikely to get caught on bags or pockets. The slider has a fair resistance and I believe it won’t move by itself.
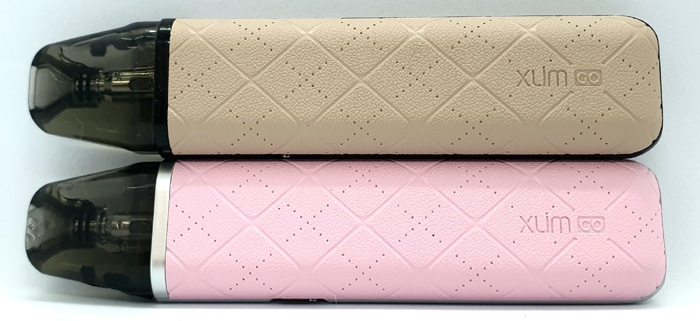
As for branding – on the front the “OXVA” logo is etched into the quilted finish and on the rear you will find the “Xlim Go” logo.
On the base is a rubber type pad which should protect the device and any surface it is sitting on from scratches. It does stand up but doesn’t need much persuasion to topple over as it is not very stable.
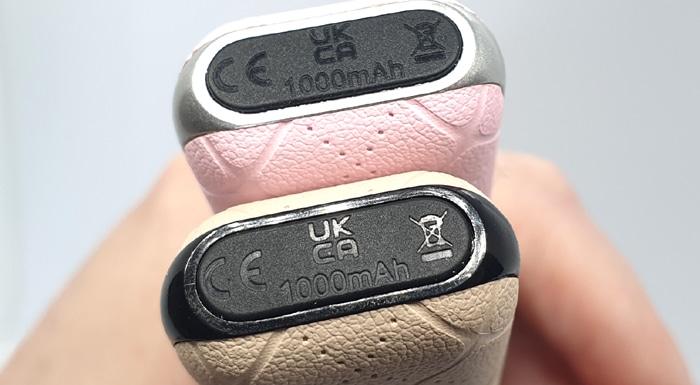
Legal logos and battery capacity are etched into the device base.
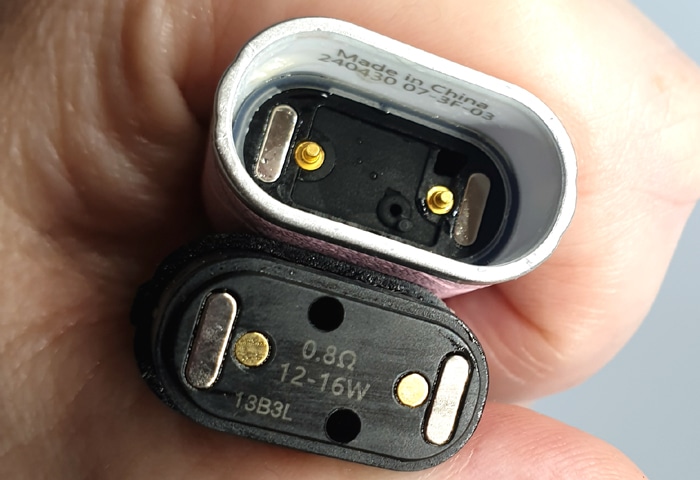
Inside the pod compartment you will see 2 spring loaded electrical contacts and 2 magnets. There is a slight wobble to the pod if you manually move it but it doesn’t rattle.
I am always dropping my kits and with the Xlim’s you can often find the pod in a different place to the device!
OXVA Xlim Top Fill Pod
Apart from the fill port location the pod is exactly the same as the V2 pod used on the early Xlim kits.
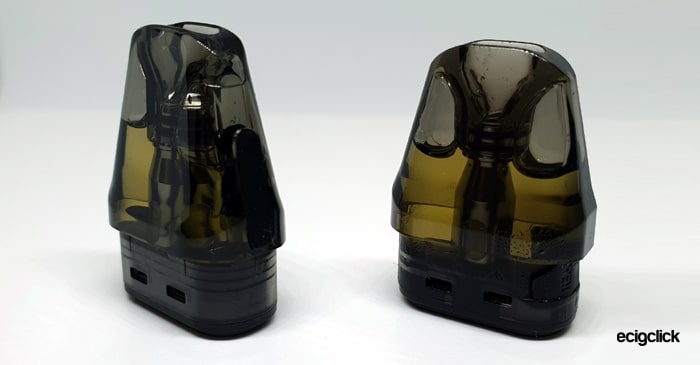
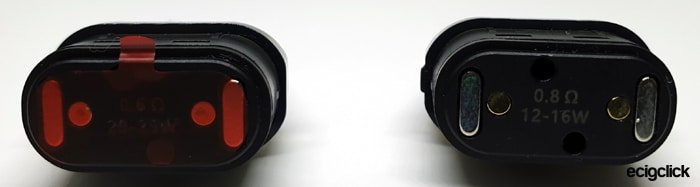
The base is exactly the same with 2 magnets and 2 contact areas. There are also 2 airflow holes which means the pod can be installed either way around. The pod resistance and recommended power levels are printed on the base too but in this case are very hard to see.

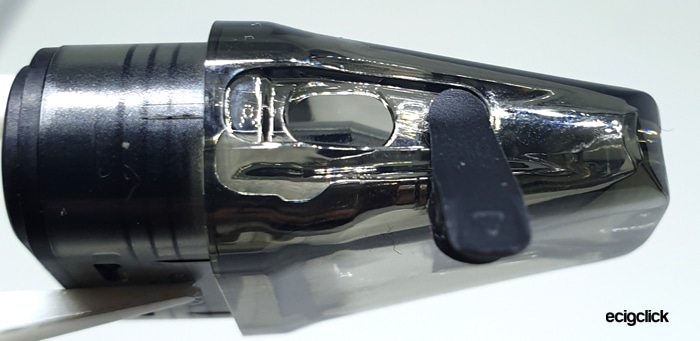
Although darkly tinted, the e-liquid level is always visible, in fact even when installed in the mod as the coil base sits level with the top of the mod.
You get the same comfortable “Duck Bill” style mouthpiece which is always a pleasure to use.
The fill port cover is located on the side of the pod and when you do your first fill it can be a bit of a puzzle as to how to access the port.
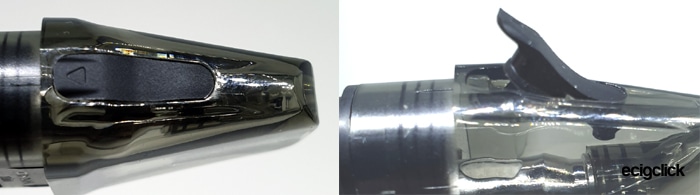
Simply lift up the bottom edge of the port cover and it will lift up to reveal the port. You can also swing the cover out of the way too.
It might be a bit fiddly to open if you have short fingernails as it is one you will need to prise up. But it is far easier to close than the V2 pods which I found sometimes leaked if you couldn’t push the cover fully in.
The fill port size is generous at 5mmx3mm and I had no issues with small bottle nozzles when filling.
OXVA Xlim Go Quick Start Guide
The kit comes with the 0.8ohm pod installed. Make sure to fill this before removing the isolator sticker at the base of the pod. If you vape before filling this will burn out the coil and the pod will need to be binned.
You will need to fill, charge and set up the device to get going – I will guide you through the steps below!
OXVA Xlim Go Basic Operation
- Power On/Off = There is no function to switch this on or off.
- Vaping = Simply inhale on the mouthpiece to vape.
- Battery indicator = The “X” logo will light up when vaping and the colour displays the battery charge remaining: Green = 60-100%, Blue = 20-60% and Red = below 20%.
- Battery indicator when charging = The indicator will light up in the colours mentioned above and then the light will turn off when fully charged.
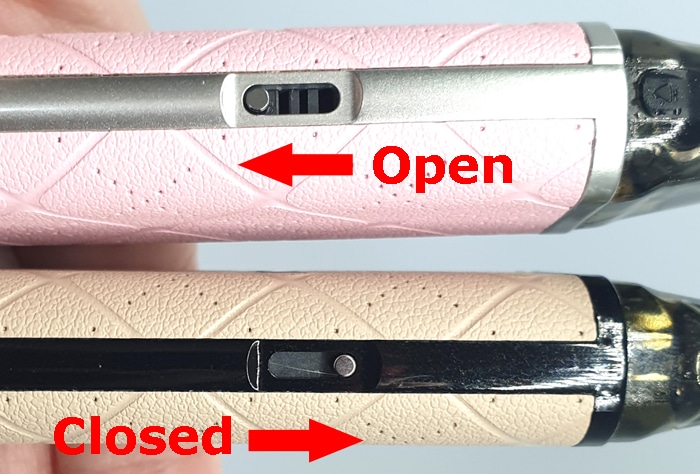
- Adjust airflow = move the slide switch on the side of the mod to increase / decrease the incoming airflow to your preference.

Open = more airflow, Closed = less airflow
OXVA Xlim Go Protections
- Low battery – The Red light will flash 10 times and the device will cut out until recharged.
- Short circuit / too low resistance – The Red light will flash 3 times. Clean pod and device connectors, or replace pod. If fault persists there may be an issue with the device itself.
- High temperature – The Red light will flash 5 times and the device will stop working until it has cooled down.
- Over time – if you vape for longer than 8 seconds the Blue light will flash 3 times and the fire will cut out. You can continue vaping by inhaling or pressing the fire button again.
How To Charge The Battery
The charging rate is specified as 1A.
- Using the a USB type C cable, connect the small end into the USB port on the mod.

- Connect the large end of the cable into a suitable USB outlet.
- The LED will cycle through the battery capacity colours and go out when fully charged.

The charging time for me using a mains plug was around 1 hour.
How To Fill the OXVA Xlim Top Fill Pod
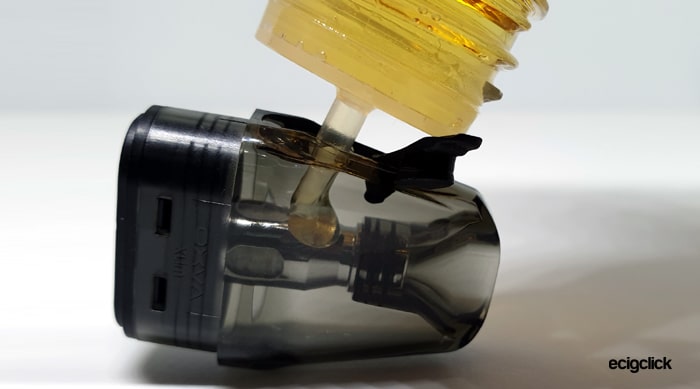
- You don’t need to remove the pod to refill. I removed it to make it easier to take a photo!
- Lift up the cover of the fill port and add e-liquid through the port.

- Watch the e-liquid level through the clear side of the pod.

- Replace the fill port cover firmly.
- If this is the first fill allow the pod to stand for 10-15 mins to allow the e-liquid to soak into the coil. This is called Priming and is a very important step. If not fully primed you could burn the coil out and your throat lining in the process!
How Does the OXVA Xlim Go Perform?
I used my own e-liquid mix which is 50/50 PG/VG made from IVG Bubblegum Concentrate at 20% ratio. This is quite high a flavour ratio as I prefer plenty of flavour, but sadly this means it can be a coil killer sometimes. But the OXVA Xlim pods usually have no issues at all with it.
I add nic salt to approx 6mg strength.
If any of these terms are over your head – have a read of our handy guides below!
- MTL V DTL – A Guide To Vape Styles
- VG and PG in E-liquid – all you need to know
- Beginners guide to E-liquid
- Nic Salt E-liquid
OXVA Xlim Pro 0.8ohm Pod
I am extremely familiar with this pod as I use it daily on my Xlim Pro and SQ Pro kits!
I love it!
However for the first 2ml don’t be quick to judge! The first fill doesn’t showcase the excellent flavour this pod is capable of.
After the first fill or two the flavour shines! I get my lovely sweet syrupy Bubblegum flavour and a good warmth from the vape.
Even though it is only a 0.8ohm coil at a low output, the flavour and vapour are just perfect!
I quote from the Xlim Pro review below…
“So I have finally given up with the first 0.8ohm pod and I can happily report I got to 5860 puffs (109 refills). That is some epic coil life!”
Airflow
I use a rating system for airflow – 0= fully closed and 10= like breathing unrestricted fresh air!
On fully closed this is about a 1 – not fully shut off as you are still able to vape, but it gets hot and not much flavour.
Whereas fully open is still great for MTL vapers (it is the setting I preferred) and you could also manage a decent RDL vape too. I would say this rates around 4.5.
Usually on MTL devices I have the airflow in the mid position, but I find the Xlim range have quite a tight airflow and I end up opening it fully.
Leaks?
Not a drop or a dribble at all from either pod! The top fill V3 port design eliminates the leak from the fill port you sometimes get on the V2 pods.
However on previous kits with the same pod I have had a bit of an issue with leaking.
With the pods included in these kits I had no leaks at all so hopefully there has been an upgrade. But I buy replacement pods a lot and some of those still have this problem.
I think this issue is caused when filling. If you push the nozzle into the fill port and aim the e-liquid at the coil I am sure it forces e-liquid back through the coil to cause the leak.
So my advice is to angle the nozzle away from the coil and make sure there is a gap in the fill port for any air to escape. Also add e-liquid slowly to avoid a jet of liquid pushing through the coil.
If you get a “gurgle” after filling, remove the pod, wrap in a tissue and blow through it to clear any sign of leaks.
If you have had a leak also put some tissue in the pod compartment of the mod and blow through the airflow inlet to clear any e-liquid inside the device.
Mod Performance
The mod automatically selects the output for the coil.
In my Xlim Pro the 0.8ohm pod automatically gets 16W of power. Comparing that with the Xlim Go it seems to be exactly the same.
As I have a couple of 0.6ohm pods knocking about I also compared the output between the two devices.
With the 0.6ohm pod the Xlim Pro automatically chucked out 22W and the Xlim Go seemed to match that
It should also work well with the 0.4ohm pods as the 30W maximum output is the same as the Xlim Pro.
The output gets a bit weak as you get a few puffs away from the battery charge being fully drained but this is normal. Otherwise the power is consistent all the way through the battery drain.
As there is no fire button this relies on auto draw sensors, which kick in super quick. I am just a bit sad that there is no fire button as a back-up should the sensors fail. I have had kits in the past (not OXVA) where the auto draw has failed over time.
Battery Life
This will always rely on your own vaping habits and the pod selected. I am a very heavy vaper so this must be considered. For a guide these are my timings…
With the 0.8ohm pod I got around 7-8 hours of vaping (4 pod refills @2ml).
Pros
- Simple version of the excellent Xlim range
- Bargain low price!
- Amazing pod life – I regularly get over 5000 puffs
- Compatible with V2, V3 and pre-filled Xlim Pods
- Beautiful to look at
- Incredible flavour
- Lightweight and a joy to hold
- Adjustable airflow
- Device selects perfect output automatically
Cons
- The pod resistance is etched into the pod base and is extremely hard to see.
- Cannot adjust the output – but the beauty of this kit is that it automatically gets the output spot on!
- Slower charge rate (1A) compared to the 2A rate of other Xlim kits.
- Kit contents a bit on the stingy side but this is priced very low
Final Review Verdict
The price of this is incredible!
Yes you only get 1 pod and the device – no lanyard or USB cable – but that means this kit is in the price range of 2 or 3 x 600 puff disposable vapes!
At that price this pod will last ages and give the most superior flavour of any pod kit I have ever tried.
I put my money where my mouth is as I use the Xlim Pro and SQ Pro daily. I have even bought them myself too as replacements for lost or faulty ones! That is how much I recommend the Xlim range!
The fact that this kit is super cheap and easy to use makes it the perfect candidate for anyone looking to switch from disposable vapes.
If you want super simplicity consider the OXVA Xlim Pre-Filled pods and you won’t even have to fill it! Just charge and replace the pods!
I think this is an absolute bargain and would recommend any starter vaper or disposable fan to buy it immediately!
I bought the Pink version with my own money as I love it so much! That is a huge recommendation from somebody who has pod kits coming out of her ears from reviews.

 Review")


How did you counted the puff as it does not have a puff counter ?
Hiya I use the same pods in my Xlim SQ Pro, Xlim Pro and Xlim Pro 2 which I have reset the puff counter with new pods and recorded the total.