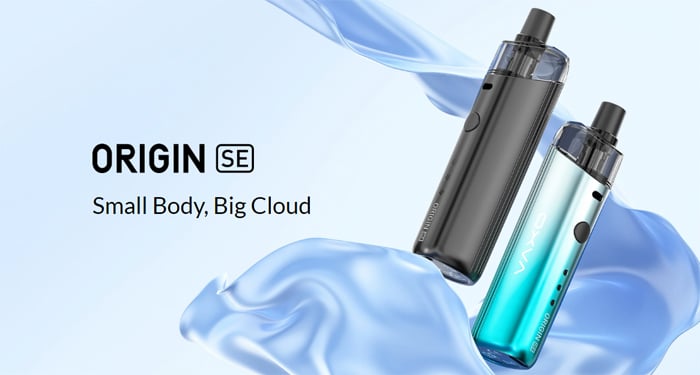
I have got my hands on the new OXVA Origin SE kit.
This is the latest addition to the popular Origin range which includes the original Origin AIO, Origin X, Origin Mini and the Origin 2 which I recently reviewed.
I had little experience of OXVA until I got my hands on the Xlim and Xlim SE – which initially were poor (due to crappy pods). However the V2 pods – the 0.8ohm in particular ended up making these kits my favourite devices and used daily!
Let’s see what the OXVA Origin SE has to offer!
Thank you to OXVA for sending these over for review!
As always my opinions are based on the device/s in my possession and I will report back accurately on my findings!
What Can We Expect From The OXVA Origin SE…
This is a pod kit with a pod section (or tank) which holds your e-liquid and a mod section (or battery) which provides the power and control.
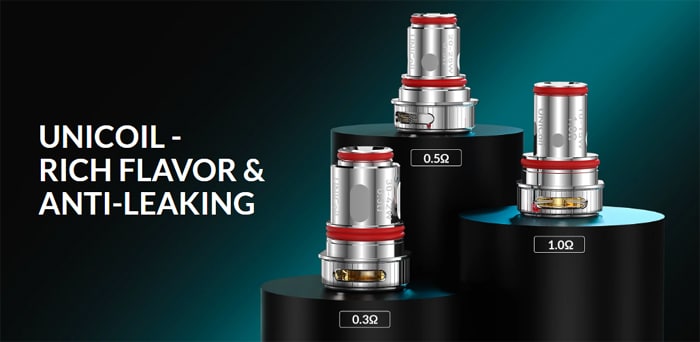
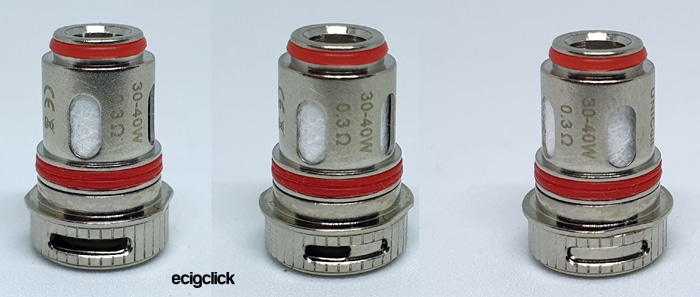
The pod has removable coils and is compatible with the Unicoil Range of coils, which are also used on previous Origin kits. Plus the RBA Unicoil can be used as long as the resistance is above 0.25ohm.
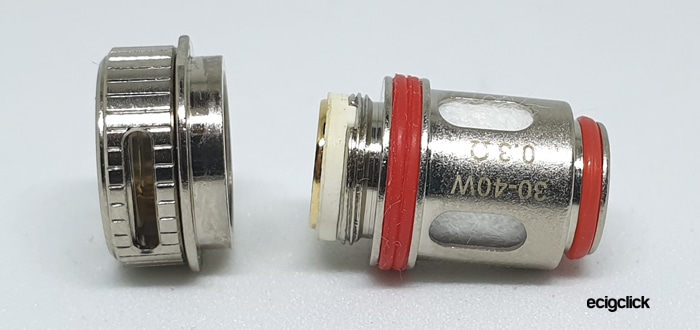
This time you get the 0.3ohm and 0.5ohm coils included in the kit. These also have an airflow control ring which you screw on the coil base. You get one control ring in the kit too.
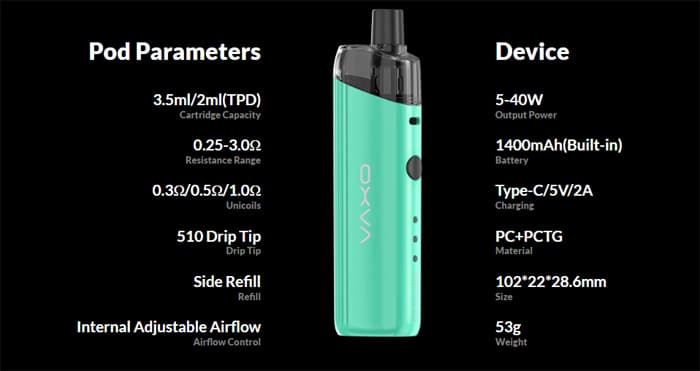
The pod will hold up to 3.5ml (standard) or 2ml (TPD Regulated Areas) and refilling is taken care of with the side fill port.
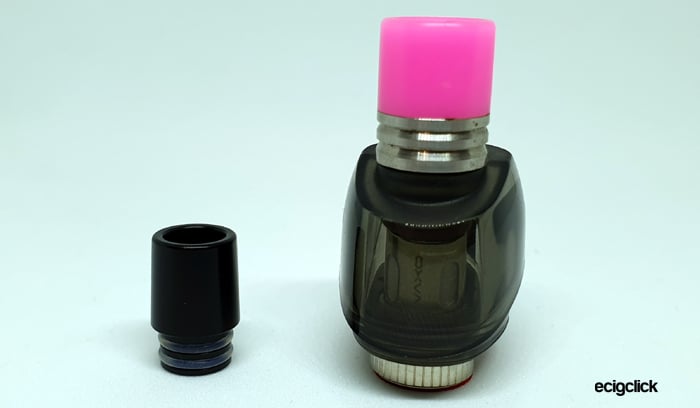
You can remove the drip tip as it is a standard 510 fitment and replace it with one you prefer.
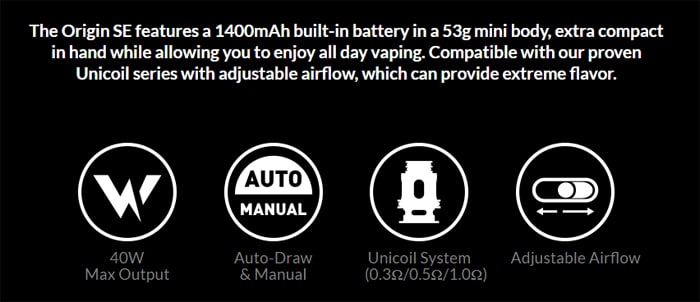
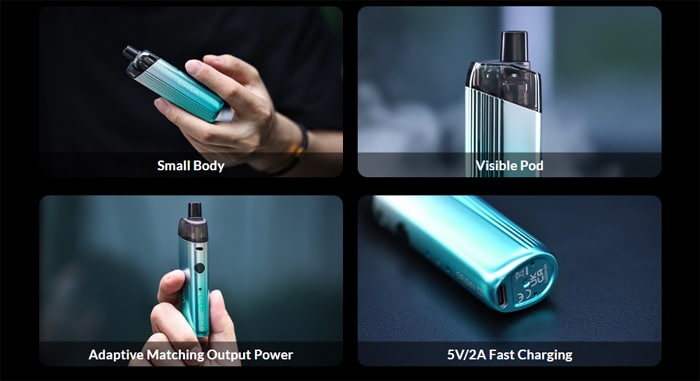
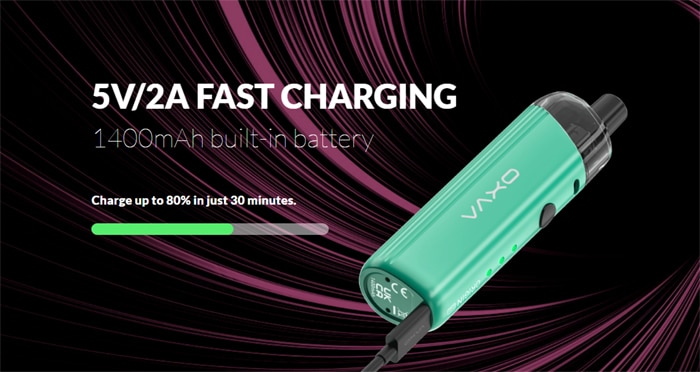
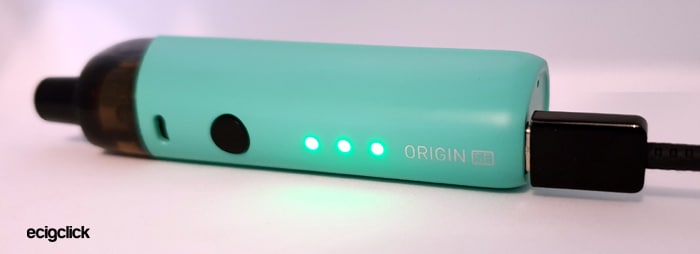
The mod section houses a 1400mAh battery which is charged using the USB Type C port at a fast 2A charge rate.
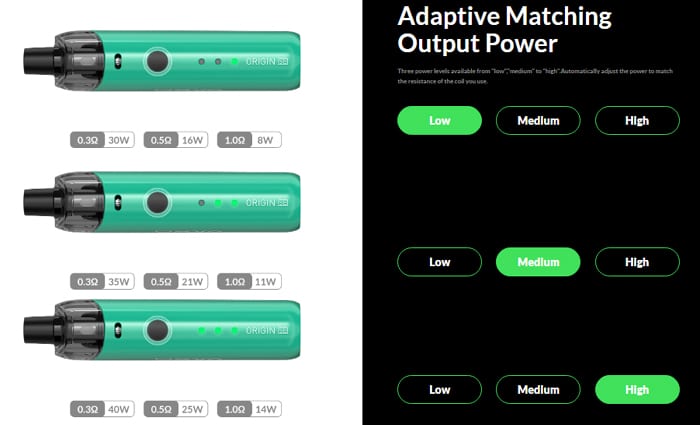
Output wise this is specified as 5-40W and for each coil you can choose from High, Medium or Low power levels. The actual output of these will be decided by the mod according to the coil resistance.
For instance:
- High level = 40W (0.3ohm) / 25W (0.5ohm) / 14W (1ohm)
- Medium = 35W (0.3ohm) / 21W (0.5ohm) / 11W (1ohm)
- Low = 30W (0.3ohm) / 16W (0.5ohm) / 8W (1ohm)
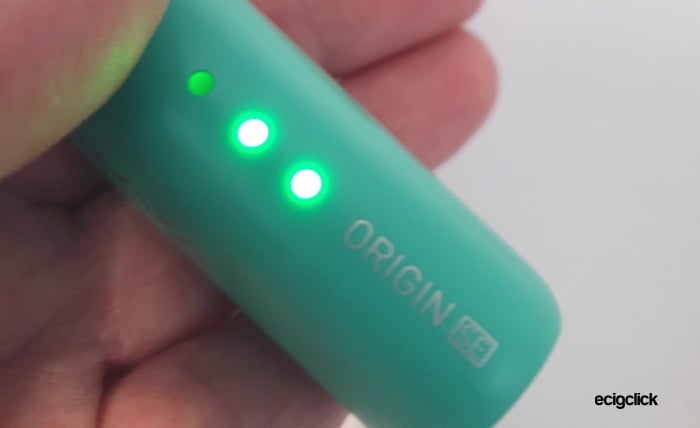
A series of LED indicators display the battery charge remaining and the power level selected.
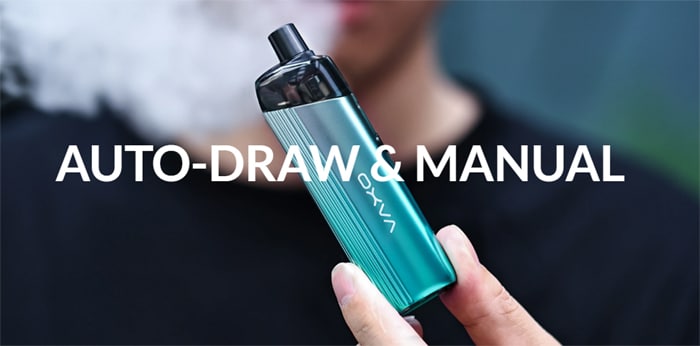
You can either use the fire button to operate or using the Auto Draw simply inhale on the mouthpiece to fire.
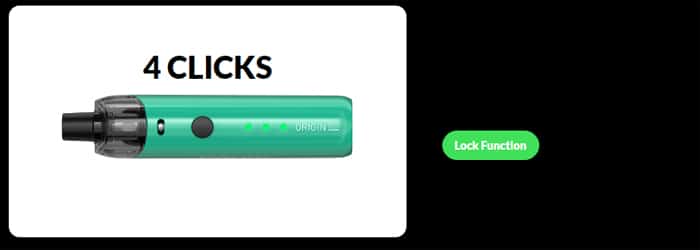
Plus there is a lock function to prevent accidental firing.
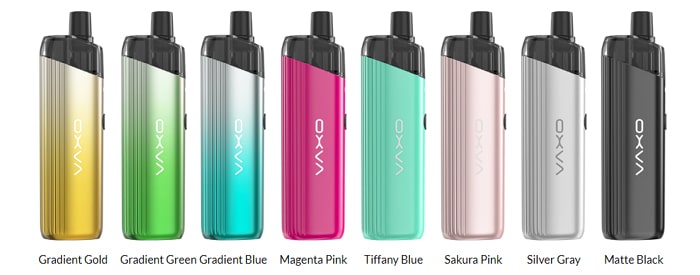
There are 8 colours to choose from: Gradient Gold, Gradient Green, Gradient Blue, Magenta Pink, Tiffany Blue, Sakura Pink, Silver Grey and Matte Black.
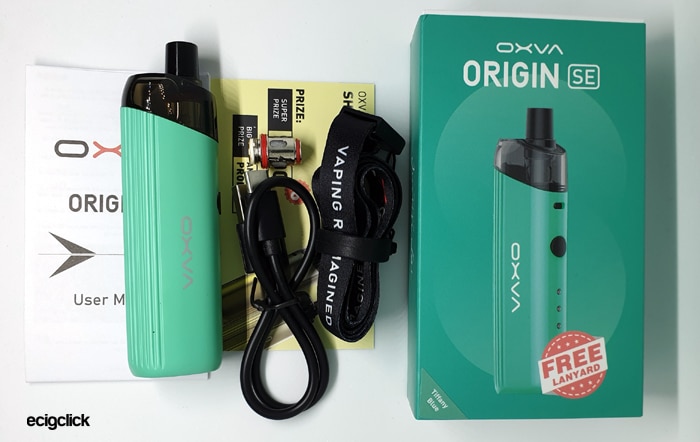
Kit Includes
- OXVA Origin SE device
- Origin SE Pod
- 0.3ohm Unicoil (with airflow ring)
- 0.5ohm Unicoil
- Lanyard
- USB Type C cable
- User manual
OXVA Origin SE Specs
- Size: 102x22x28.6mm (including pod)
- Output: 5-40W – 3 power levels
- Battery: 1400mAh (internal)
- Display: LED indicators
- Capacity : 3.5ml (standard) / 2ml (TPD)
- Coils : Unicoil range
- USB Type C Port – 2A fast charge rate – 80% charge in just 30 minutes
- Resistance range: 0.25-3ohm
- 510 drip tip
- Adjustable airflow
- Side refill
- Auto draw or manual activation
- Photon chipset
- Lanyard included
OXVA Origin SE Design and Build Quality
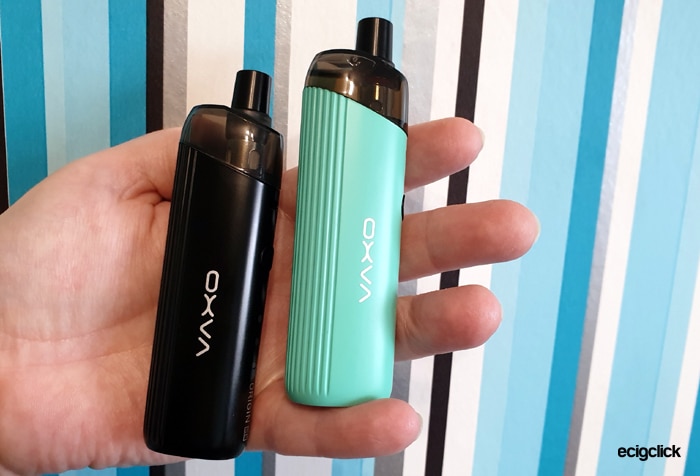
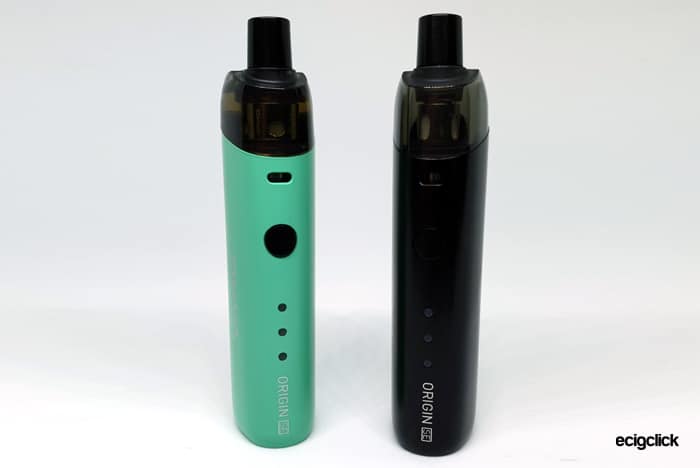
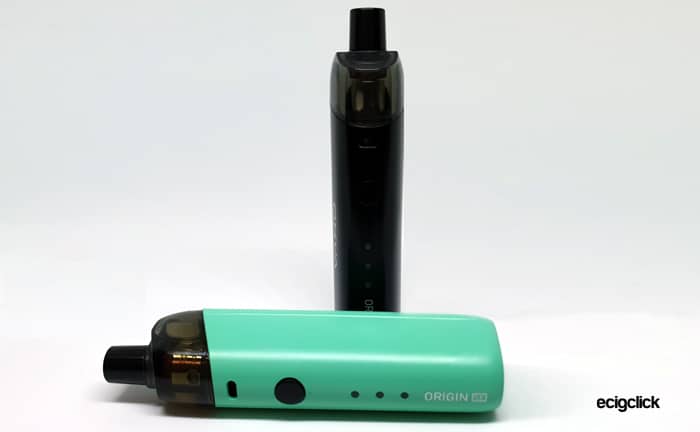
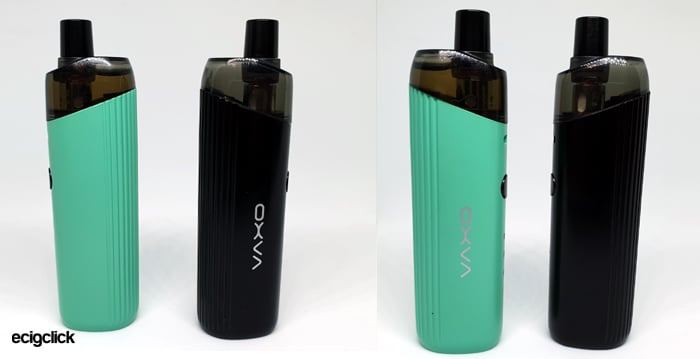
I received two of these in the Tiffany Blue and Matte Black variants.
The packaging worked great – both devices arrived in pristine condition.
The instructions were OK, I have seen better and indeed a lot worse. They tell you how to operate and fill the device. There was no mention of power level indication but the graphic I shared earlier shows this.
I am also impressed with the kit contents when you consider this is a pretty low price kit, you get 2 coils, USB cable and a funky lanyard.
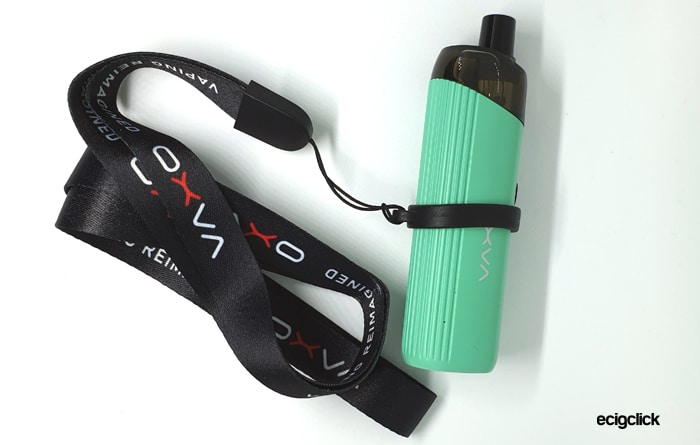
Talking of the Lanyard it has a large rubber ring on the end which basically slips over the whole device. Just in case you weren’t sure how it fitted!
Device
Wow this is tiny! Oh and super cute!
It has a rubberised coating and feels lovely in the hand. It is actually so light weight too! I find it surprising they have squeezed a 1400mAh battery in there!
The device profile is kind of a “C” shape with a flat side where all the adjustments take place.
At the top of the flat side there is the airflow inlet hole and below that is a tiny round (6mm diameter) super clicky fire button.
A vertical column of LED’s are beneath this and the lights light up in various colours and combinations to display battery capacity, power level and fault conditions.
At the base of the flat panel side is the “Origin SE” logo.
The sides are plain until they start to curve towards the back and a textured ribbing is applied.
One side features the OXVA logo.
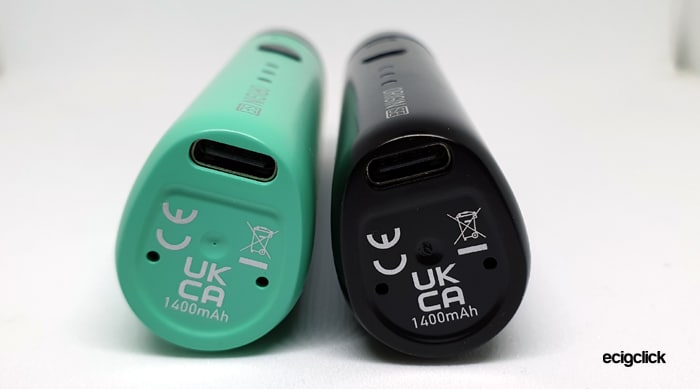
The base has the required legal logos, 2 battery vent holes, USB Type C port and battery capacity printed on in Silver.
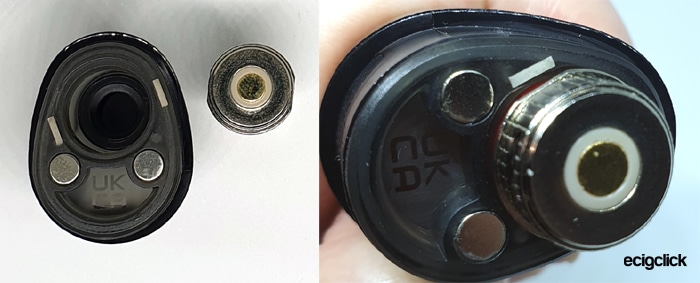
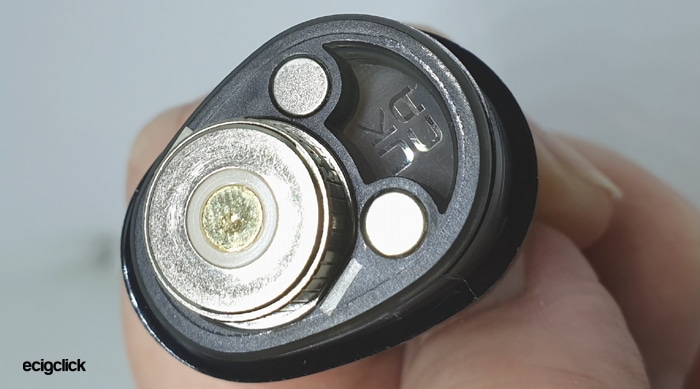
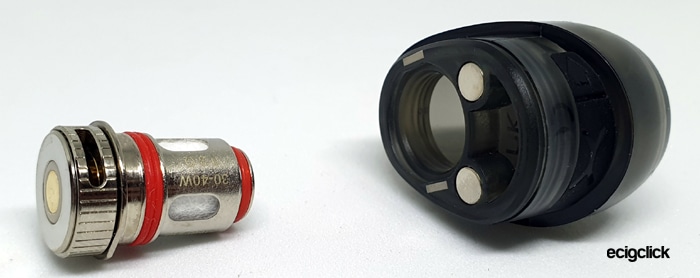
Inside the pod compartment are 2 magnets and 2 contacts which are spring loaded.
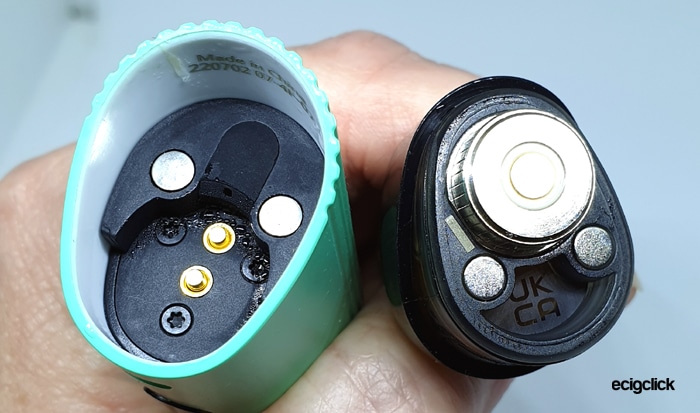
All in all excellent build quality and design, feels lovely in the hand with the rubbery finish. Oh and of course the Tiffany Blue was super cute.
Pod
I am not sure what size pod I have got – there is no mention of it on the box. As there are no TPD warnings printed on the box I assume it is the 3.5ml version. Obviously this is just a sample but if you are in a TPD regulated area you will only get a 2ml version which is yuk.
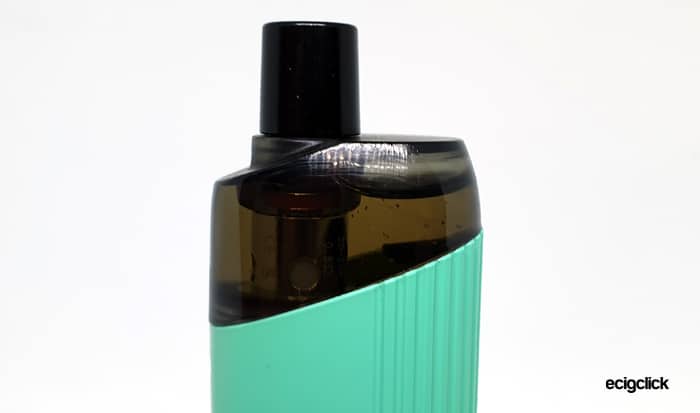
I love the fact that although the pod is tinted you can see pretty much the whole contents meaning judging the liquid level is easy peasy.
The drip tip is a standard 510 fitment and I tried other drip tips with O-rings and they were perfectly fine. You may never change this but it is good to know if you lose the original you can replace it very cheaply!
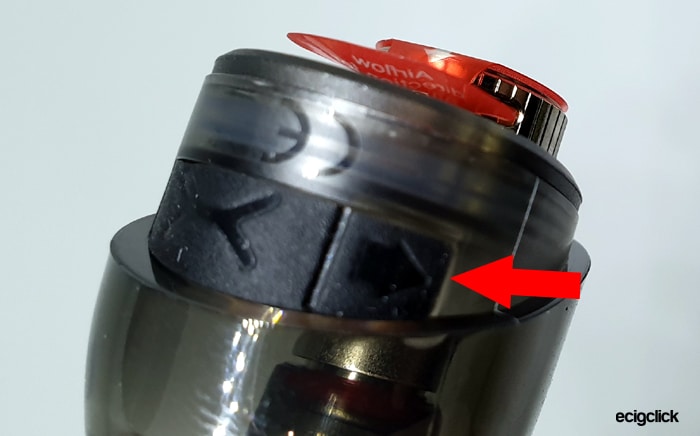
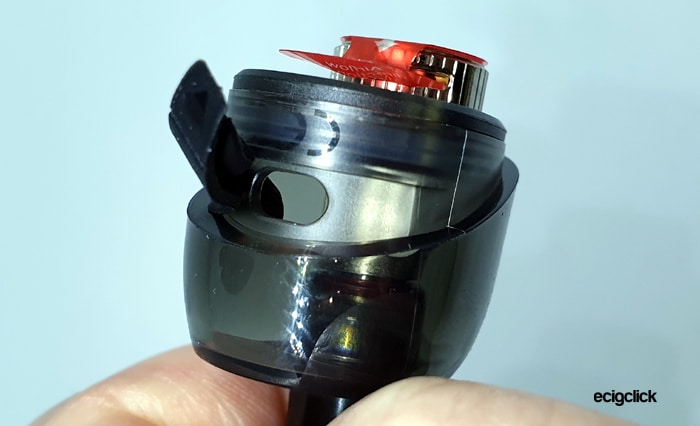
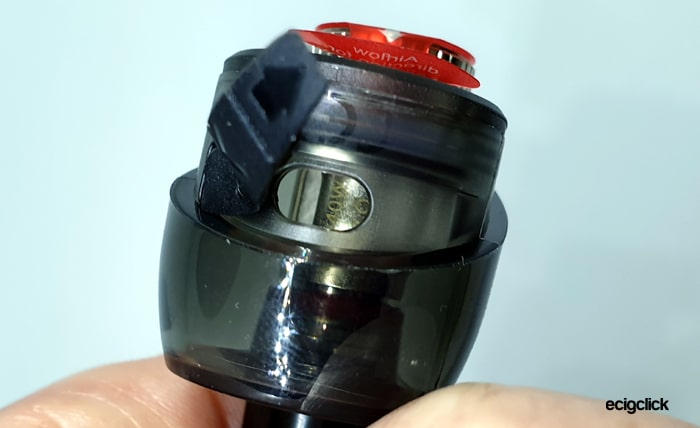
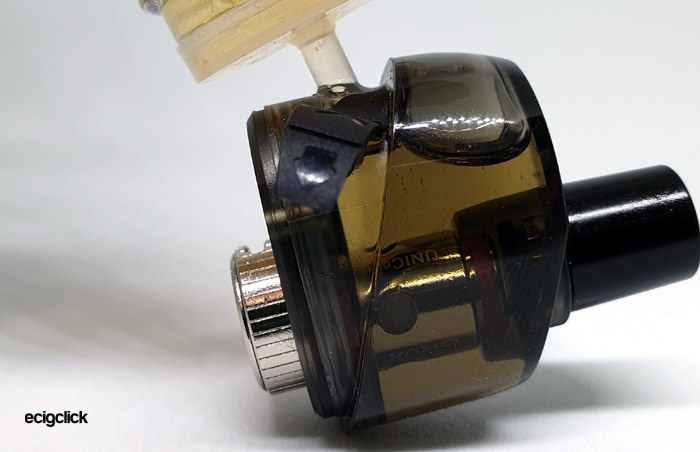
A fill port is located on the side with the cover having an arrow to show you where to lift.
I used a 50ml shortfill bottle and had no issues refilling at all. As the slot is very wide there was plenty of room for air to escape to prevent air locks and over flowing.
The port itself is around 3mm high and 6mm wide.
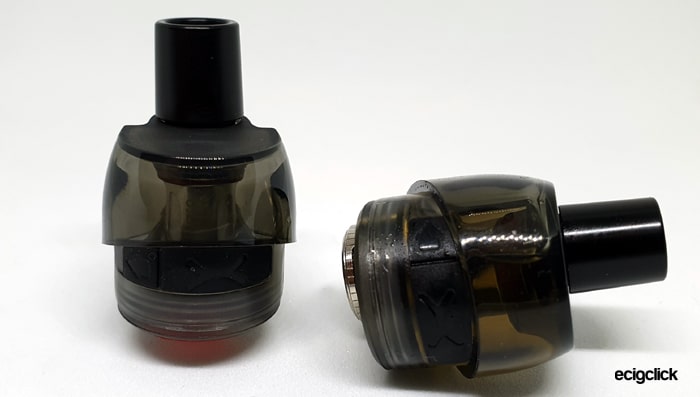
On the base of the pod is the coil location. The base of the coil has the adjustable airflow control. This is a ring which screws on and off the base of the coil. You get 1 provided in the kit, so when you remove a coil make sure to retain the adjuster!
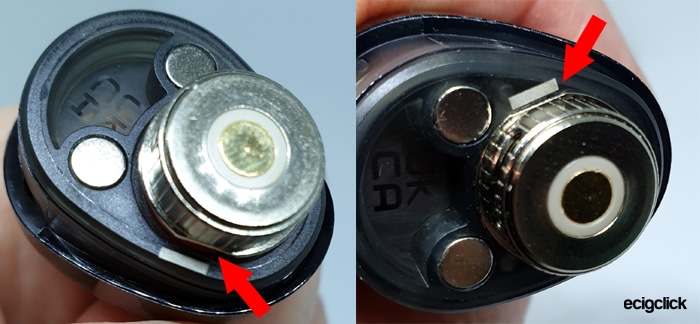
There are 2 small straight edges where the airflow ring locates these are marked with lines. Make sure that the airflow inlet is facing towards the area that says “UK CA”.
You can adjust the airflow without removing the coil!
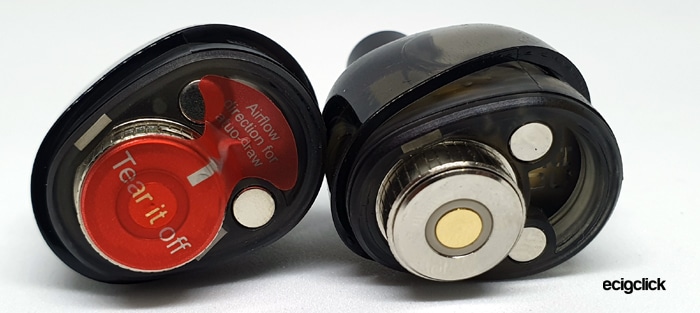
Two strong magnets are provided to keep the pod in place. The pod will only fit in the device in one position due to the asymmetrical shape of the device and pod.
A great design, the only thing if pushed for me to moan about is the airflow ring situation. You have to remove the pod to adjust and there is a large risk of it getting lost if you bin a coil.
OXVA Origin SE Quick Start Guide
The device arrives with the 0.3ohm Unicoil installed.
An isolation sticker is provided to make sure the device is not accidentally fired. Do not remove the sticker until you have filled the pod!
You will need to charge up the device, fill the pod and adjust the airflow to get started. I tell you how to do all of this!
Basic Operation
- Power On/Off: Press the fire button 5 times
- Vaping: Press the fire button or just inhale on the mouthpiece.
- Battery indicator when in use: 65-100% charged = Green light, 30-65% charged = Blue light, below 30% charged = Red light.
- Lock / Unlock: To lock / unlock the fire button press the fire button 4 times.
- Adjust power level: Press the fire button 3 times to toggle between the power levels.
- Power level indicator: Low = 1 light lit, Medium = 2 lights lit, High = 3 lights lit.
- Airflow adjustment: Remove the pod and turn the adjuster on the base of the coil to reduce or increase airflow resistance.
Protections
- Cutout – if vaping for longer than 8 seconds the fire will cutout to prevent coil or device damage. 3 Blue lights will flash 3 times and the fire will stop working.
- High temperature – if the device overheats 3 Red lights will flash 5 times. Device will operate again when cool.
- Low battery – one Red light will flash 10 times – time to recharge.
- Short circuit – 3 lights flash Red 3 times. Check pod and device connections, clean connectors, replace coil. If still not fixed the device may be faulty.
How To Charge The Battery
- Insert the small end of the included USB Type C cable into the charge port of the device.
- Insert the large end of the cable into a suitable USB outlet.
- Leave to charge.
- The lights will cycle through the colours, Red, Blue and then Green. When fully charged all the lights turn green for a few minutes then all the lights will go out.
Charging took around 1 hour with a 2A charging plug every time. Which is longer than I anticipated?
How To Fill the Pod
- Remove the pod from the mod.
- Lift up the fill port cover – you can carefully swing it out of the way to aid filling.
- Fill the pod whilst watching the e-liquid level.
- Replace the fill port cover firmly.
- Leave pod to stand for 10 minutes to allow the coil to soak up the e-liquid before using if using a new coil.
- Replace pod into mod – this will only fit one way around.
How To Replace The Coil
Try to empty the pod before removing the coil. If this is not possible make sure to have plenty of absorbent stuff around as the pod contents will spew out when the coil is removed.
- Remove the pod from the mod.
- Turn the pod on its side and pull out the coil and base unit.
- Unscrew the base from the coil – do not discard this as you will need it!
- Screw the base onto the new coil.
- Push the coil fully into the pod making sure that the airflow inlet hole faces the airflow sensor (“UK CA” marked area) and the straight edges on the coil base align with the ones on the pod. If the inlet is not facing this way, remove and rotate the coil & base 180° and install.
- Fill the pod as described above and leave to stand for 10 minutes.
OXVA Origin SE Performance
I will be using IVG Bubblegum Select shortfill e-liquid which has a 70% VG and 30% PG ratio.
I have added nicotine salt to make it up to a strength of 6mg.
- MTL V DTL – A Guide To Vape Styles
- VG and PG in E-liquid – all you need to know
- Guide To Nicotine Salt
0.3ohm Unicoil Performance
I started off at the lowest power setting (only 30W!!) and just WOW! I didn’t need to take the power any higher.
As I am a MTL vaper perhaps that’s why the quality of the high VG and 0.3ohm coil blew me away. Plus of course the IVG e-liquids do have a great flavour concentration which is why I tend to use them a lot.
The sweetness of the Bubblegum came through strong and the cooling hit was prominent too. Incredible!
Wonderful! Absolutely wonderful and the bonus is I should get longer battery life on the lowest power level!
Plenty of vapour – obviously not a huge cloud chucker, but way more than you would get from a simple MTL kit and with the nic salt I added I still get a slight throat hit.
0.5ohm Unicoil Performance
As I found with the Origin 2 this coil was a lot weaker. Also I found the auto draw really struggled even with the airflow half closed. I had zero issues with this using the 0.3ohm coil. I even tried to close the airflow down further and it still was struggling to fire.
On the low power setting there was a decent flavour but nothing compared to the blast you get with the 0.3ohm.
In the mid power setting this did improve and got a bit warmer but still nothing to write home about. However for me this setting gave the best performance.
On the highest power setting this just got warmer – a slight improvement to the flavour but it felt dry and I was on edge with long vapes worrying about a dry hit.
I gave it chance to “bed in” but nothing changed over the 3 pod fulls.
I said in the Origin 2 review that this coil was very “Meh”. Neither being a great performer for RDTL or MTL.
This coil offers nothing that the 0.3ohm coil can’t do better. I almost see it as being pointless. It doesn’t cross the barrier between MTL and DTL and is just weak in comparison with the other coil included in the kit.
Using the 0.5ohm coil turns an ace kit into an average kit just by changing the coil!
Airflow
The airflow adjustment is provided by the screw on ring which fits to the base of the coil. You will have to remove the pod to adjust this – which is a bit of a niggle – but once set you shouldn’t have to do it again unless you change the coil.
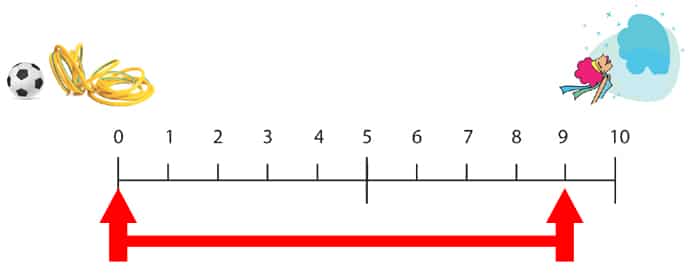
Airflow wise with both coils I found you could close it down completely and open it up to a very open airflow. With “0” on the chart below being fully closed and “10” being breathing fresh air – you had a wide range of adjustment from 0-9! The airflow is hugely versatile!
The 0.5ohm coil acted very strange with the airflow. This coil and the auto draw did not work together well at all.
Does It Leak?
With the 0.3ohm coil I got zero leaks. The pod compartment was bone dry – not even any condensation!
With the 0.5ohm coil there was slight condensation – very slight and no leaks.
Mod Performance
The firing was super quick whether you used the fire button or auto draw but it was not issue free.
The auto draw with the 0.3ohm coil was efficient whatever you set the airflow to. Some kits struggle when the airflow is fully open but no issues at all with this.
However with the 0.5ohm coil and the airflow in the mid position this was struggling to auto fire. It took a lot of sucking (oooh Matron). I closed the airflow down further and it still barely fired? Very odd.
The output was really stable, I only noticed a drop in performance on the last 2 vapes before the low battery cut off kicked in.
Battery Life
Obviously this always varies according to the power setting, coil installed and your own vape habits.
I vape pretty constantly and heavily all day so to give you a guide here are my findings…
Using the 0.3ohm coil at Low power setting – this varied a lot. The shortest time was 3.5 hours and the longest was 5.5 hours. Both times the battery lasted me 2 fills (7ml) of the pod.
Using the 0.5ohm coil at the Medium power level I got 5 hours in total and 2.5 pod fulls (8.7ml).
Pros
- Super cute and weeny!
- 0.3ohm coil flavour is absolutely epic – even on the lowest power setting!
- Clear easy to read LED lights.
- Power and airflow adjustments provided. Airflow has huge adjustment range!
- Can see all the e-liquid through the pod when it is installed on the mod.
- Compatible with 510 drip tips
- Easy to operate despite having some more advanced functions
- Auto draw or button fire and you can lock the fire button too – preventing accidental firing!
Cons
- No spare airflow rings, could be easily lost when discarding a coil. I have seen them for sale on their own on the OXVA website.
- You do have to remove the pod to adjust the airflow, but it doesn’t really move once you have set it up so it’s not a deal breaker!
- Slower charging than advertised.
- 0.5ohm coil did not seem to like auto draw firing – even with the airflow fully closed?
- Weak 0.5ohm coil – I suggest OXVA ditch this coil and put in either 2x 0.3ohm or a MTL style coil.
OXVA Origin SE – Final Review Verdict
Am really loving OXVA as a brand, so far all the devices I have used have been great.
As it stands as an MTL vaper this kit won’t be used as much which is a shame as with the 0.3ohm coil I bloody love it!
If OXVA release an 0.8ohm Unicoil the same as the coil used in the Xlim V2 I would be a happy Shelly! I would be using the Origin SE all the time then!
If you love some RDTL vaping – man just buy it – it is an absolute beauty. Small but such a pleasure to use. Easy to fill, easy to adjust, great battery life and epic flavour.
The main gripe for me is the airflow design, it could be better but at least there is some adjustment which is never a bad thing!
Also the charging is not as fast as I was expecting, the claim of 80% charge in 30 minutes did not appear to be accurate. It took 35 minutes for the light to get to the Green colour (65% or more charge). I found it took around an hour every time I charged it at 2A.
I found the 0.5ohm coil to be just OK, the flavour was only decent and the auto draw really didn’t like playing nicely with it – even with the airflow closed down? OXVA please ditch this coil from the kit and put in 2 of the excellent 0.3ohm coils or even a new MTL coil would be great.
If you are an MTL vaper like me – this kit doesn’t really offer a satisfying MTL vape in my opinion. It is suited to RDL or DTL vapers.
Have you tried the OXVA Origin SE? Let me know what you think and your experience!


Fast charging actually works if you use an adapter head.
I was using a 2A mains charging plug so I would assume that would give the correct output?