In for review is the Lost Vape Ursa Nano Art pod kit.
The Ursa family include simple pod kits such as the Ursa Baby and Ursa Nano plus more advanced pod mods such as the Ursa Pod Mod and Ursa Mini Pod.
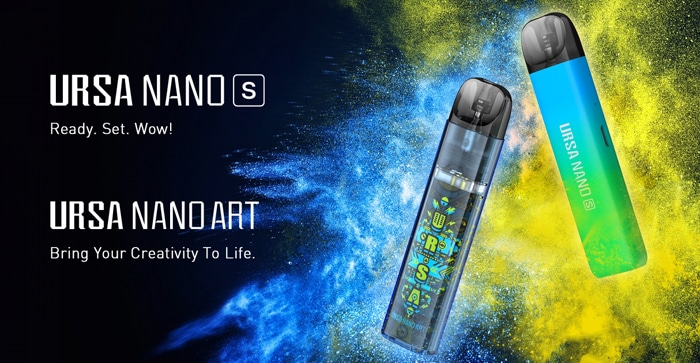
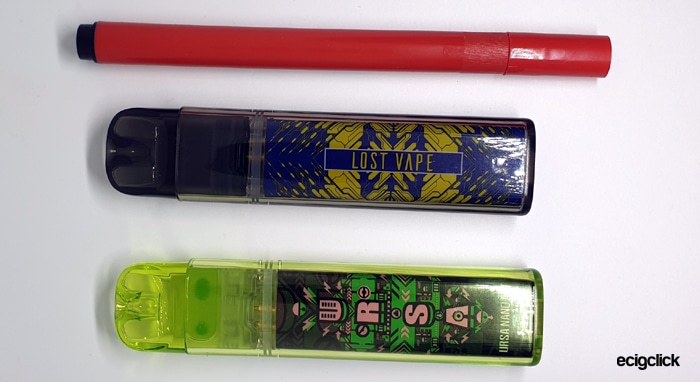
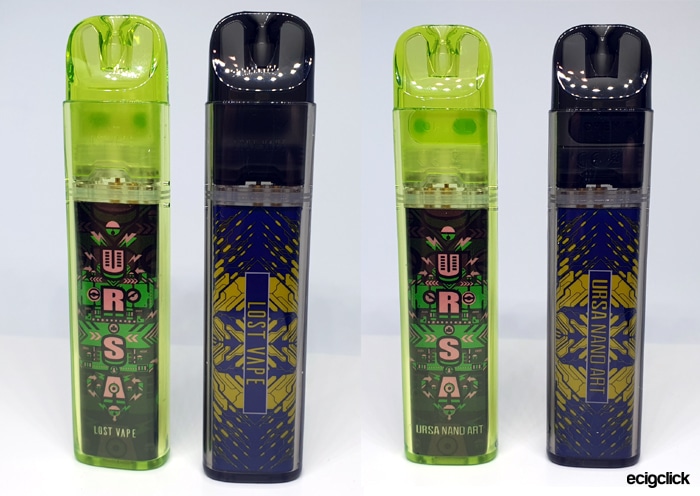
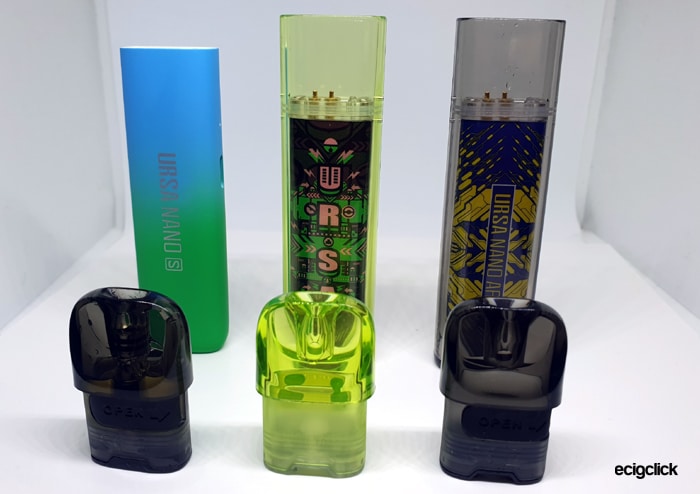
Unfortunately on the Lost Vape website they have bundled the Ursa Nano S and the Ursa Nano Art together, so am sorry if you see both in some of the images. The Ursa Nano S will be covered in a different review.
What To Expect From The Lost Vape Ursa Nano Art…
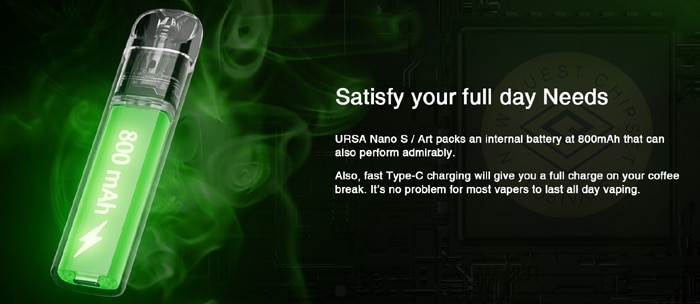
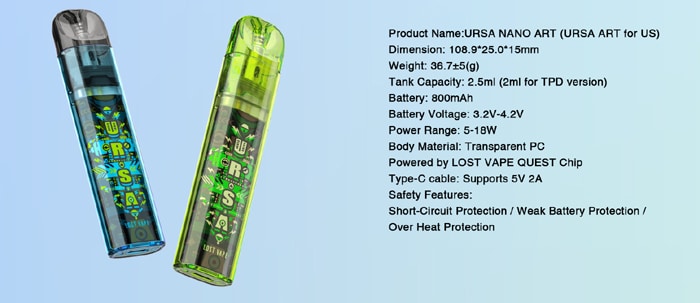
Battery wise this has an 800mAh capacity battery with a USB Type C 2A recharging facility.
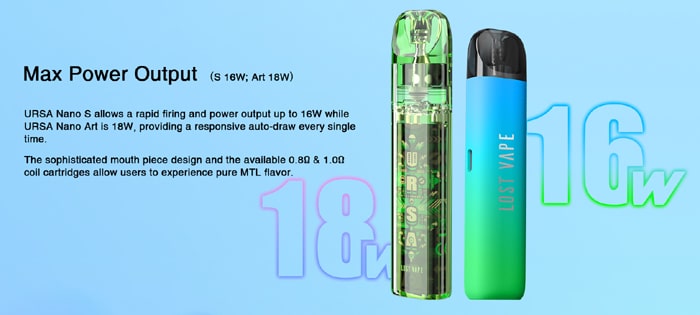
The output for the Nano Art is 5-18W. From what I can see there is no method of adjusting the output so I assume the device adjusts according to the coil installed? No confirmation of this though.
The Nano Art uses refillable and replaceable coil pods. These are compatible with the UB Mini coil range and you get the 1ohm S2 and 0.8ohm S1 coils in the kit.
There is no airflow adjustment and from what I can tell this must be auto draw as I cannot see any fire button. There is an LED indicator but according to the instructions this only alerts on low battery and fault conditions.
Here is an introduction video from the Lost Vape YouTube channel.
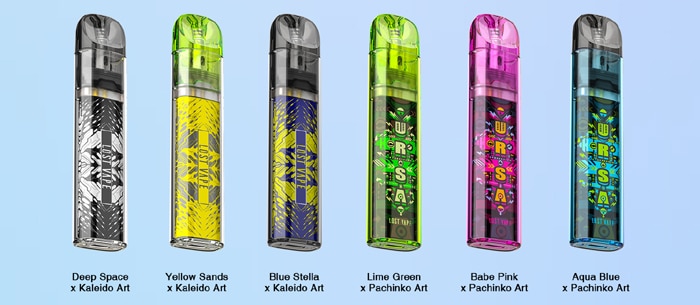
You can choose from 6 options: Deep Space X Kaleido Art, Yellow Sands X Kaleido Art, Blue Stella X Kaleido Art, Lime Green X Pachinko Art, Babe Pink X Pachinko Art and Aqua Blue X Pachinko Art.
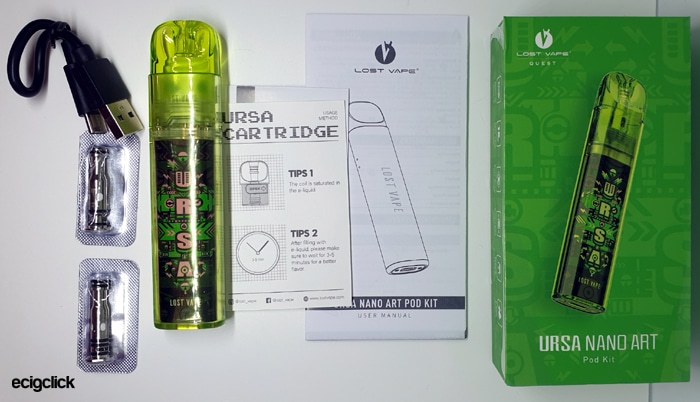
Kit Includes
- Lost Vape Ursa Nano Art device
- Empty replaceable coil Ursa pod
- 0.8ohm UB Mini S1 coil
- 1ohm UB Mini S2 coil
- USB Type C cable
- User manual
Lost Vape Ursa Nano Art Specs
- Size: 108x25x15mm
- Output: 5-18W
- Battery: 800mAh (internal)
- Display: LED indicator
- Resistance range: Not specified
- USB Type C port – 2A charge rate
- Pods: Refillable replaceable coil pods
- Compatible with UB Mini coils and URSA Nano pods
- Capacity: 2.5ml (standard) / 2ml TPD
- Side fill port
- Lost Vape Quest Chipset
Design and Build Quality
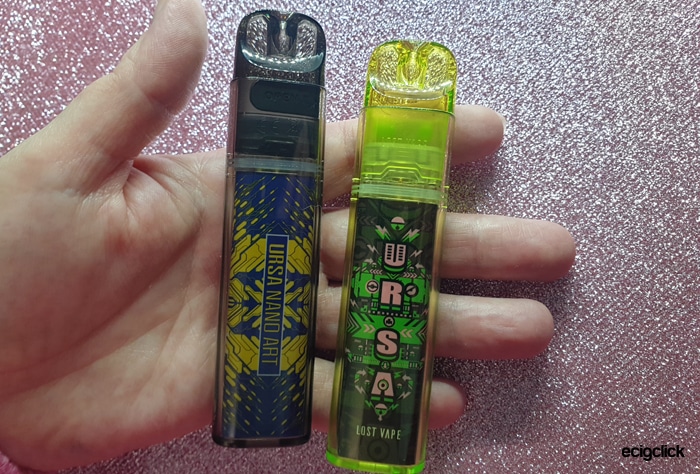
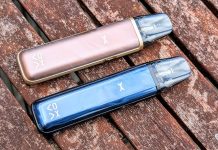
I received this in the 2.5ml Lime Green X Pachinko Art and Blue Stella X Kaleido Art versions.
Both arrived in pristine condition and well packaged.
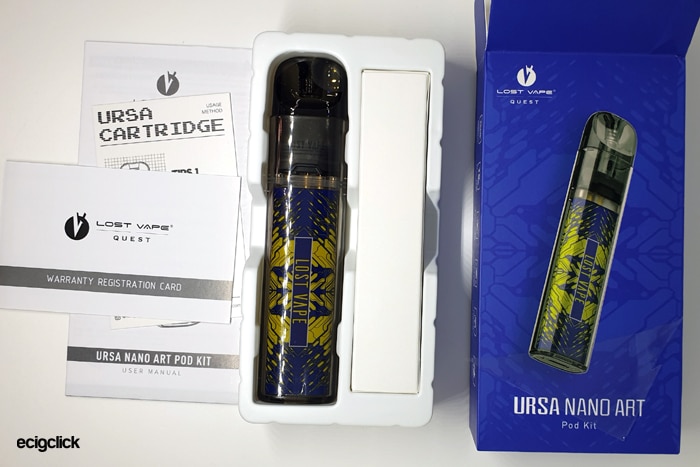
The device sits in a plastic inner tray and the coils and USB cable are housed in a small cardboard box.
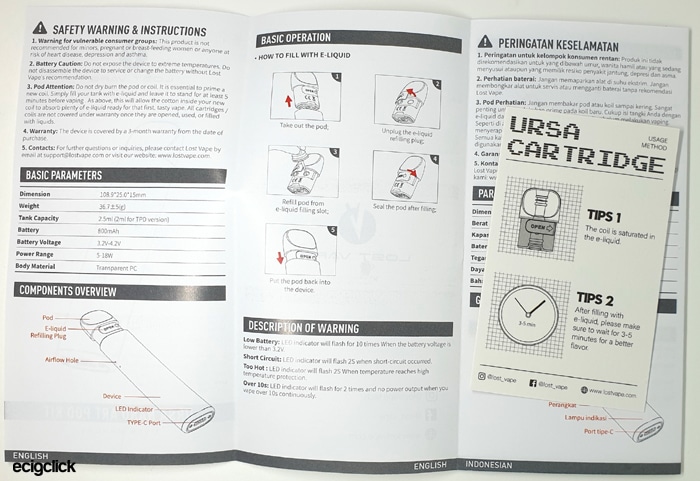
The instructions are pretty good with diagrams and plenty of info! You can also download a digital version here.
Lost Vape Ursa Nano Art Mod
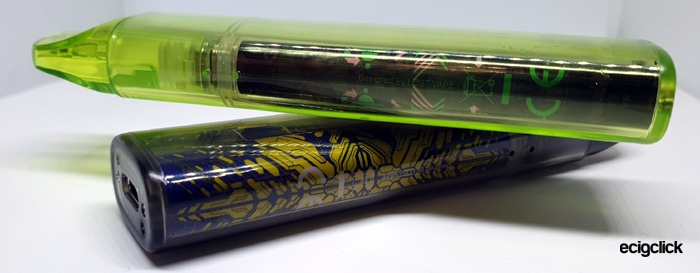
The design of these is unusual.
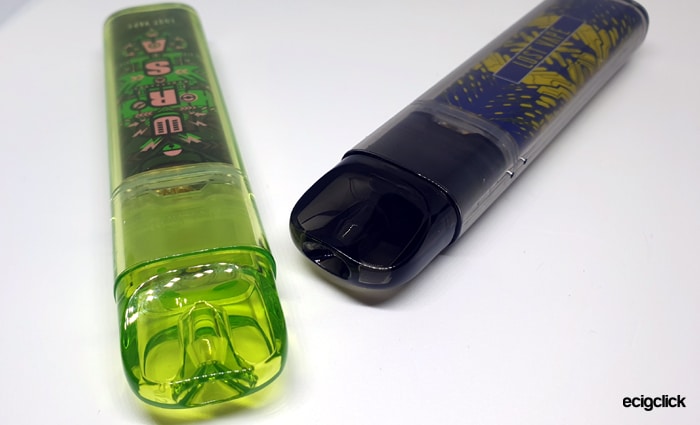
There are 2 art designs – the Pachinko which has a cartoony like vibe which is my favourite and the Kaleido art which is more like contrasting geometric symbols.
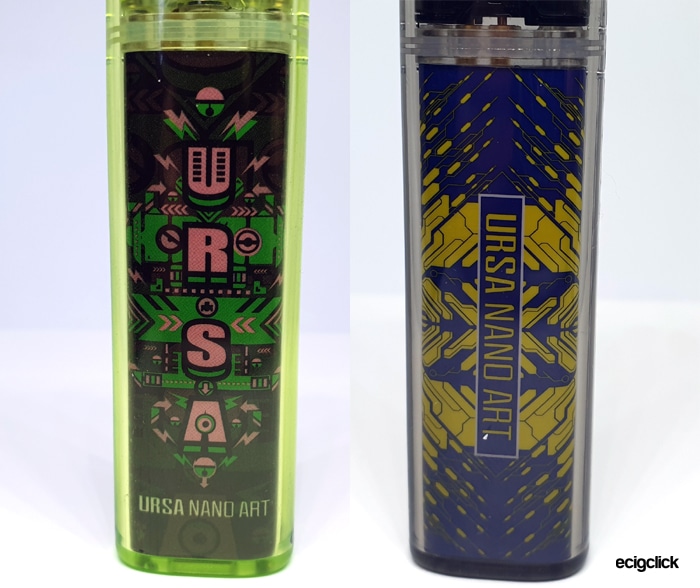
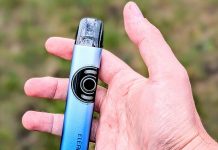
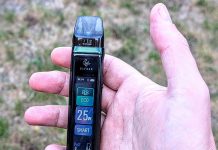
This artwork is not on the outside layer, instead the whole device is encased in a transparent tinted plastic shell which extends over the pod compartment.
I am not sure how I feel about this – it does look a bit cheap but it does feel nice in the hand and less likely to damage the artwork as it is totally encased.
All the edges are super smooth and the side seams can just about be felt but are very minimal.
One side of the device has “Ursa Nano Art” and the other “Lost Vape”.
The sides are plain apart from 2 holes which are air inlets.
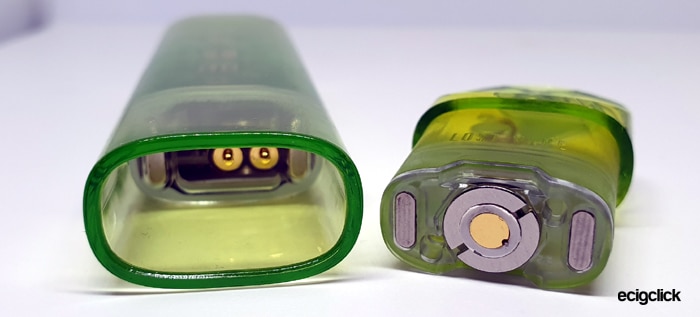
You can see clearly the pod contacts and base through the device body. Inside the pod compartment are 2 magnets and 2 spring loaded contacts. The pod is held in firmly but there is a slight wobble in all directions.
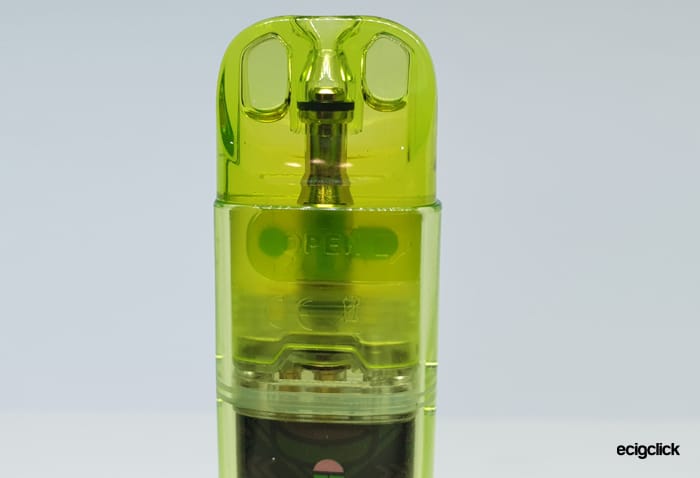
All of the pod contents are visible – so it is super easy to keep an eye on e-liquid levels. Condensation is also visible in this clear pod compartment – which is not always a great look!
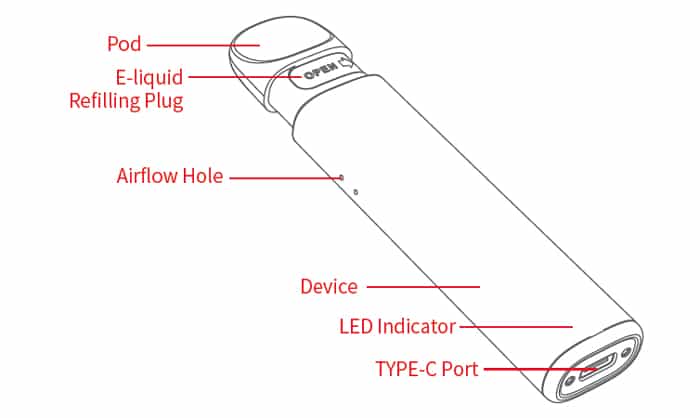
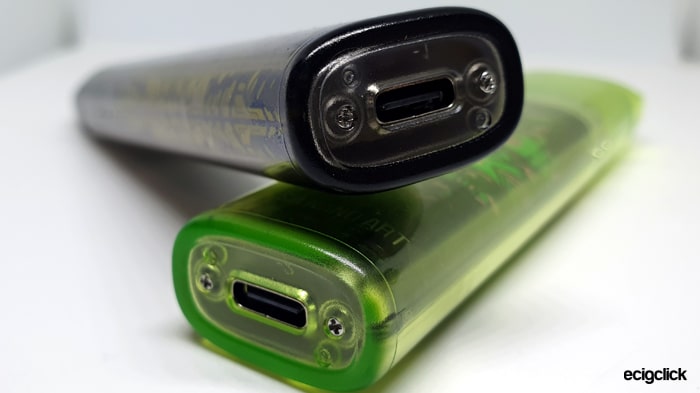
The base of the device features the USB C charging port and 2 screw heads. This will stand up on its own fine, but will obviously have to be laid down for charging.
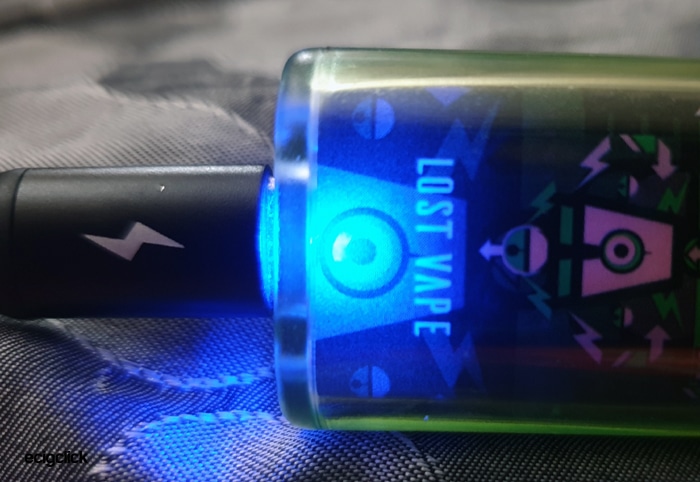
An LED indicator is provided but it is pretty much hidden, you will see a small circle on the base of the front which is where it lives. Once the LED lights up you can see it clearly. Also there is light at the base of the pod – not sure if just the shine from the main LED or if there is another LED located there?
You can use the Ursa Nano fixed coil pods in here as well – I know as I tried the pod from the Ursa Nano S and it worked perfectly. You can even swap the other way and use the UB Mini pods in the Nano S! Full marks for compatibility!
Ursa UB Mini Pod
It is worth noting – as this is a review sample – I have the 2.5ml pod. Those in TPD regulated areas will only get a 2ml pod.
This pod uses the UB Mini range of coils which are compatible with other devices. I used these pods before in the Ursa Baby Pro kit.
The pod for the Green kit was bright Green and the pod for the Blue kit was Black tinted. I am not sure if replacement pods will be offered in the same colours – you might end up buying a Black pod if you need a new one?
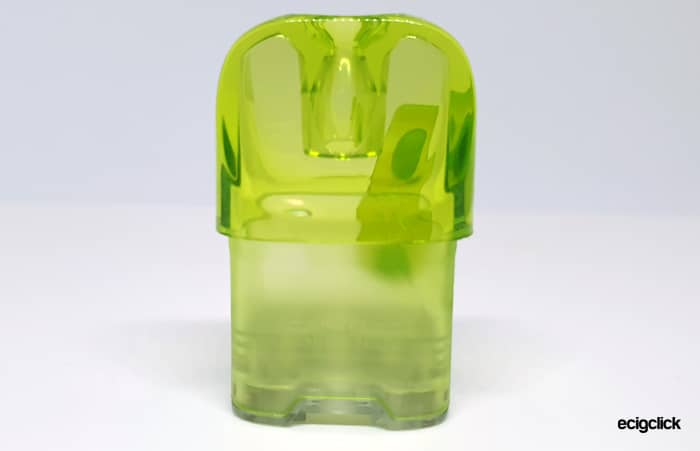
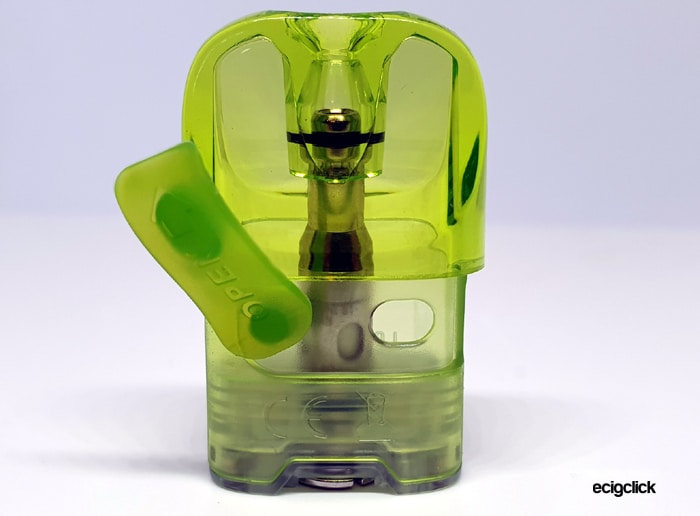
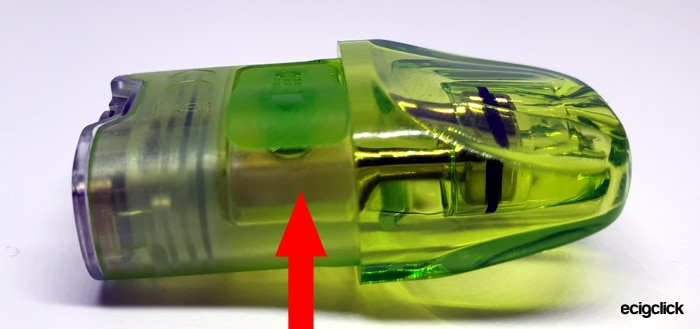
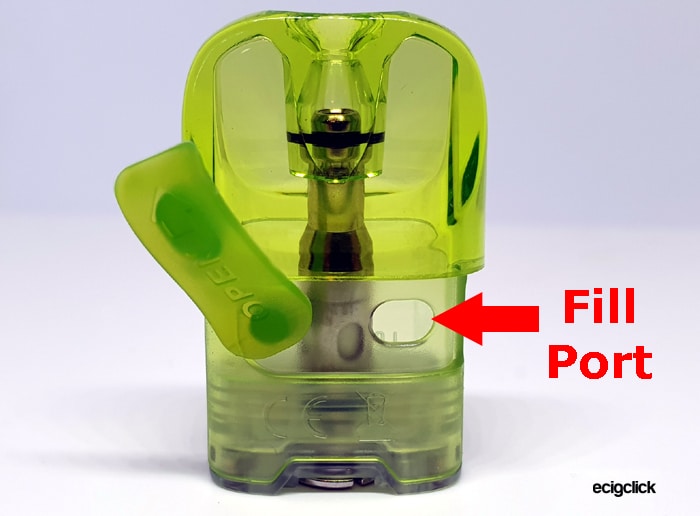
The main pod design is identical to all of the other Ursa Nano style pods, with the big horizontal fill port cover with a great thumb cut out to help lift it.
You can also swing the port cover out of the way.
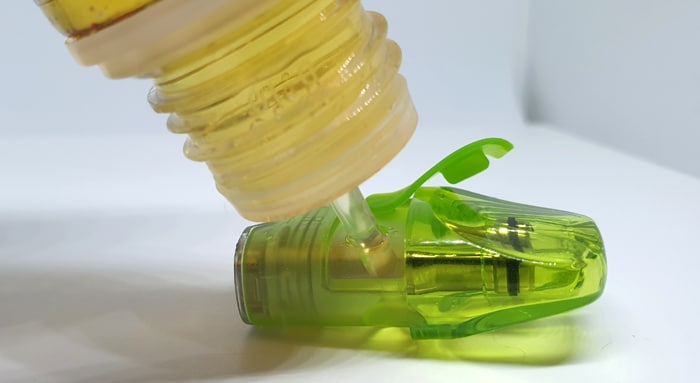
The fill port measures around 4x6mm but due to its location you do have to kind of tip the pod up at an angle to get as much e-liquid in as you can!
I had no issues with filling, you don’t get air locks due to the size of the port and all my bottle nozzles were fine.
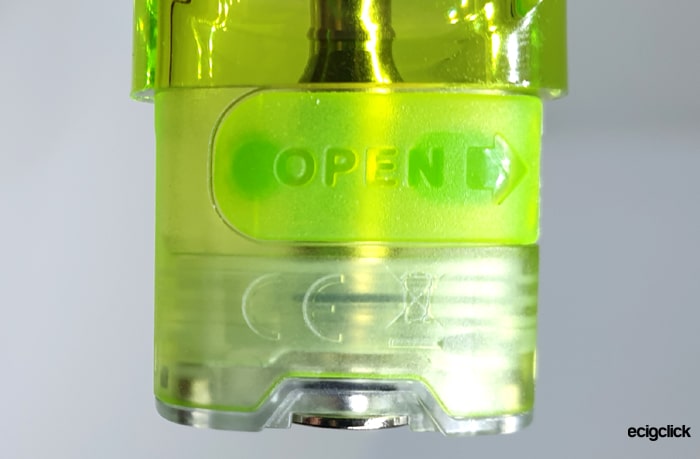
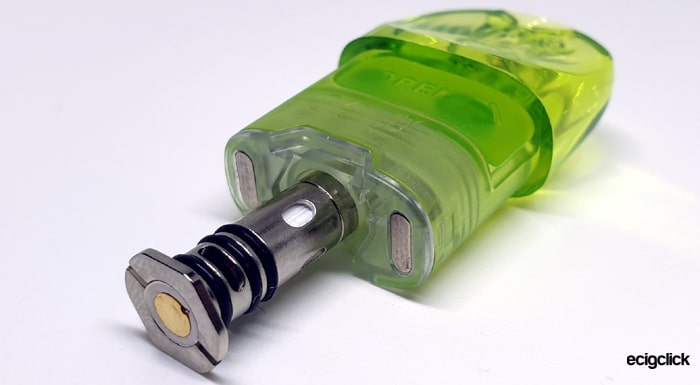
At the base of the pod are the magnets. The coil base provides the electrical contact to the device.
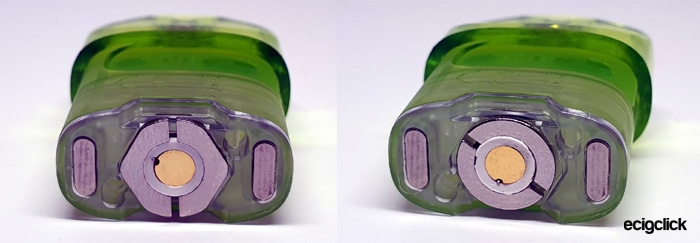
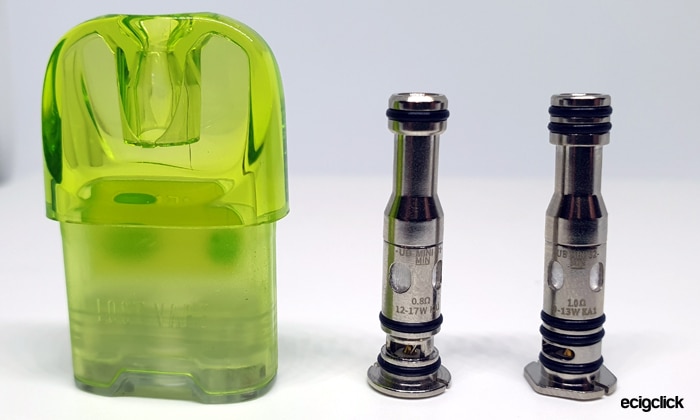
You get 2 coils in the kit and weirdly the base of each coil is different.
The 0.8ohm coil has a round base and can be installed in any direction easily.
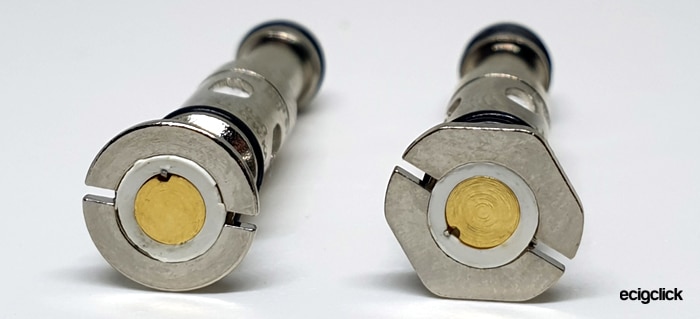
The 1ohm coil however has a sort of hexagon base and you need to carefully align the shape of the coil base with the edges on the pod. You may find you have to remove and replace the coil a few times to get it to align.
A smooth “Duck Bill” size mouthpiece makes this super comfortable to use.
Lost Vape Ursa Nano Art Quick Start Guide
The pod comes with no coil installed so you will need to choose a coil, install, fill, charge and away you go.
However never fear – I will guide you through the steps below!
Basic Operation
- Power On/Off = this has no on / off or fire button.
- Vaping = inhale on the mouthpiece to trigger the auto draw system.
- Battery indicator = this will flash 10 times when the battery needs charging.
- Battery indicator when charging = it doesn’t say on the instructions but in my experience the light goes out when fully charged.
Protections
- Low battery – LED will flash 10 times when this requires charging.
- Short circuit – LED will flash 2 S (no idea what the “S” means – perhaps 2 seconds?) – clean the pod and device contacts, replace the pod if necessary. If fault still occurs the device may be faulty.
- Over Time Protection – if you vape for longer than 10 seconds the LED will flash twice and the device will cut out. This is to prevent over heating or accidental firing. You can vape again straight after.
- Too Hot – if the device exceeds the temperature limit the LED will flash 2 S (again ?). Wait for the device to cool down.
How To Charge The Battery
The charging rate is specified as 2A.
- Using a USB type C cable connect the small end into the USB port on the mod.
- Connect the large end of the cable into a suitable USB outlet.
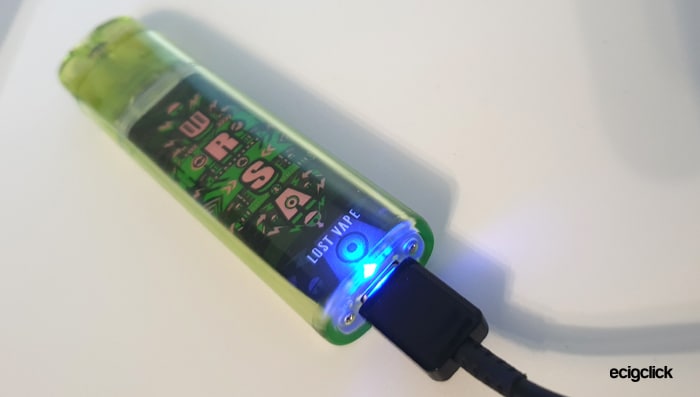
- The LED will light up Blue when charging.
- When fully charged the LED indicator will go out.
The charging time for me using a 2A charging plug/outlet was around 1 hour 15 to 1 hour 20 minutes.
How To Fill the Pod
- Remove the pod from the mod.
- Tip the pod on its side with the fill port at the top.
- Lift up and swing the fill port cover out of the way.
- Add e-liquid whilst observing the level through the pod.
- Close the fill port firmly.
- If this is the first fill or a new coil leave the pod to stand for 5-10 minutes. Take a few dummy inhales on the mouthpiece before inserting the pod into the mod to help with the e-liquid flow.
- Replace the pod in the mod.
How to Change The Coil
I would recommend emptying the pod before changing the coil as the e-liquid will spew out of the mouthpiece the second the coil is removed. Alternatively make sure there is loads of tissue around when you do this.
- Remove the pod from the mod.
- Pull out the existing coil from the pod base (if installed).
- Push a new coil into the pod base until it is fully pushed in – it will be flush with the pod base. Depending on the coil you may need to make sure it aligns correctly.
Left = 1ohm coil, Right = 0.8ohm coil - Fill the pod as described above. Leave the pod to stand for 5-10 minutes to prime the coil with e-liquid.
- Take a few dummy inhales on the mouthpiece before inserting the pod into the mod to help with the e-liquid flow.
- Insert the pod into the mod and set the correct output for the coil resistance.
How Does the Lost Vape Ursa Nano Art Perform?
I mainly used my own e-liquid mix which is 50/50 PG/VG made from IVG Bubblegum Concentrate at 20% ratio. This is quite high a flavour ratio as I prefer plenty of flavour, but sadly this means it can be a coil killer sometimes.
I add nic salt to approx 6mg strength.
If any of these terms are over your head – have a read of our handy guides below!
- MTL V DTL – A Guide To Vape Styles
- VG and PG in E-liquid – all you need to know
- Beginners guide to E-liquid
- Nic Salt E-liquid
0.8ohm UB Mini S1 Coil
I used this coil on the Ursa Baby Pro and really did not like it. There was a cottony taste which would not go away.
So far I have refilled this 7 times and although slightly better, that taste is still lingering. Unfortunately I had to persevere with it to get a battery charge time! I know I am a trooper lol!
I find it quite unpleasant!
If I was to keep using this kit I would ditch this coil completely and use the fixed coil (disposable) Ursa Nano 0.8ohm pod which I absolutely loved in the Ursa Nano S. It is far superior and quite frankly amazing.
1ohm UB Mini S1 Coil
This is way better than the 0.8ohm coil – no yukky taste – yay!
I am finding this a very “gentle” vape – quite cool and soft. After the 3rd fill the flavour really started pumping and was great.
The cool vape is not for me, if it was slightly warmer this coil could be a 10/10!
However where this coil will shine is with high nicotine strengths. I only use 6mg so this was quiet a weak inhale for me. But with for instance 20mg nic or above you want it smooth and gentle and this coil would be ideal.
Airflow
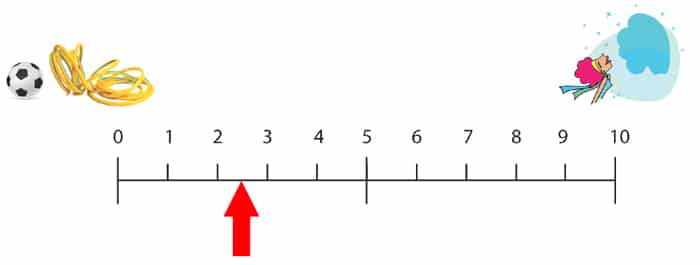
Both coils give a great MTL airflow which requires a decent amount of suction to trigger the auto fire.
I would say in numerical terms – 0 being fully closed and 10 being breathing fresh air – this is roughly a 2.5.
In comparison to the OXVA Xlim – this is equivalent of having the airflow slider fully open – which is still a restricted MTL vape.
If you are a RDL (Restricted Direct Lung) vaper I think you would find this airflow too tight.
Mod Performance
I had no issues with the mod at all, it charged and fired as you would expect.
The auto draw was reliable and responsive.
I did find the lack of battery charge remaining indication was pretty annoying, but you can also tell about 30 vapes before it conks out as the vape is very weak by this point.
Leaks
I got no leaks at all in use, but after using the Ursa Baby Pro I suggest you firmly push the fill port cover closed after filling. On that device I did get leaks from the fill port.
So on this kit I made sure to close the port firmly and so far so good!
Due to the clear nature of the pod compartment you can see all the condensation collecting which is not the nicest of things to see!
Battery Life
This is obviously only a guide as all our vaping habits vary.
With the 0.8ohm coil I got around 5.5 hours of vaping to one charge.
With the 1ohm coil this time varied quite a lot, I got between 7 and 9 hours of vaping with one charge.
Pros
- Inexpensive disposable vape upgrade!
- Super compatibility – able to use UB Mini coils and Ursa Nano fixed coil pods.
- Very smooth in the hand
- Love the Pachinko art!
- Easy to use with great instructions
- Excellent kit contents – 2 coils and USB Cable
- Can view the full pod contents easily
- 1ohm coil very gentle with great flavour – ideal for high nicotine strengths
- Great battery life with 1ohm coil – 7 to 9 hours
- Perfect MTL airflow
- No leaks
Cons
- The plastic casing around the pod port does make this look a bit cheap to me (subjective)
- Am not a fan of the Kaleido art (again subjective)
- No battery charge indicator
- 0.8ohm coil has odd flavour
- Slow charging at 1 hour 20 mins
- Condensation does collect in the transparent pod compartment which is always in view
Final Review Verdict
There have been a few points dropped for various reasons.
Build quality wise the wobbly pod dropped a few marks as did the lack of LED battery charge remaining indication.
Ease of use wise – this is pretty easy to use, but the instructions omit information on charging. If you are a new vaper or transitioning from disposables this info needs to be provided. Saying that – the instructions are way better than the Ursa Nano S.
I also have to bear in mind how inexpensive this kit is, the contents are pretty generous with 2 coils and USB cable despite the low price.
The 1ohm coil felt a bit weak for me but would be ideal for those who require higher nicotine strengths as this should be pretty smooth. Thankfully the flavour really ramped up after around 3 fills and was still going strong at the 7th fill!
Personally I am still not sold on the 0.8ohm S1 UB Mini coil. I hated it in the Ursa Baby Pro and this time was only slightly better but that background “cottony” taste still persisted.
If I was Lost Vape I would remove this coil from the kit completely. The Ursa fixed coil 0.8ohm pod is way superior and I would replace the coil with that. Plus it would show how versatile the kit is with replaceable coils or fixed coil pod options.
As it stands I would use this kit regularly with the fixed coil pods. With the included coils it would be resigned to a shelf.
