Introducing the Koopor Mini manufactured by Koopor Shenzhen in China. The Koopor is a compact 60 Watt device with included temperature control.
Manufactured from stainless steel and zinc alloy the Koopor is a small but highly durable device with a very appealing form factor.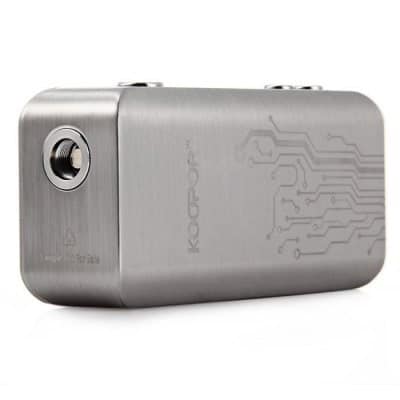
Kooper Mini Specifications
- Stainless steel and zinc alloy construction.
- VW and Temperature Control Mod.
- Temp control range: 200°F-600°F (100°C-315°C).
- Wattage Range: 1-60 Watts.
- Output voltage: 0.8V-9.0V.
- Resistance range in VW: 0.1 Ohms- 2.0 Ohms.
- Resistance range in TC: 0.06 Ohms- 2.0 Ohms.
- DC-DC Flat Signal.
- Spring-loaded connector and stainless steel threads.
- Replaceable 18650 Battery (Not Included).
- Magnetic back cover.
- Micro USB port for firmware upgrades only not for charging.
- Dimensions: 83.8mm (H), 41mm (W), 24.5mm (D).
- Weight: 120g.
- Multiple safety features.
Kooper Mini Box Contents
- 1x Koopor Mini.
- 1x Authenticity Card.
- 1x User Manual.
- 1x Micro USB Charging Cable.
- 1x Orange silicon sleeve. (Was included with the review sample item but I am uncertain if it comes with the production models.)
Everything is presented in an orange and white eye catching box with a solid foam inlay.
Kooper Mini Styling
I have to say I really do like the overall looks of this device with its brushed steel finish. On one side of the mod is an engraved circuit board pattern and above that you have the name “Koopor” etched.
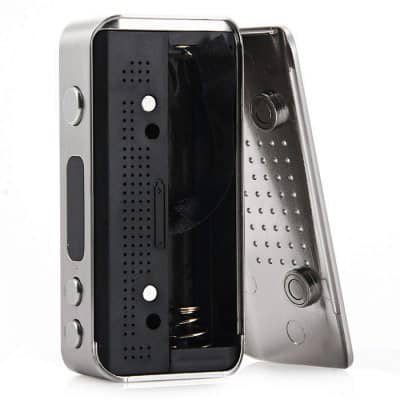
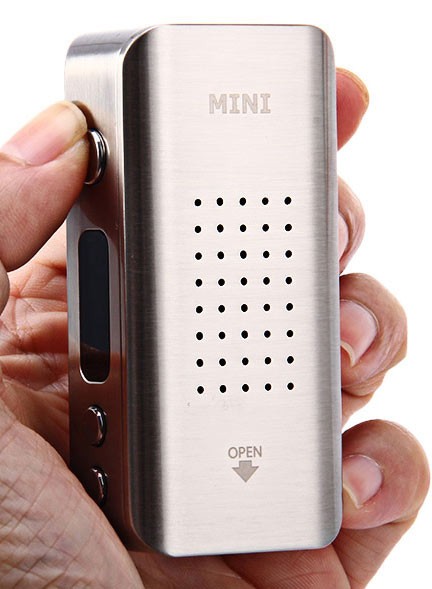
On the reverse side which is the battery compartment lid the device name “Mini” is engraved and beneath that you have forty venting holes for the battery. The battery lid itself is magnetic and slides out.
It is a very good fit featuring strong magnets and it is wobble free. The device takes a single 18650 battery and the nice thing is it is inserted with the positive facing up unlike a lot of single 18650 devices of late. There is also a battery ribbon in there to ease with removal.
The base of the device features a Micro USB port but it is important to note that it is for firmware updates only. In fact it has this written on the device next to the port since batteries must be charged externally.
The base also features eight more battery venting holes so you can be certain that you’re battery shouldn’t ever overheat.
At the top of the mod is the 510 connector which is spring loaded and featuring durable stainless steel threads. All of my sub ohm tanks and drippers sat flush with the device.
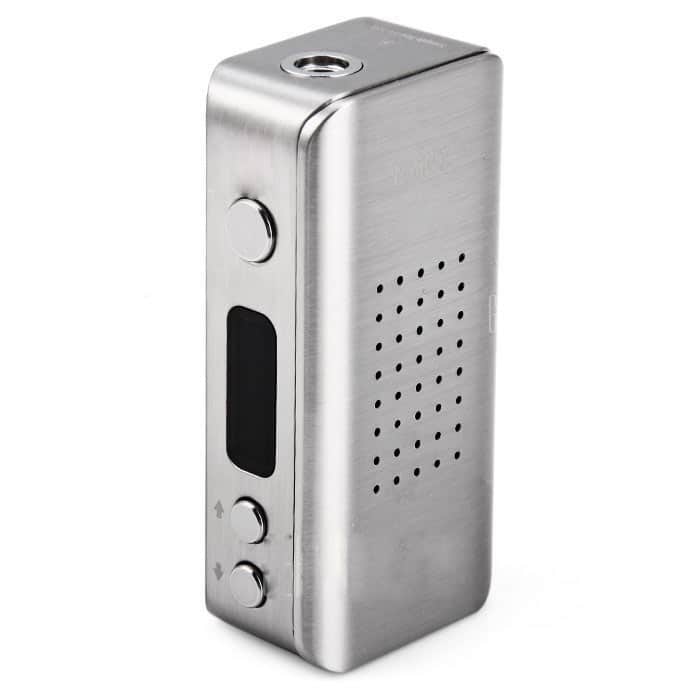
Along the front side of the device is the main fire button which does rattle a fair bit. However if you fit the silicon sleeve it is rattle free but in my opinion Koopor should tighten it up. The plus and minus buttons have no issues.
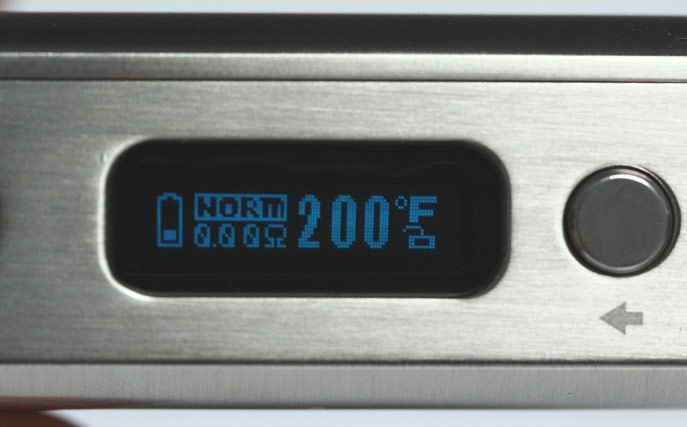
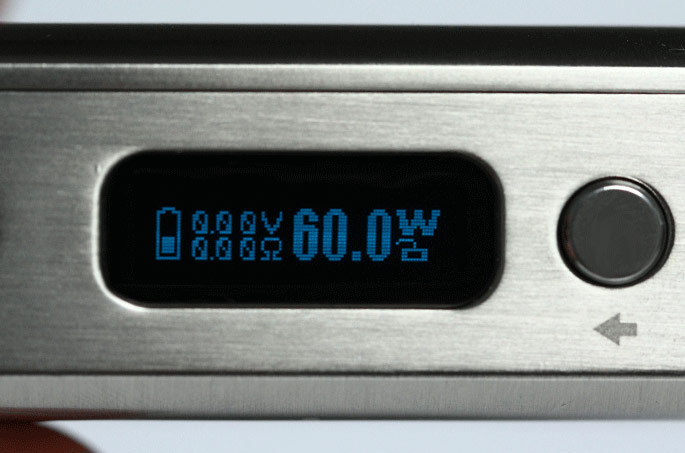
The display itself is bright and all information is suitably shown from temperature/wattage (mode dependent), battery charge and the coil resistance.
In addition it also shows whether you are using soft, normal or hard mode. This feature is something that devices such as the SX Mini M Class and the Smok XCube II include. What it does is let you increase or decrease the initial vape by 10%.
So if you set the device to “hard” and you are running at 40W for the first few seconds you will get 44W before it drops back down to 40W. The “soft” mode is the exact opposite so at 40W you would get 36W. If you don’t care for either of these modes you can simply set it to “normal” mode.
How Does The Kooper Mini Perform?
This device is a solid performer so don’t let its compact size fool you. Having 60W of power in such a small device is extremely useful as is the ability for it to run temperature control up to 600°F/315°C.
You are prompted with the “new coil up, same down” message when you screw on a new atomizer as is typical with most of these devices. For a new atomizer you press “up” using the plus button, for the same coil “down” minus button.
Apparently the device performs checks on the coil resistance frequently to determine if any changes have occurred. I have read from various sources that sometimes the device prompts you when coming out of standby mode but in the time I have spent using it that only seems to occur when you power on the device.
I know there is an issue when changing atomizers because it sometimes won’t let you fire a new tank or dripper but this is easily solved by holding down both the fire button itself and either the plus or the minus key so the device registers the new coil.
The menu itself features everything you could possibly want ranging from wattage/temperature mode, puff counter to soft/normal/hard mode as well as being able to flip the screen display and more besides.
One thing you do need to be aware of when using temperature control is that there is a feature on the device called TCR (Temperature Control Resistance), the default setting for Nickel is incorrect and you need to adjust it to 0.0060. Once you have that adjusted it should remain in the memory.
The Koopor also features titanium coil functionality if that is something you would like to explore.
You cannot alter the wattage while in temperature control unlike some other devices so what you have to do is choose your desired wattage first then switch into temperature control.
When using my Herakles with a Ni200 coil I set the wattage to 40W which is my preference then change mode to temperature control. I find 260°C with the “hard” option enabled to make for a very satisfying vape.
I should have mentioned earlier that the menu itself does take some getting used to. Every function has a specific icon that is detailed in the manual but it isn’t very well explained and some of it doesn’t make perfect sense most likely due to the translation from the original Chinese.
You have to be prepared to have a little patience and learn what things do but certainly this device it isn’t as immediately user friendly as others. Having said that once you know how it all works it is great and I don’t find the menu that bad now but I do think Koopor could have made it a little more straightforward.
Three clicks of the fire button gets you into the menu and then by pressing the fire button or the plus and minus keys you can cycle though all the functions. Once you have a function you want to alter you just pause for a second and then it will open a sub menu so you can make changes.
Bear in mind if you aren’t quick enough it will close the menu which some people will find annoying. The icons and the functions they represent aren’t very apparent initially and like I said it does take getting used to.
The wattage can be locked/unlocked by holding the plus and minus buttons down simultaneously. The device can also be locked/unlocked by clicking the fire button five times. To completely shut down the device you need to go into the menu and select the power icon.
Allegedly the Koopor is supposed to feature Bluetooth 4.0 connectivity but my smartphone is not compatible with it anyway. I have not come across this feature with the review/sample item so maybe it is something reserved for the final production models.
Is it worth it?
The Koopor Mini represents very good value for money. It is certainly well built about from the slightly loose fire button but importantly the button does work without issues.
This device is certainly an interesting choice if it appeals to you but I think the menu makes it a little less friendly to newcomers. I find that I rather like it myself despite its minor quirks because the small size is excellent.
Final Kooper Mini Review Verdict
In my opinion the Koopor Mini is a lovely compact 60W device with fully functional temperature control. It has a nice weight to it and feels good in the hand. The only downside is a somewhat rattly fire button when the silicon sleeve isn’t used and a menu that does take some getting used to.
Pros
- Compact and durable 60W device.
- Good value for money.
- Temperature control works without issue but the TCR default needs to be adjusted for correct operation.
- Battery door has very strong magnets and is wobble free.
- Excellent small form factor.
- Large amount of venting and numerous safety features.
Cons
- Menu takes some getting used to.
- Menu options must be selected very quickly.
- Atomizer coil resistance needs to be confirmed on some occasions.
- Fire button is loose and rattles.
- Battery cannot be charged via Micro USB port. (Personally I don’t see this as a con because charging batteries externally is safer).


I got one of these today. Can’t find the android app for it. Also how long the battery should take to fully charge with 2.4A charger?
What tank coil etc should I get for this? Not sure. Sub Ohm mid wattage. What works with temperature control?
Hey Donald,
If you are new to TC it would be worth taking a quick look at our temperature control guide to get a general overview.
In short, only use Ni200, Ti, Stainless Steel coils for temp control. Kanthal coils are not to be used in TC settings.
Stainless Steel can be used in both Wattage and TC mode.
Ni200 and Titanium coils are NOT to be used in wattage/power mode.
Many tanks nowadays offer both coil options so you can swap and change between wire types.
For sub ohm vaping (with standard coils) the lowest resistance you would want to go to with 60W max power would be 0.3Ohm. The coils from each manufacturer normally give an ideal wattage range so be sure to check out what they recommend.
As for a sub ohm TC tank. Take a look at the following. good performers and have TC coils available.
Aspire Cleito with SS 316L Coil (If you want to use in TC)
Geekvape Eagle Tank – This is a little different but provides ‘disposable’ rebuildable heads. you can just add cotton if you want for extra life or just replace. Again, lots of coil head options but for TC look at the specific TC compatible coils.
Freemax Starre Pro – Another good performer for temp control.
Have a look at the above, any questions please ask.
Thanks
Jonny
Good mod. Convenient and reliable. I am using it still
Lovely little device, don’t own one but would love one in black, have tried my friends after trying the koopor plus and deciding its far too big for me really.