The Innokin Sceptre pod kit is a funky looking pod kit from (in my opinion) the king of starter kit brands!
The device is apparently designed for MTL (Mouth to Lung) and RDL (Restricted Direct to Lung) vaping styles.
We tell you more about these terms in our Guide to MTL and DTL.
Scroll down to the bottom of the review for the update as to how these kits are performing after being used for 6 months – heavily!
What To Expect From Innokin Sceptre Pod Kit…
So the main components are the device and the removable pod.
The device contains a 1400mAh battery and you charge this via the Micro USB port.
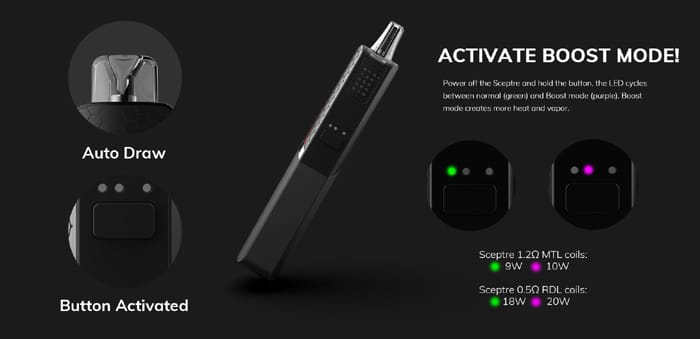
You can select from two output levels – “Standard” and “Boost” and the actual output varies depending on which coil is installed:
- 1.2ohm coil – Standard = 9W, Boost = 10W
- 0.5ohm coil – Standard = 18W, Boost = 20W
To vape you can either just inhale to trigger the automatic airflow sensor or press the fire button.
The LED indicators display the battery level remaining and the power level selected.
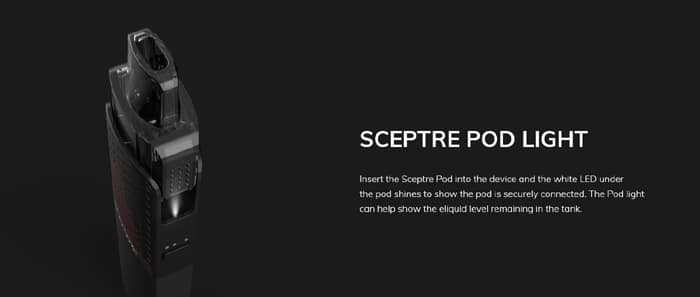
A light is also provided to view the liquid level in the pod when you press fire or install the pod.
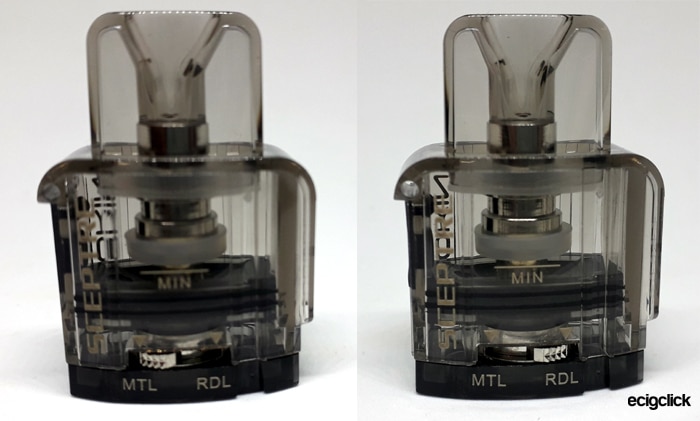
You can select from two different airflow options to suit your preference – the MTL (Mouth To Lung) setting gives a tighter airflow and the RDL (Restricted Direct To Lung) is a looser airflow.
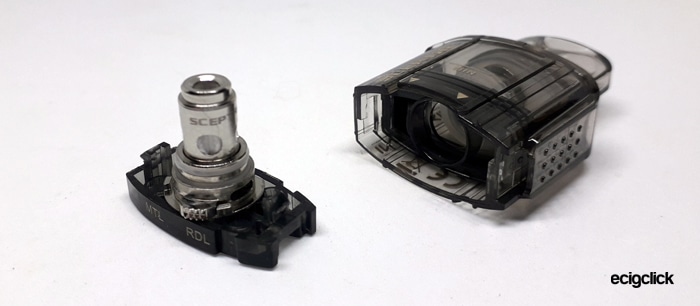
The pod is refillable via the side fill port and the coil is replaceable. Choose the coil to suit your vaping style…
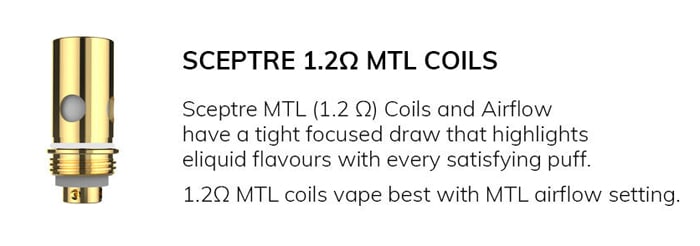
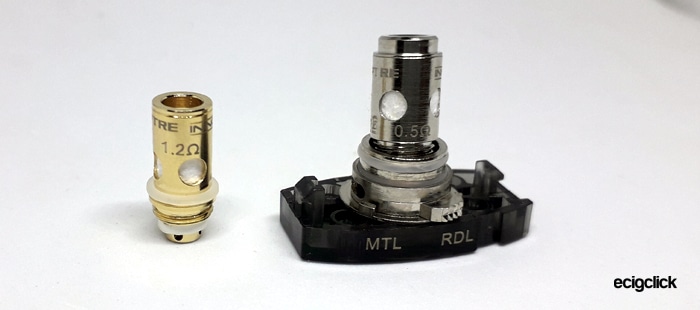
For MTL vapers the Innokin Sceptre 1.2ohm MTL coil is provided and the airflow switch on the side of the pod can be set to the MTL position to restrict the airflow the most.
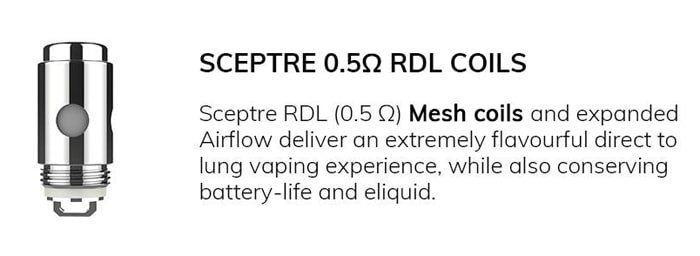
For RDL Vapers the Sceptre 0.5ohm RDL coil is provided and set the airflow switch to the RDL setting.
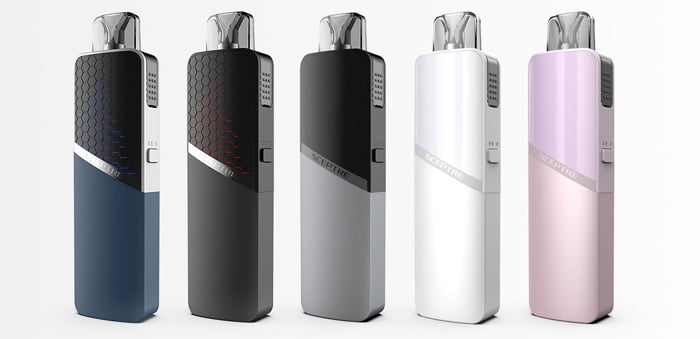
There are 5 colours to choose from: Blue, Black, Grey, White and Pink.
As usual I will report back honestly on my findings of the kit I have been supplied.
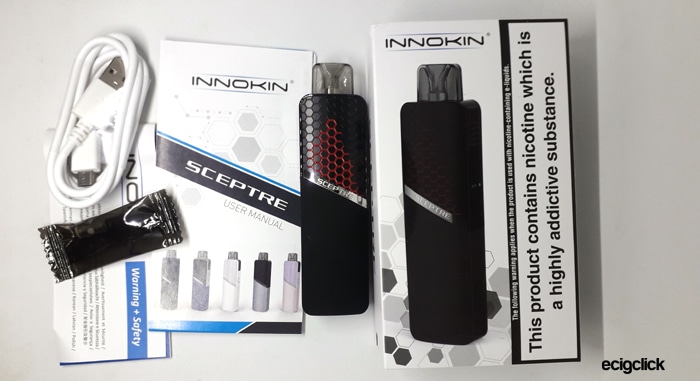
Inside the Box
- Innokin Sceptre device
- Pod
- 1.2ohm coil (installed)
- 0.5ohm coil
- Micro USB cable
- User manual
Innokin Sceptre Pod Kit Specs
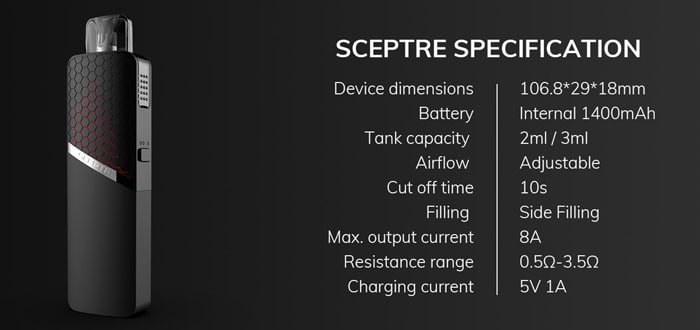
- Size: 106.8x29x18mm
- Output: 9 or 10W (1.2ohm coil) / 18 or 20W (0.5ohm coil)
- Battery: 1400mAh (internal)
- Display: LED indicators plus pod light
- Resistance range: 0.5-3.5ohm
- E-liquid capacity: 3ml (Standard) / 2ml (TPD)
- Pods: Refillable, replaceable coil
- Coil options: Sceptre 1.2ohm or 0.5ohm Mesh coils
- 2 airflow options
- Auto draw or button fire
- Side fill port
- Micro USB port with 1A charge rate
Design and Build Quality
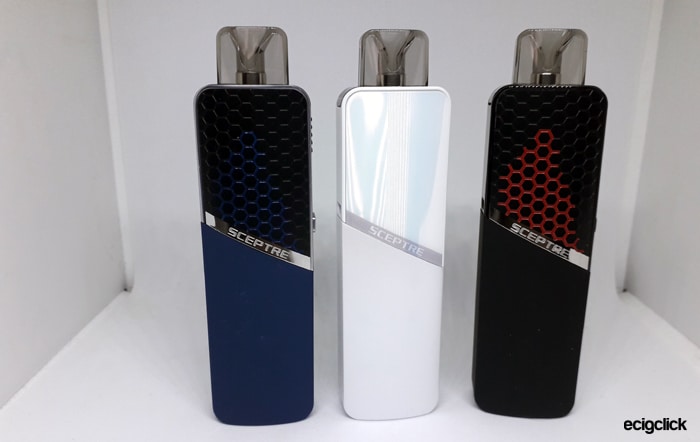
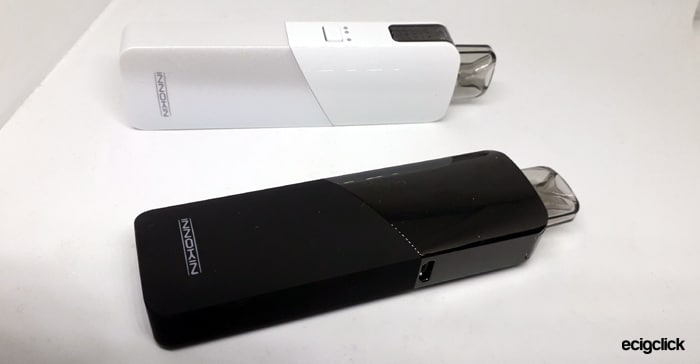
I received the Innokin Sceptre Kit in the Black, White and Blue colours.
I have to admit I also had 2 prototype versions a few months ago in the blue – and to be honest I don’t think much has changed from them to the new versions I have now.
Innokin Sceptre Mod
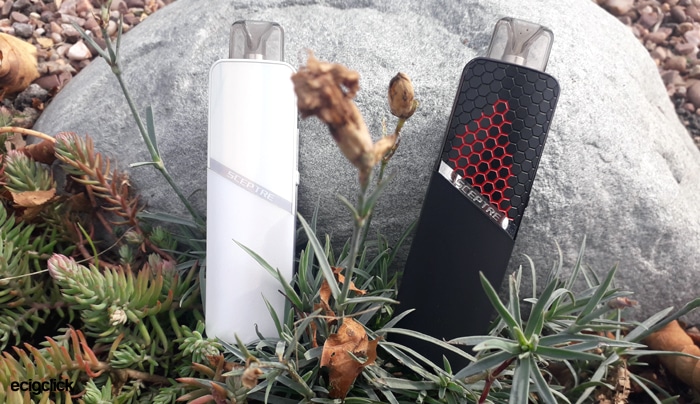
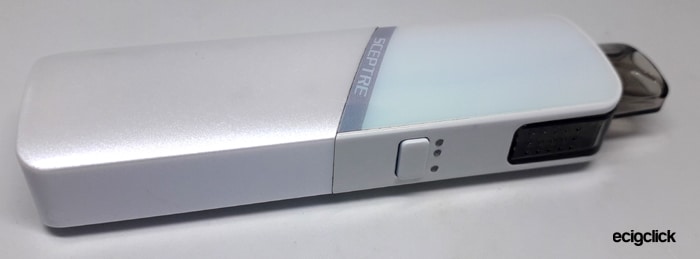
The design is very pretty – especially on the white version I received.
I would love the pink one – but I didn’t get that!
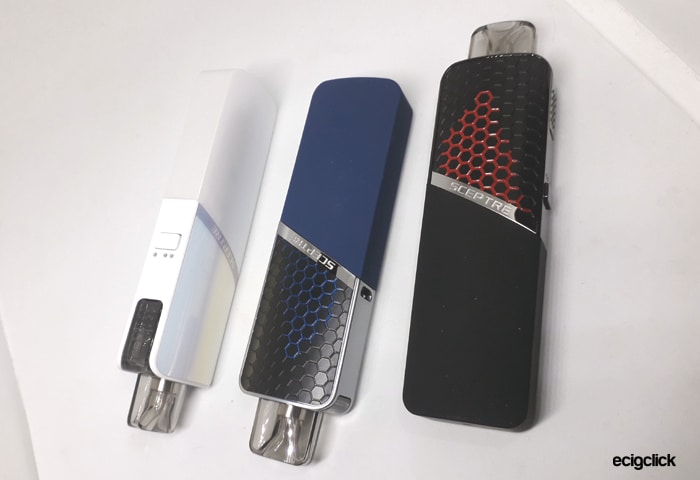
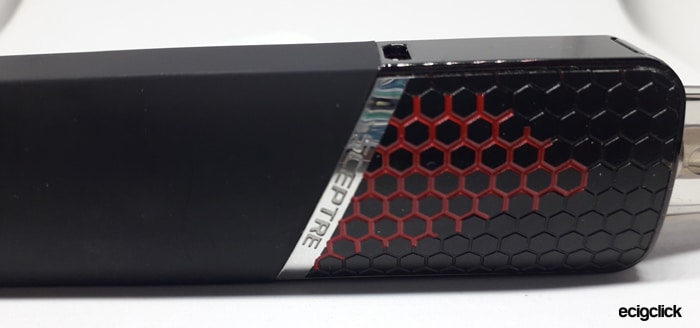
On the Black and Blue version there is a honeycomb pattern on the front which is nice but it is slightly spoiled by a glob of colour which just seems to be pretty random.
In fact the colour accent on the honeycomb makes it look like some of the paint has chipped off the mod.
The smooth body on the white device is beautiful, the Black and Blue versions have a rubbery feel to the bottom part of the device.
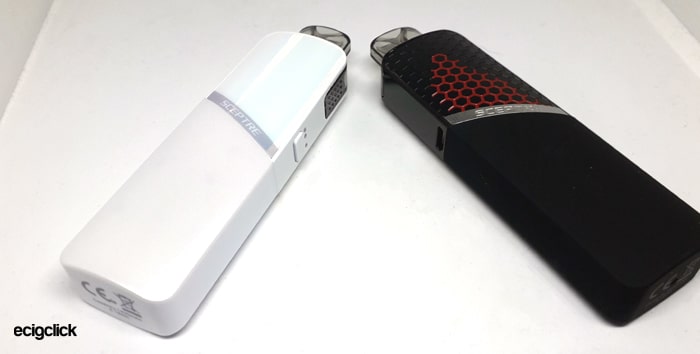
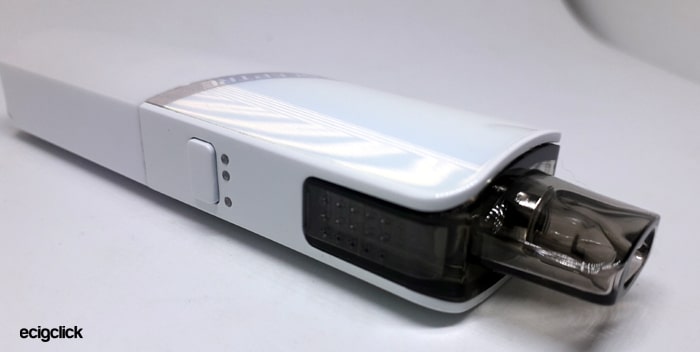
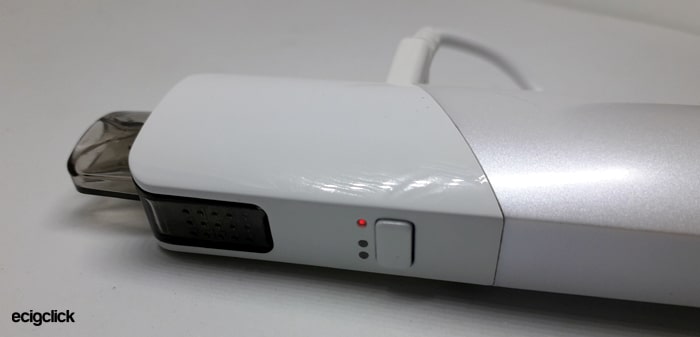
Having the fire button on the side of the device can feel a bit weird.
It is awkward to press when vaping as you have to hold the device with the mouthpiece horizontal, you also cannot see the LED indicators when vaping.
The fire button position also caught me out a few times when I was carrying the device – it is very easy to accidentally trigger the fire.
The branding is quite minimal – with the Innokin logo on the rear and the Sceptre logo on the front diagonal “slash”.
On the base are the required legal logos and the battery capacity text.
Above the fire button are the LED indicators, 2 for power level and 1 for battery level. These are clear to see but not easy to see whilst vaping.
So you might find yourself just tapping the fire button to see the status.
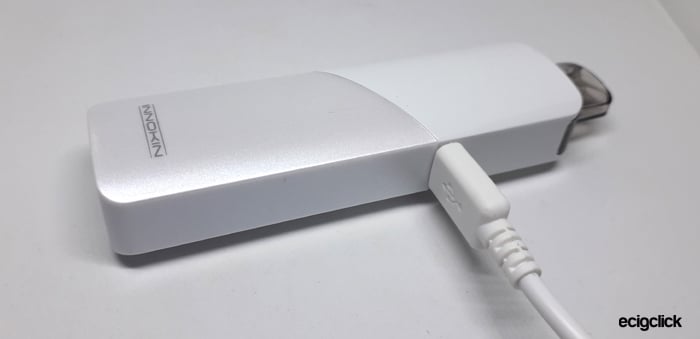
The opposite side to the fire button houses the micro USB port which I have had no issues with at all.
With the USB port location plus the fact it doesn’t stand up very stably you will find yourself lying the pod down when charging or not in use.
I do think a Lanyard would be a nice inclusion in this kit.
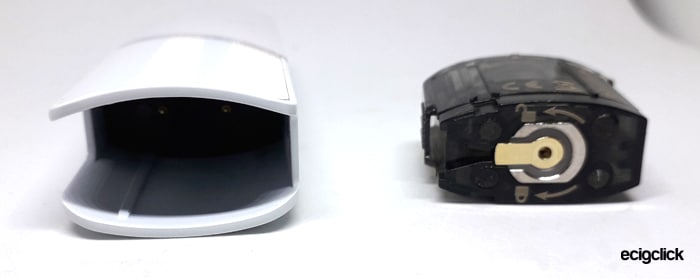
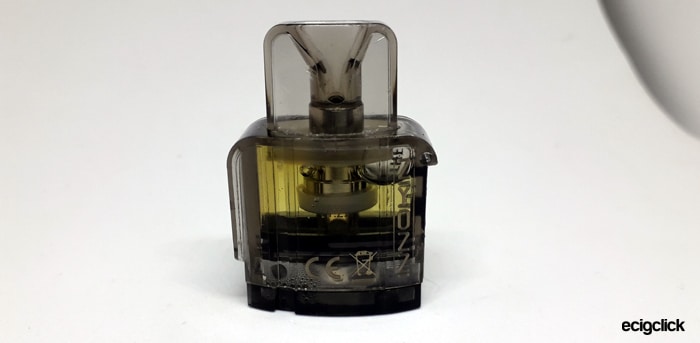
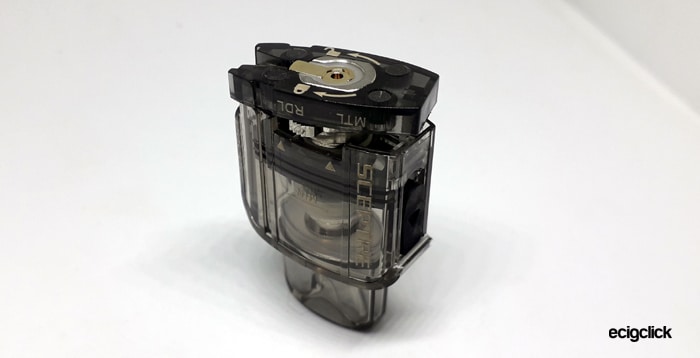
Innokin Sceptre Pod
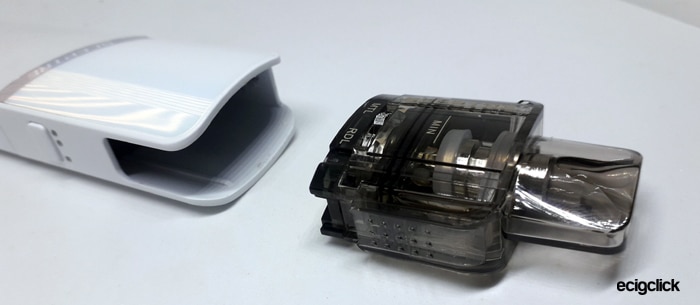
The pod is held magnetically into the battery and there is a slight wiggle to it, but only if you move it by hand, it doesn’t flop about in normal use.
There is only one way to install the pod – it will not even attempt to enter the housing if the wrong way around.
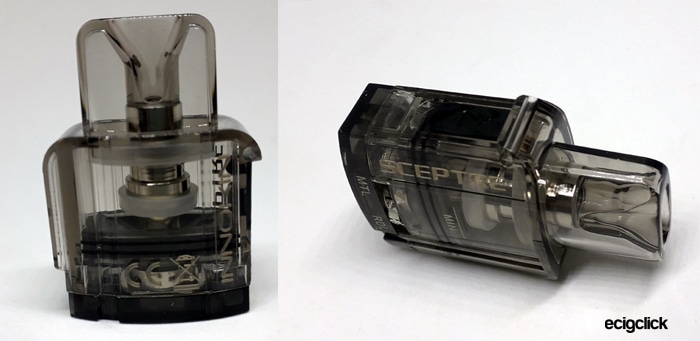
The pod itself is very clear and you can easily see the liquid level.
When the pod is installed – the pod light allows you to just about see the e-liquid level at the side of the pod but most of the pod is obscured by the mod body.
The horizontal mouthpiece is lovely to vape on but does make the mod sit in a weird position when vaping.
It is easy to adjust the airflow setting with the slide switch although the text on the pod is a bit small to read easily.
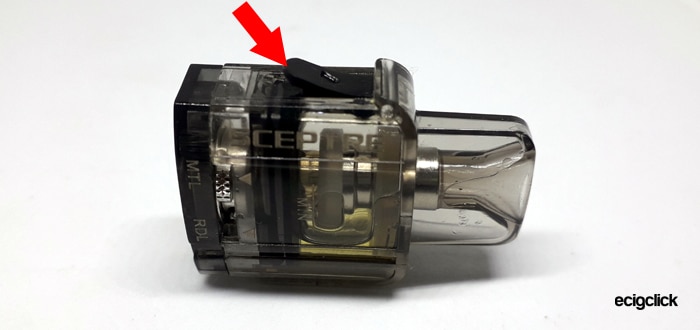
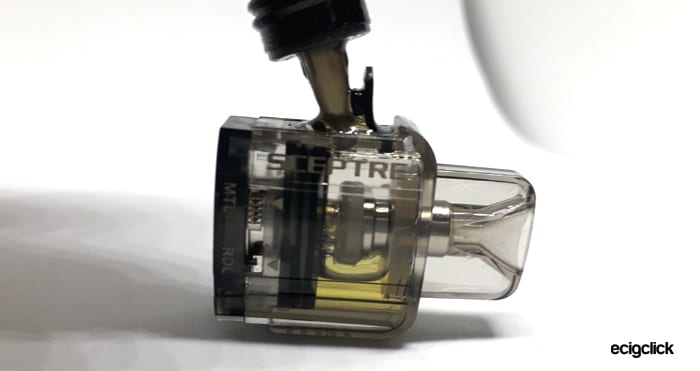
A refill port is located on the side of the pod it is quite small, I had no issues with 10ml bottles but larger nozzles may struggle to fit. It is a bit fiddly to try and hold the fill port plug out of the way whilst filling though.
Also when refilling if your nozzle takes up most of the fill port you can get some air/e-liquid escaping when filling due to slight air locks.
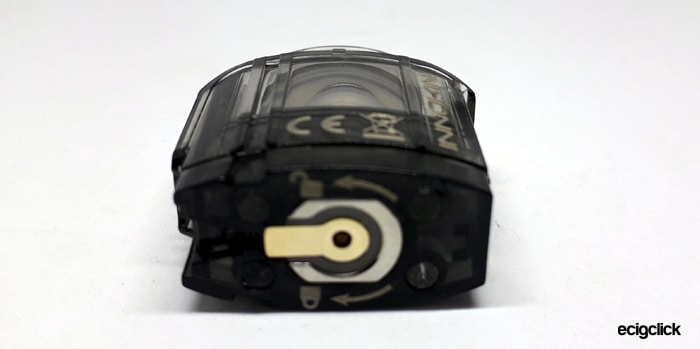
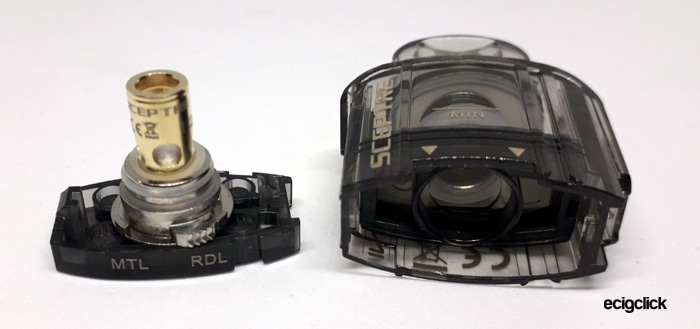
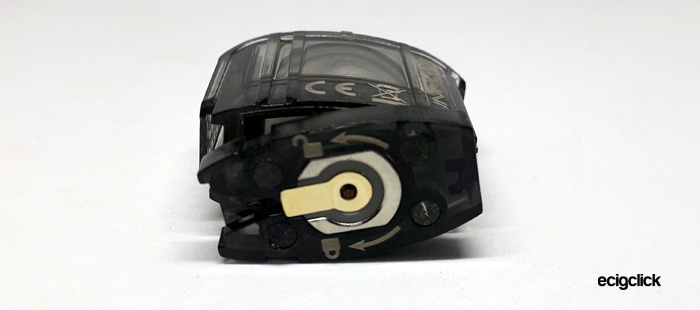
On the base of the pod are the arrows and lock/unlock symbols to aid with coil replacement – good job really…
My biggest gripe with the pod is how tricky it is to change the coil.
The base rotates only a small amount and it is hard to grip.
Installing the coil into the base isn’t too bad but replacing the base again is hard due to having to make sure the base is at the right angle to the pod that the catches are inside the pod before you turn the base.
Innokin Sceptre Pod Kit Quick Start Guide
The device is supplied with the 1.2ohm coil already installed in the pod.
Make sure to fill the pod before use or else you will burn your coil out!
Innokin Sceptre Pod Kit Basic Operation
This is pretty simple to operate but there are a few adjustments you can make too.
- Turn On/Off – press the power button 3 times
- Change power level – turn off the device and hold the power button in. The lights above the button will change colour. The green light is the standard power level and the purple light is the boost power mode. Release the power button when the light illuminates for the power mode you want. It will cycle between both power modes when you hold the button down.
- Battery capacity remaining – The battery indicator LED will change colour according to the charge remaining in the battery: Red = 10%, Blue = 10-50% and Green = 50% and above.
- Change airflow setting – remove the pod and slide the lever to the MTL or RDL setting.
- Not firing and LED light flashes – remove the pod and clean the contacts on the base of pod and inside the mod. If this doesn’t rectify it check the coil is tightened onto the pod base, I have had it come loose a few times!
Innokin Sceptre Pod Kit How To Charge The Battery
- Using the included USB cable plug the small end into the charging port on the device.
- Install the large connector into a suitable USB outlet at up to 1A charging rate.
- Whilst charging the LED will display Red at up to 90% charged and will turn green above 90%. When fully charged the LED will turn off completely.
I found using a 1A charging plug it took just over 2 hours (2 hr 8 mins) to fully charge the battery.
How To Remove the Innokin Sceptre Pod
- The pod simply pulls out from the body – a slight magnetic resistance holds the pod in place.
- To replace make sure the pod is inserted the correct way around – it will only go in one way.
How To Fill the Innokin Sceptre Pod
- Remove the pod from the device.
- Tilt the pod on its side and lift up the fill port cover (arrowed).
- Add e-liquid whilst observing the level through the pod.
- Replace the fill port cover and install the pod into the device.
- For first fill or when a new coil has been installed leave the pod to stand for 10-15 mins before vaping to make sure the coil has absorbed enough e-liquid.
How To Replace the Innokin Sceptre Coil
- Remove the pod from the device.
- Turn the pod upside down.
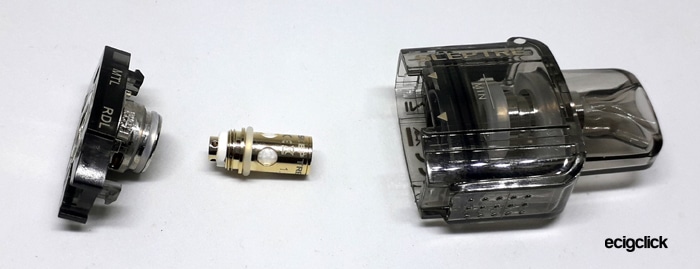
- Turn the black base in the “Unlock” direction shown and the base will lift out of the pod.
- Unscrew the coil from the base assembly.
- Install a new coil onto the base.
- Align the tabs on the base so they are just inside the pod and make sure the airflow lever is on the correct side.
- Turn the base to lock in position.
- Fill the pod and leave to stand for 10-15 mins.
- Replace the pod in the device.
How Does the Innokin Sceptre Pod Kit Perform?
As there are 2 different coil types I found myself using 2 different types of e-liquid.
With 1.2ohm coil I used CrazyCloudzzz CrazySaltzzz Bubblegum 50/50 VG/PG with 20mg Nicotine Salt strength.
With the 0.5ohm coil I used Stika Bombz Fruit Salad, 80%VG and 3mg nicotine strength
1.2ohm Coil
This I have to say is my preferred coil. I am a MTL vaper rocking the strong nic salts and this kit instantly fulfilled all my nic cravings.
I found in the standard power mode this did perform well but felt like it needed slightly more “ooomph“.
Setting the device to boost power really improved the flavour and throat hit and this is my preferred setting.
It did take 2-3 refills before the flavour really started to kick in – it was great with the first fill but got even better!
I will also add on one of the 1.2ohm coils I recorded how many refills I got and it was 14 (x2ml) and the flavour was just starting to tail off slightly. But no burnt hits at all so it still could have kept going for a few more refills I think!
The next coil lasted 8 days – which is good going as I really am hammering this kit for the nic salt hit!
Plus I have 2 of these kits on the go (not using any other devices) and the other coil lasted 12 days.
0.5ohm Coil
The experience with this coil was similar to the 1.2ohm coil. It took a few refills before the flavour started to sing.
On the standard power level this was OK – decent – nice etc, but on the boost power level the flavour was really impressive for such a small coil at low power.
The vapour output was impressive too when you consider the power and size of this kit.
It won’t replace a dedicated sub ohm tank by any means – but is still a handy way of using higher VG liquid when out and about – save you buying separate bottles of liquid for sub ohm and pod devices.
It had no issues wicking the 80%VG e-liquid at all.
Innokin Sceptre Pod Kit Airflow
On the MTL setting with the 1.2ohm coil I find the airflow perfect. Even with the auto draw activation – it is quite a tight airflow but not the tightest I have used.
However, for me, this is spot on MTL and with the flavour and throat hit the Innokin Sceptre throws at you, this gives a wonderful vape experience.
With the airflow set to the RDL position this is still quite restricted, which is a good thing as on early versions this was too open and caused issues with the auto fire. On the new versions the auto fire works quickly and is responsive in RDL mode.
Battery Life
As usual this will vary according to your own vaping habits, power level, coil resistance etc. But to give you a guide…
- With the 1.2ohm coil on the higher (boost) power level I got 15 hours in total! I can hardly believe it myself!
- With the 0.5ohm coil on the higher (boost) power level (to be updated)
I did find once the blue LED came on that it wasn’t long before the red LED followed – so use the blue LED as a guide of when to look for a charger!
Pros
- The flavour and throat hit is surprising!
- Excellent coil life!
- 0.5ohm coil even coped with 80% VG e-liquid
- Incredible build quality – they have been used daily and treated quite roughly and still look immaculate!
- No leaks or malfunctions at all
- The ability to replace just the coil makes this cheaper to run – the coils are not expensive to buy either
- Great airflow in both settings – auto draw works perfectly
- Amazing battery life!
- Pod light is useful for checking e-liquid level
Cons
- Can be a bit thirsty on e-liquid
- Some of the colour accents on the black and blue versions look a bit strange
- The fire button position can be inconvenient whilst vaping and carrying the device
- Draw activation was not mentioned on the instruction leaflet
- Coil removal is a bit fiddly
- USB Type C faster charging would be a nice feature
Final Review Verdict
So yet again Innokin has knocked out another cracking starter kit. But equally sub ohm vapers will enjoy the 0.5ohm coil and the flavour it provides.
A few small changes would make this perfect as some of the operations such as coil change and refilling can be a bit fiddly but they are not that detrimental for me when you consider the great experience this kit gives you.
I would recommend this for new vapers who need a strong nic hit – but they might be put off by the coil change aspect – so not for complete technophobes.
If you like high VG sub ohm vaping then this is a great little out and about or back up kit to save you lugging around a big box mod.
Some of the colours look stunning – but the honeycomb paint effects look a bit strange as there is just a random splash of colour which makes it look like some of the paint has chipped off.
I will add that a couple of times I have been greeted with the “flashing LED” and the device will not fire. I found that the coil can sometimes come a bit loose – which is strange – but tighten it up and away you go!
6 Month Long Term Use Comments…
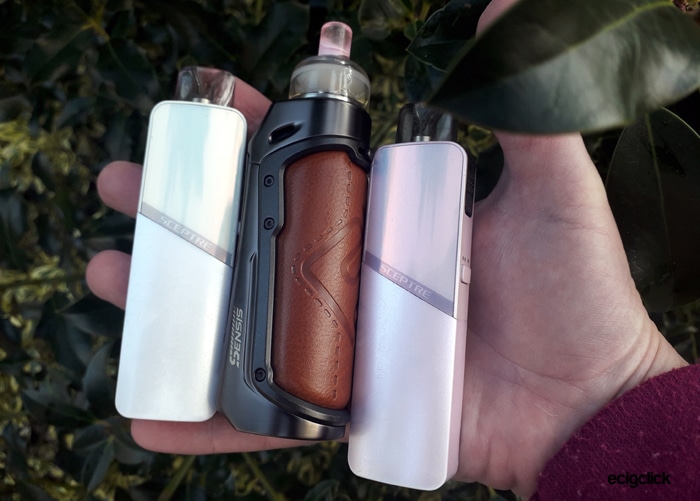
So I have been using two of the Sceptre kits for around 6 months now – the Pink and White versions.
I have to say these are still my favourite kits! See the photo below for how they look now – I also have the Sensis kit which I use the Sceptre 1.2ohm coils in as I love them so much!
There is some wear on both devices mainly the front of the lower finish which has worn off slightly leaving white underneath – but both kits have had a lot of heavy treatment in handbags, in the car, dropped, trod on so they are wearing really well!
I use these kits heavily daily – one in use and one on charge. The battery is still charging and holding charge perfectly. The fill port covers and USB ports are still holding up fine – usually these can be the first things that fail with long term use.
A small issue has arisen – sometimes the device fire button can stick – usually when turning it off – but luckily it does cut out – or you can simply remove the pod. What I also do is blow into the fire button to clear any liquid which may have accumulated.
The coil life for me is usually just over a week to 10 days – but I have noticed the odd “Dodgy” coil in a pack of five. These sometimes only last a single day or are pretty burnt from the first vape. Sadly with mass produced gear this can happen – but the packs of coils are cheap enough. But again if you do find that happening simply replace the coil with a new one.
I also managed to purchase some 3ml pods which have made these kits even better for me. That way along with barely having to charge them you barely have to refill either.
My long term use has been with the 1.2ohm coils – as I only vape MTL.


How many days is the life of the coil?
I use 11mg nic salts which are pretty sweet and I get around 7-10 days coil life with the 1.2ohm coil.
My only problem with this kit has been that I have been unable to find larger tanks. The 2ml tank(UK) is too small to be useful. I have a Smok RPM2 that also came with 2ml tank but i found 4.5ml tanks on ebay and bought 4 of them.
You are right as I feel as though I am always filling mine (have 2 on the go still – my favourite kit!) – however doing a Google there are some over seas companies selling the 3ml versions – China for instance has a few vendors so that might be worth a try? I haven’t ordered any myself but you have made me think it might be a good idea!
I did try to pull a pod apart to see if I could expand the capacity at all – but that was a total failure – just wouldn’t stop leaking! With the Smok pods usually there is something inside you can pull out to increase the capacity.
Shell