The Freemax Maxpod kit is a handy size vape device coming from a pedigree of good taste…
Freemax began in 2013 and has given us some epic vape tanks over the years, from the Starre Pro in 2015, the game changing Fireluke Mesh, my personal favourite the Mesh Pro plus the wonderful Twister and Gemm Kits.
This company has a reputation for squeezing every morsel of flavour from your e-liquid – so can they squeeze all that flavour out from a tiny little pod mod?
Time to get stuck in and find out!
What Can We Expect From The Freemax Maxpod Kit?
So this is the first proper Pod Kit from Freemax, the Gemm Pod Kit although called a pod was really a disposable tank atop a small mod.
Most of us now have “Pod Fatigue” and I do understand – but one coming from a usually reliable brand like Freemax did interest me a lot.
This is not a really fancy pod mod – it is pretty basic with draw activated firing and a single power output but that can be a bonus for people who want little faff and tech to get their heads around.
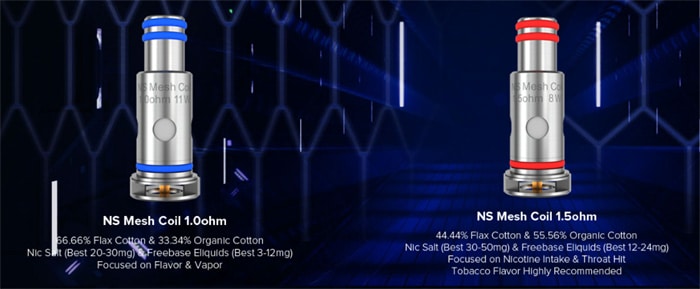
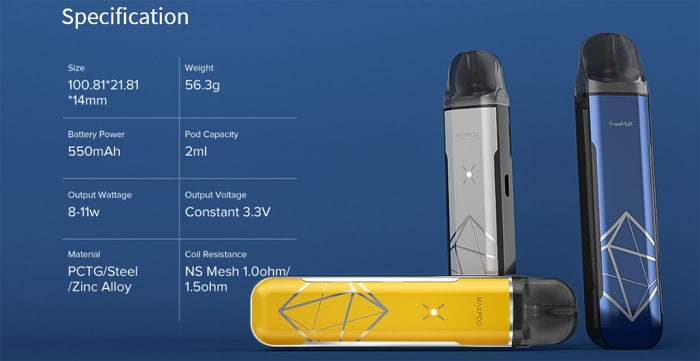
Inside the body is a 550mAh battery which outputs a constant 8W (1.5ohm coil) or 11W (1ohm coil).
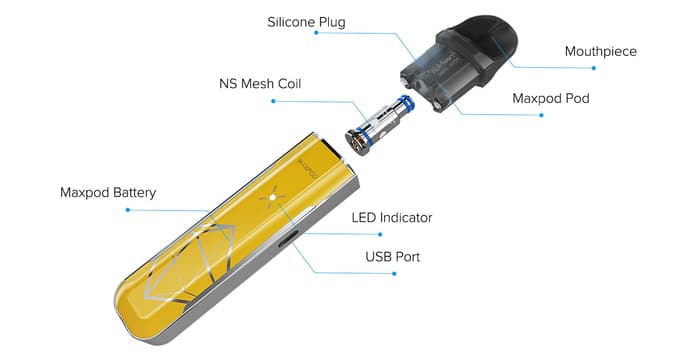
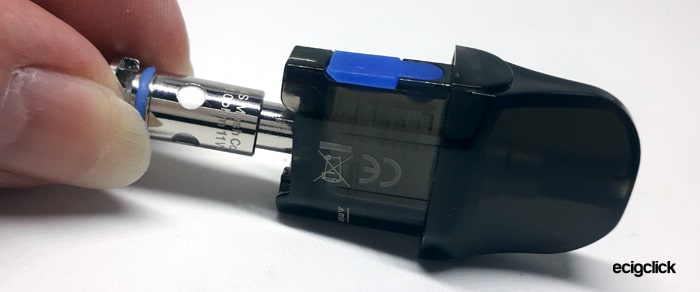
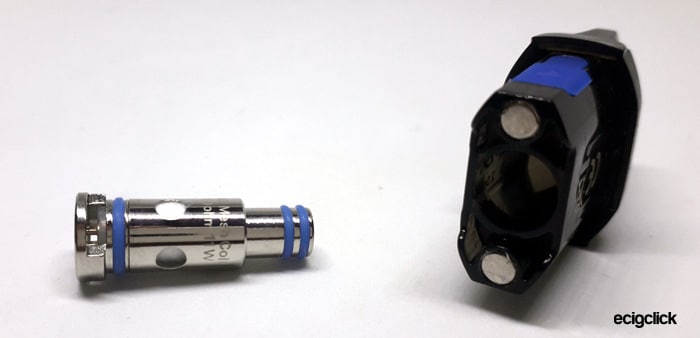
The coil is removable and is a simple push in fit in the base of the pod. There are 2 coil options and you get both in the kit – NS Mesh 1ohm and 1.5ohm. These are designed for MTL vapers and higher nicotine strength e-liquid.
There is no adjustment or display – a single LED indicator lights when firing and displays the battery capacity remaining.
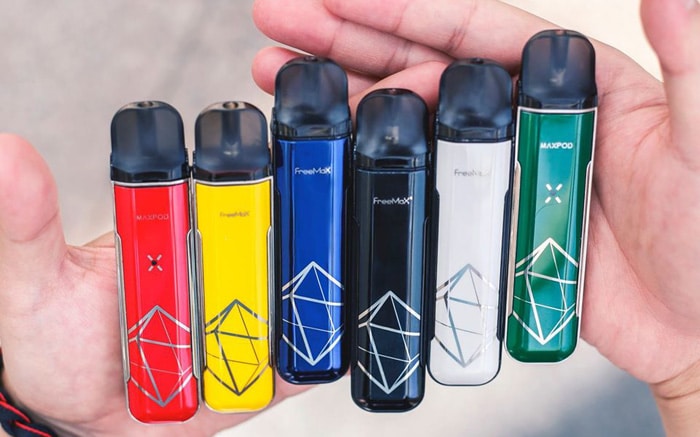
There are 6 colours to choose from: Red, Yellow, Blue, Black, White and Green.
As always I will report honestly on the device I have in my possession!
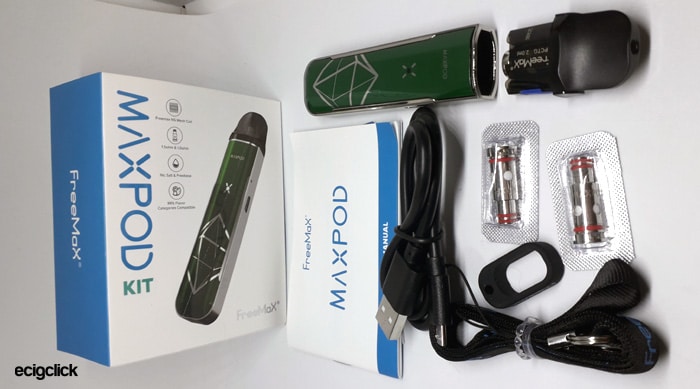
Inside the Box
- Freemax Maxpod device
- Pod with NS Mesh 1ohm coil installed
- NS Mesh 1.5ohm coil (I actually had 2 of these in my kit – box did state you get 1! Bonus!)
- Lanyard and ring
- Micro USB cable
- User manual
Features
- Size: 100.8×21.8x14mm
- Output: 8-11W
- Battery: 550mAh
- Display: LED indicator
- E-liquid capacity: 2ml
- Pods: Refillable, replaceable coil
- Coil options: NS Mesh 1ohm / 1.5ohm
- Draw activation
Freemax Maxpod Kit Build Quality and Design
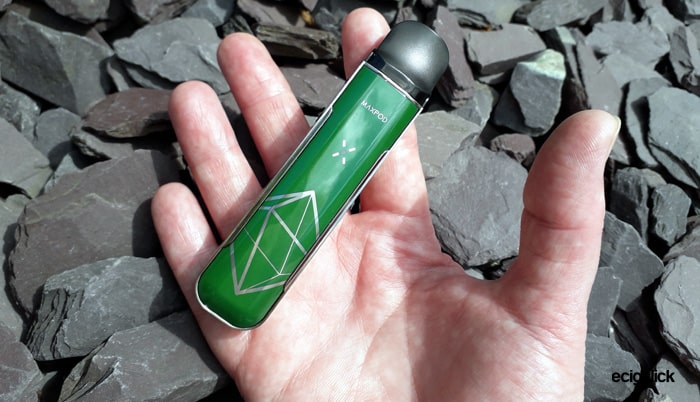
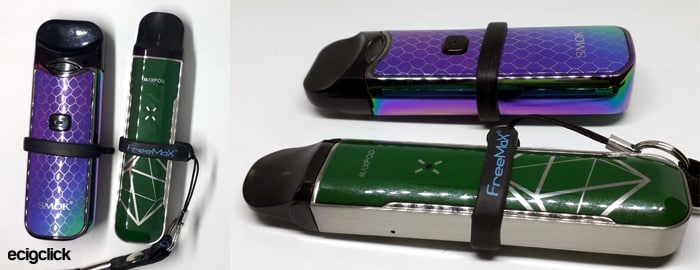
I received the Freemax Maxpod kit in green, and all the components arrived in pristine condition.
The packaging was good and as mentioned above I actually got an extra coil in my kit – woohoo!
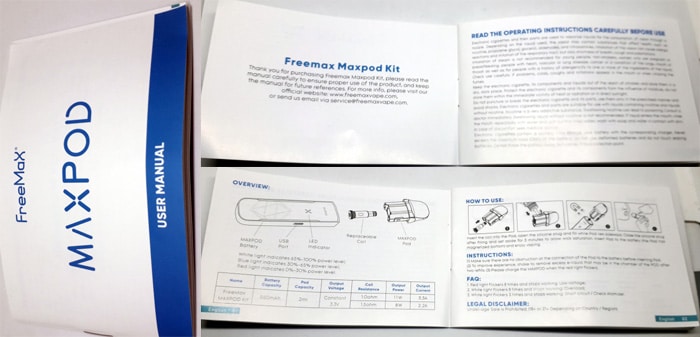
The instructions are a bit of a letdown – only a few pages in English – the rest of the booklet is in other languages.
I found most of the info I needed though apart from charging rate and how to know when the device is fully charged.
Freemax Maxpod Kit – Device
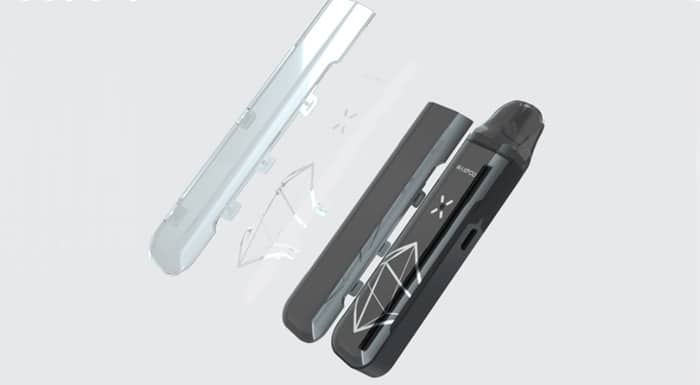
The body of the battery section is made from steel and zinc alloy with a plastic casing over the top.
The casing is made using IML (In Mould Labelling) technology which is basically different layers encased in a clear laminate coating.
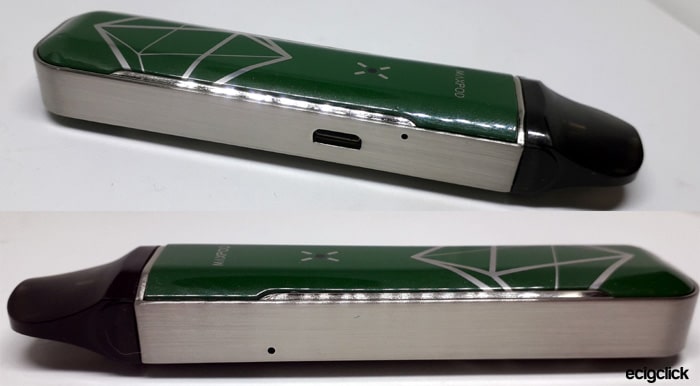
As a result you can see the main base colour is a metallic / sparkly green and the layers above that are mirror shiny silver.
The front of the device has the Maxpod text and a kind of 3D cube style graphic. In the centre of these is the LED indicator light, it is pretty tiny to be honest – I hope it is nice and bright!
The rear of the device has the same 3D cube and the Freemax logo.
Each side of the device has a shiny metal finish and has a small airflow inlet hole.
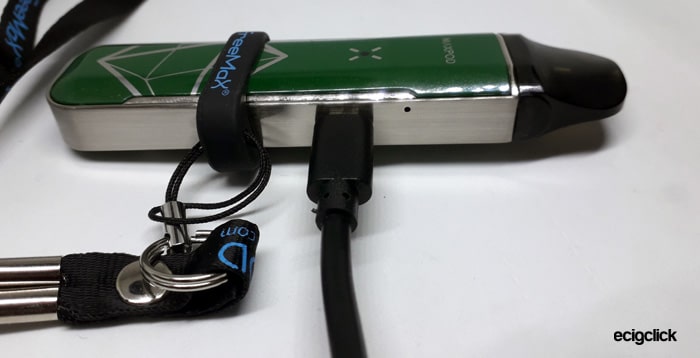
The micro USB port is located on the one side of the device and no issues with this at all.
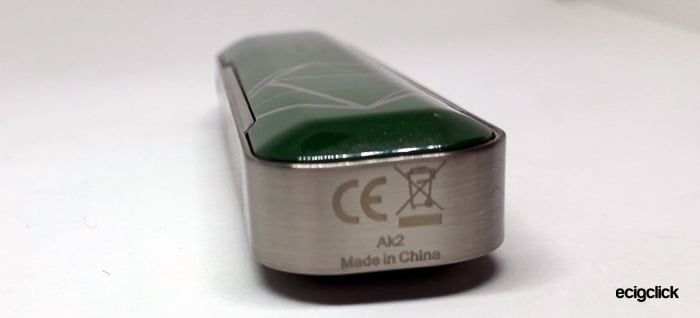
On the base are the required legal logos, “Made in China” and some kind of reference number.
This is a very solid and sturdy device – reminds me very much of the original Smok Nord with a metal base and plastic panels on the side. It is not heavy but does feel like a quality product!
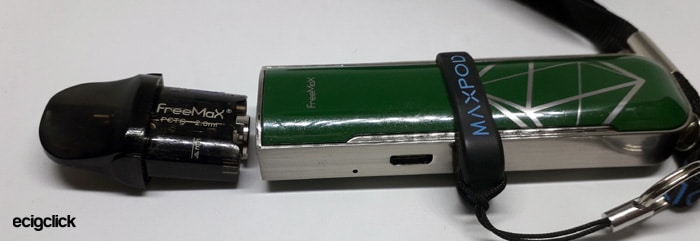
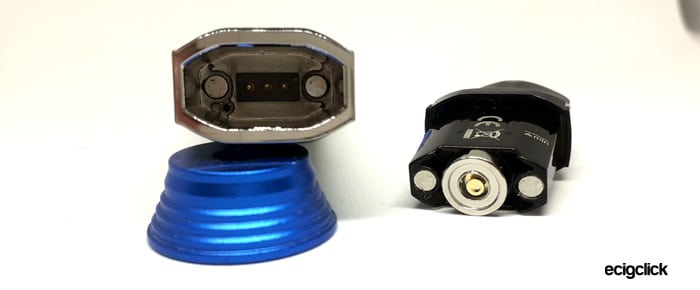
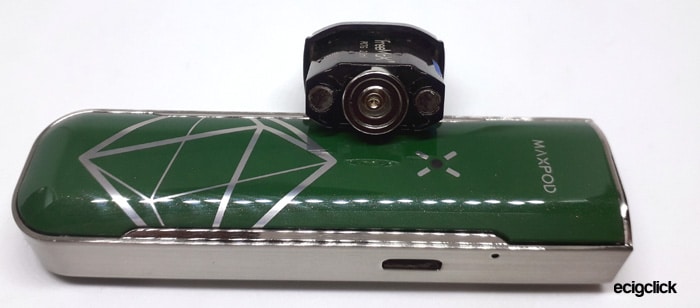
The pod compartment contains 2 strong magnets which pull the pod inside securely and 3 spring loaded connector pins. I have not noticed a drop of liquid in here at all and no leaks (so far!)
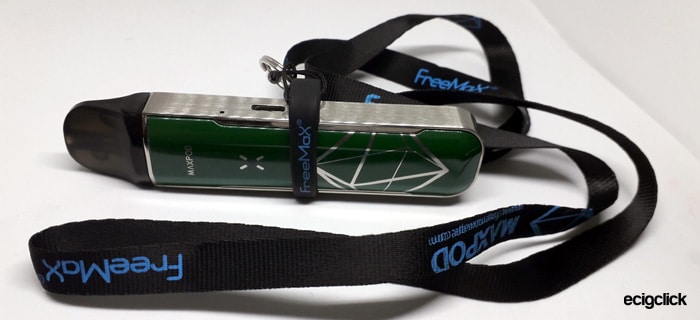
The kit also includes a swanky lanyard – which you attach to the battery with the tight rubber ring so you can wear it around your neck.
Something I do a lot now as so much easier than losing your vape every 5 mins!
Freemax Maxpod Kit – the Pod
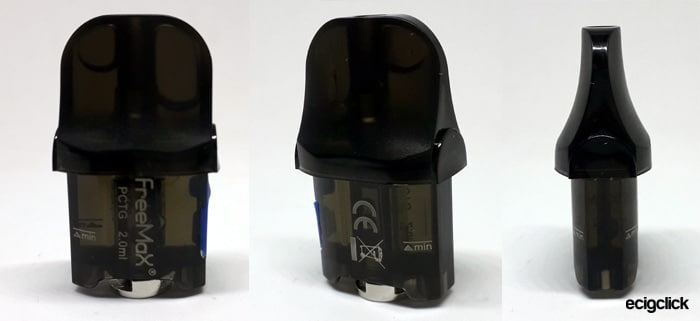
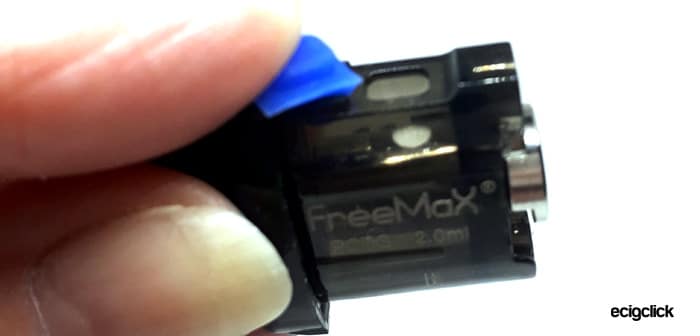
The first thing that struck me about the pod – although pretty dark and half the pod is concealed within the battery section – is that it is still light enough to see e-liquid clearly woohoo!
So many pod kits forget that you actually want to quickly check your liquid level.
If the level is below half you can simply turn the pod upside down and check there is liquid there. But there is a minimum level so when you think you are close to that make sure to remove the pod to check.
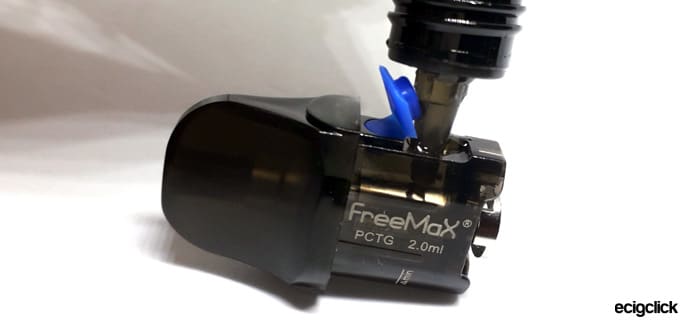
Filling is pretty simple but I did find I was tilting the pod in different directions to get the liquid to flow evenly around each side of the pod.
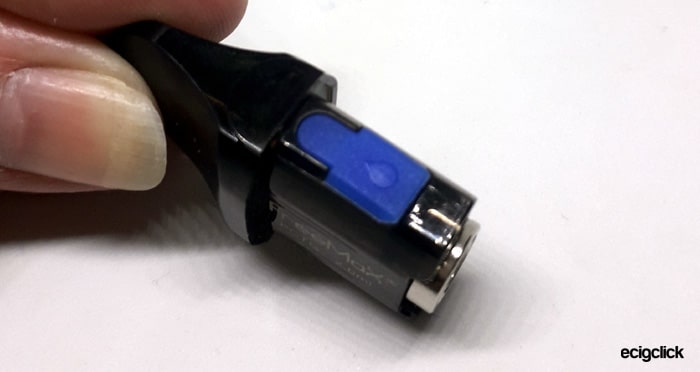
The fill port plug is easily removed but hard to try and hold open when refilling.
I did only try to fill with standard 10ml bottles and there were no airlock issues and the port was plenty big enough.
Installing and removing the pod is a breeze, although it feels loose it is securely held in with magnets.
In fact even putting the pod into the device slightly means the magnets draw it in fully which is always a good sign – you can shake the device and no movement from the pod at all.
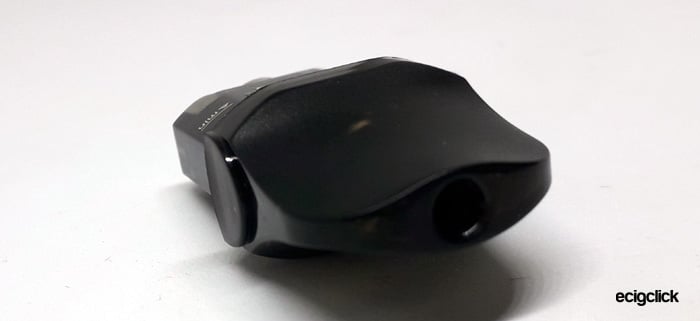
The mouthpiece is a flatter oval profile like a ducks beak and feels very comfortable.
So all in all a great design for liquid vision, coil installation, comfort and security in the battery!
Freemax Maxpod Kit – Quick Start Guide
The kit is supplied with the pod packaged separately and the 1ohm coil is already installed.
PLEASE DON’T even test vape this before you have filled – as one suck and you will knacker your coil up – and you will regret that with a mesh coil!
It tastes like a bonfire in your throat!
Freemax Maxpod Kit – Basic Operation
This is a draw activated device so no buttons to press at all.
Freemax Maxpod Kit – Battery Capacity Indicator
The LED on the front of the device lights up when vaping – the colour of this LED indicates the battery capacity remaining.

Please note the values on the Freemax website are different to the values printed in the instruction manual…
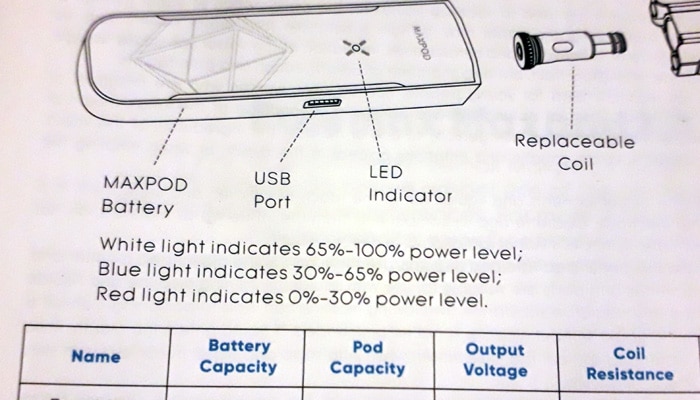
- White LED = 65-100% (instruction manual) / 71-100% (Website) charge remaining
- Green LED = 30-65% (instruction manual) / 31-70% (Website)
- Red LED = 0-30% (instruction manual) / 1-31% (Website)
The LED also indicates if there is a fault…
- Red light flickers 8 times and device stops working = low battery
- White light flickers 8 times and device stops working = overload (?) Not sure what this means – perhaps too long a vape?
- White light flickers 3 times and device stops working = short circuit / atomiser or coil fault.
How To Charge The Freemax Maxpod Kit Battery
- Using the short USB cable included plug the small connector into the USB port on the side of the Maxpod battery.
- Install the larger connector into a suitable USB port.
- Observe the LED on the battery – it stays on Red whilst charging and then goes out completely when fully charged.
I found this took 30 mins to charge from empty using a 1A charging plug.
Sadly as the manual gives no indication of charging rate I played it safe at 1A – not 2.5A as some chargers can do.
How To Fill The Freemax Maxpod Kit Pod
- Remove the pod by just pulling it from the battery section – it is held in place with magnets so may be a slight resistance.
- Tip the pod on its side and open the fill port plug to expose the port.
- Add e-liquid whilst observing the level through the side of the pod.
- Replace the fill port plug and install the pod on the battery.
- If this is the first fill or a new coil leave the whole device to stand for 10 mins to allow the coil wicking to absorb the e-liquid.
A “Min” mark is indicated on the side of the pod – try not to let the liquid level fall below this.
How To Change the Freemax Maxpod Kit Coil
- Remove the pod by just pulling it from the battery section – it is held in place with magnets so may be a slight resistance.
- Turn the pod upside down and pull the coil from the pod.
- Install a new coil by pushing it into the pod fully.
- Fill the pod with e-liquid before vaping and leave to stand for 10 mins before use.
How Does the Freemax Maxpod Kit Perform?
This is a primarily MTL designed kit so really you need to use lower VG e-liquid and a higher nicotine strength or nic salts.
I am using my usual CrazySaltzzz Bubblegum e-liquid which is 50/50 VG/PG – 20mg nicotine salt.
Freemax Maxpod Kit – 1ohm NS Mesh Coil (Blue Seals)
This was the coil I tried first as it was already installed in the pod.
I left it to stand for a good 15 mins and my first vape was surprisingly beautiful!
As expected Freemax hasn’t let me down with the flavour at all!
The throat hit is solid and I can feel the warmth from the vape on the tip of my tongue.
The RPM Lite and the Maxpod have both reminded me how lovely my bubblegum e-liquid is! They both bring out flavour profiles I have been missing with my Drag Nano! I almost get a sherbet type sensation whilst vaping – which is luuverly!
Also I’m finding the e-liquid usage is so economical – I keep checking thinking surely it must need filling again and nope still 3/4 full!
Freemax Maxpod Kit – Airflow – 1ohm NS Mesh Coil
This gives a tight MTL draw – not quite as tight as the Innokin EQ which is the tightest I have found but still a lot tighter than other kits I am using.
Slightly tighter airflow than the Voopoo Drag Nano and the recent Smok RPM Lite.
I would place the airflow on a scale of 1-10 (1 being fully closed) to about 3.
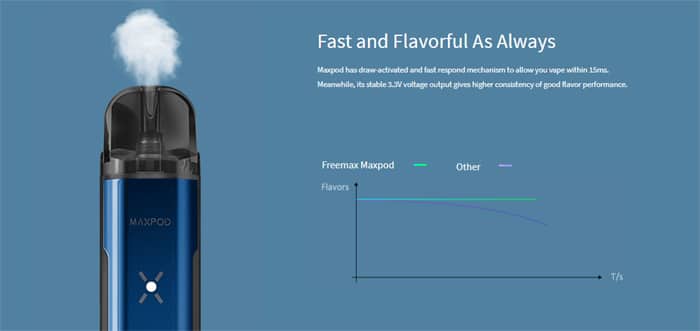
The firing time is instant – you don’t need to turn purple sucking on this at all!
Freemax Maxpod Kit – 1.5ohm NS Mesh Coil (Red Seals)
As I had two of these coils I decided to test it with Nicotine Salt e-liquid and standard Freebase liquid.
Freemax Maxpod Kit – Nic Salt Liquid
Using the same e-liquid as with the 1ohm coil there was a slight different in the experience.
The flavour was still very clear and beautiful. I did find that the throat hit was a lot smoother and I missed the warm and fizzy sensation I got with the 1ohm coil.
I still think this coil is a beauty but for me I like the throat hit and warm vape so I found the 1.5ohm mesh with Nic Salt to be not as good as the 1ohm.
But again it depends on your preference – I am still at a stage where I need a nic hit so I do miss the power from the lower resistance coil.
For those who want a more gentle, cooler and still flavourful vape the 1.5ohm coil is great, it also would suit those who often find strong nic salt makes them cough as this really smooths out the effect of the nicotine.
Freemax Maxpod Kit – Freebase Nicotine Liquid
For this I used the spare 1.5ohm coil I got in the box (which was a bonus!) and some 50/50% VG/PG e-liquid in a Cherry Flavour with medium high strength freebase Nicotine.
The throat hit with the freebase nic is stronger than with the nic salt – as expected but the flavour is still amazing.
You even get a little crackle of the liquid vaporizing as you inhale.
If you are using freebase nic I would choose this coil as it would be too harsh with the 1ohm I think.
Freemax Maxpod Kit – Airflow – 1.5ohm NS Mesh Coil
This is a lot tighter than the 1ohm coil and I would put this nearer a 2.5 in tightest levels. But the firing mechanism was still quick but this draw was a lot tighter.
I also found myself taking longer vapes to get the inhale I wanted.
Freemax Maxpod Kit – Battery Life
The battery life will vary depending on which coil you have installed and also your own vaping habits.
With the 1ohm coil I got 6.5 hours. When the LED displayed RED I only had about 5 vapes before the battery cut out.
With the 1.5ohm coil I got around 8 hours – I actually missed the RED LED coming on and suddenly was wondering why it wouldn’t fire haha!
Pros
- Great flavour and throat hit
- Lovely finish to the device – feels excellent quality.
- Easy to fill and good visibility of e-liquid level
- Lanyard is super handy
- Super quick firing
- Quick charging – only 30 mins at 1A
- Really easy to use
- Economical on e-liquid
- Can replace just the coil – not having to discard the whole pod.
- No leaks, dry hits or wicking issues at all.
Cons
- The LED indicator is pretty small sometimes you do miss it lighting up
- Instructions whilst they cover most things are omitting some info and very brief
- Micro USB cable is pretty short compared to other brands – mild niggle really!
Final Review Verdict
This kit reminds me so much of the Smok Nord (the original one).
Although slightly different in shape the styling is the same, a metal casing with plastic side panels, and it feels just as robust as the Nord and even vapes beautifully.
However the Freemax Maxpod Kit has more of a MTL restricted airflow, the Nord could not quite get it tight enough.
It is worth saying though that the Nord was designed for MTL and DTL style coils whereas the Maxpod is 100% MTL.
It is as simple to use as the Nord, feels as hard-wearing (My 2xNord kits have outlived way more expensive kits!) with the emphasis on MTL flavour and airflow.
For those who like a strong punch of Nicotine Salt e-liquid and a warm vape choose the 1ohm coil.
If you want strong nicotine but find it really harsh on the throat try the 1.5ohm coil as much smoother but still tons of flavour.
For me the 1ohm coil was the winner!
By choosing the coil you like this kit will cater for those who want a good strong nic hit or those who just want a smooth high nicotine level vape.
Ideal for new vapers and out and about use!
Have you tried the Freemax Maxpod Kit? If so let me know how you got on with it in the comments below!



why does it only blink red once when i put the charger in and doesn’t stay red or blink at all?
Usually that is when it is still fully charged – it attempts to charge and then decides it doesnt need it!
Thank you for a thorough, informative review! I’ve got a maxpod OTW
Hi Michelle, thanks a lot. Freemax seems to be the winner. I’ll give it a try.
Hi Michelle, thanks for the review. I suppose you have tried Caliburn? Which one of the two produces better flavour? what about airflow?
Hi Tom, I loved the Caliburn in fact I have 2 of them!
The flavour between the two is pretty close, both give amazing flavour!
The Freemax Maxpod is slightly better as the actual device is sturdier, easier to fill, more economical on e-liquid, the battery life seems longer and the power doesnt drop as the battery capacity decreases – on the Caliburn when the blue light has been on for a while the output suffers a lot. Plus the Caliburn does take longer to charge.
Another point is you need to buy full pod replacements on the Caliburn whereas the Freemax you can just change the coils.
I love the Caliburn but I prefer the Maxpod 100%!