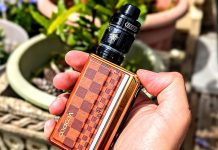
I have been really interested in getting my hands on the Eleaf iStick Pico S kit since I wrote a preview for it in April!
Eleaf are a huge vaping brand and need little introduction – and their Pico range of mods have played a part in most people’s vaping journey!
I owned a Pico mod and there have been updates and different versions created to keep up with the trends – including the Pico Baby, Pico 21700, Pico Squeeze 2 and the list goes on!
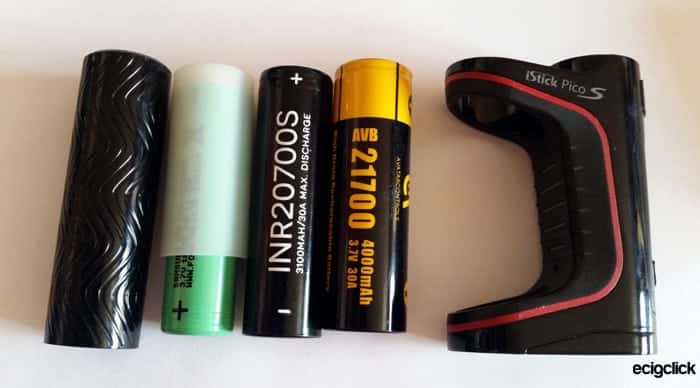
Some of the newer vaping trends include the use of 21700 batteries, mesh coils, bubble glass, cobra drip tips and sparkly LED bling – and the Pico S kit ticks all those boxes!In fact the kit I received included a 21700 Avatar battery – you can also use 20700 and 18650 batteries – so if you have them lying around they will be useful for this kit!
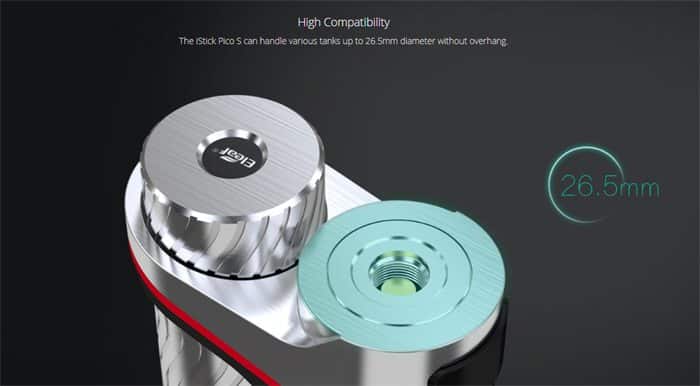
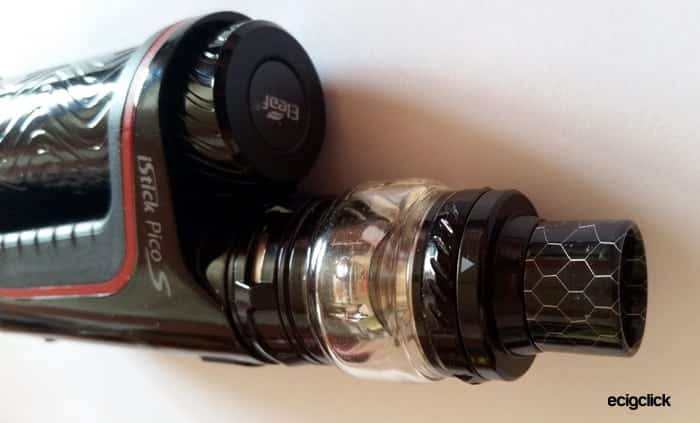
Another massive change to this version is the fact that you can use tanks up to 26mm diameter. I am very thankful for that as that was why I gave my original Pico away as the tank size was very restrictive due to it being obscured by the battery cover.
The mod can output up to 100W however I think it will not reach that level using a 18650 battery. With the 18650 battery I would imagine it would be similar to the original Pico 70-75W.
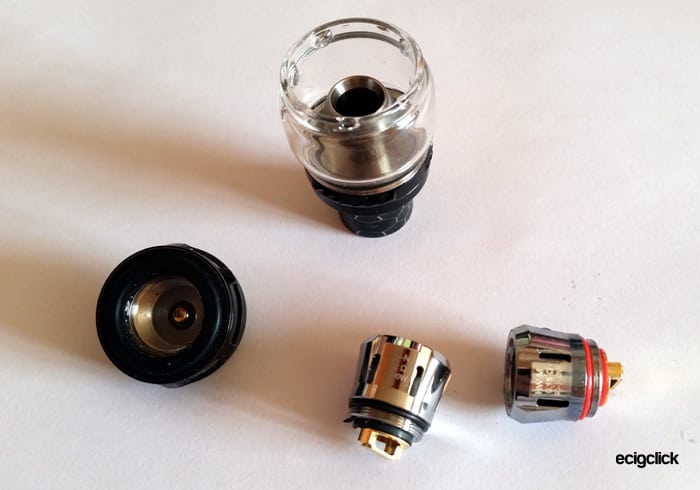
The kit version includes the Ello Vate tank – which has the ability to use the HW-N and HW-M mesh coils – in addition to the existing range of HW coils – and even some from other manufacturers!
And lastly as you can see the aesthetics have had a massive makeover to bring this new Pico up to date.
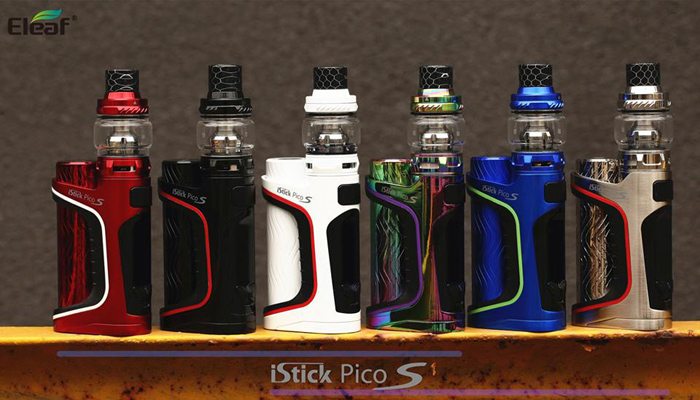
There are 6 colours to choose from – Red, Black, White, Dazzling, Blue and Silver.
So now the Eleaf iStick Pico S is mine let’s see how it performs!
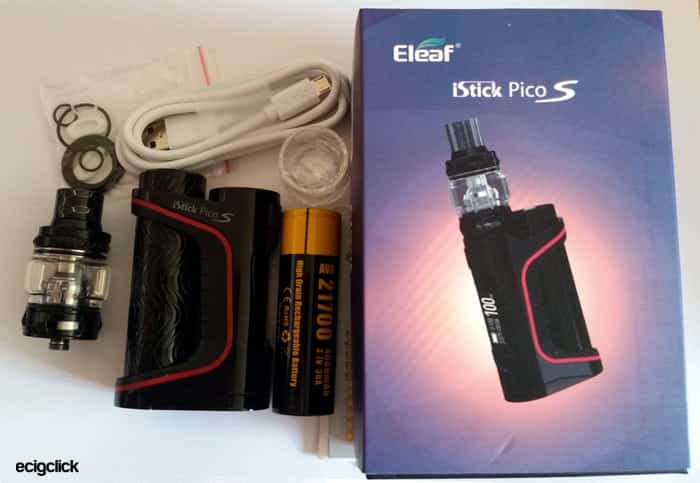
What’s In The Box
- Eleaf iStick Pico S Mod
- Eleaf Ello Vate tank
- HW-N coil head
- HW-M coil head
- Avatar AVD 21700 battery (optional)
- QC USB cable
- User manuals
- Spare parts
Features
Eleaf iStick Pico S Mod Specs
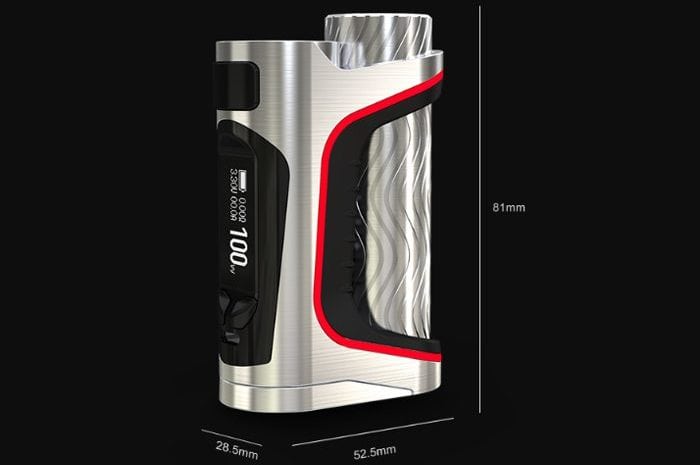
- Size: 52.5mmx28.5mmx81mm
- Weight: 142.8g (without battery)
- Battery type: 21700 / 18650 / 20700
- Output wattage: 100W max
- Output voltage: 0.5V-9V
- Resistance range: 0.05Ω-3.0Ω (VW/Bypass mode) / 0.05Ω-1.5Ω (TC-Ni/Ti/SS/M1/M2/M3 mode)
- Colours: red, black, white, silver, dazzling, blue
- 7 colour LEDs
- Compatible with tanks up to 26.5mm diameter
- Firmware upgradeable
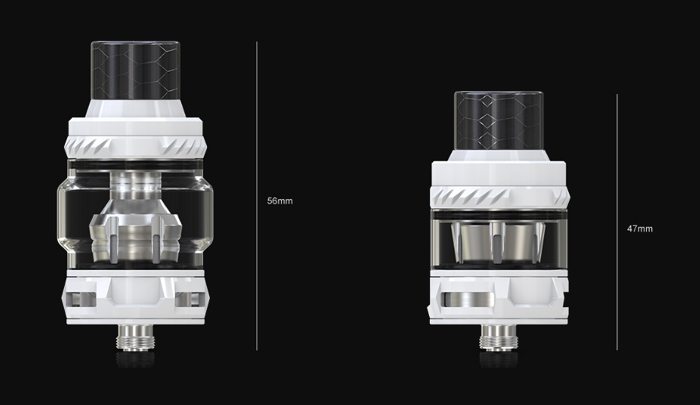
Eleaf Ello Vate Tank Specs
- Diameter: 28mm (6.5ml version) / 26.5mm (2ml EU version)
- Height: 56mm (6.5ml version) / 47mm (2ml EU version)
- E-liquid capacity: 6.5ml / 2ml
- Colours: red, black, white, silver, dazzling, blue
- Coil head compatibility: HW Range
- Top slide refill cap
- Bottom adjustable airflow
Build Quality & Design
I received the full kit version in Black.
In the kit you get the Pico S mod, Ello Vate tank to match the mod and even a battery to get you started – wonderful!
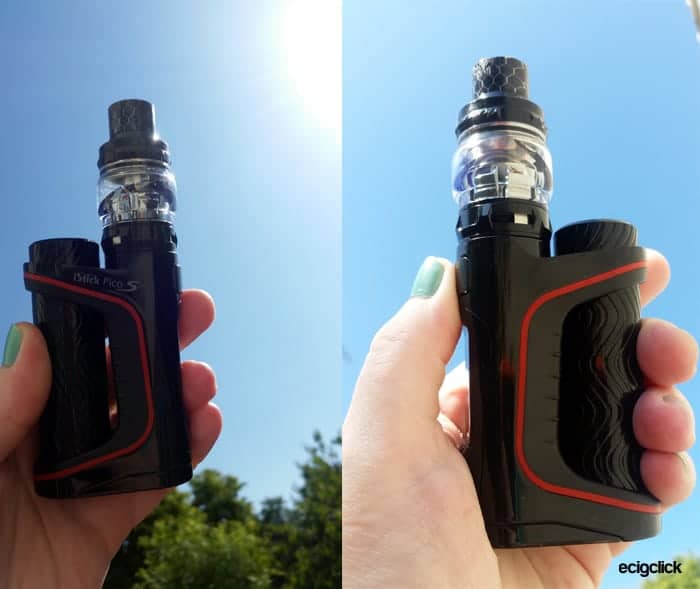
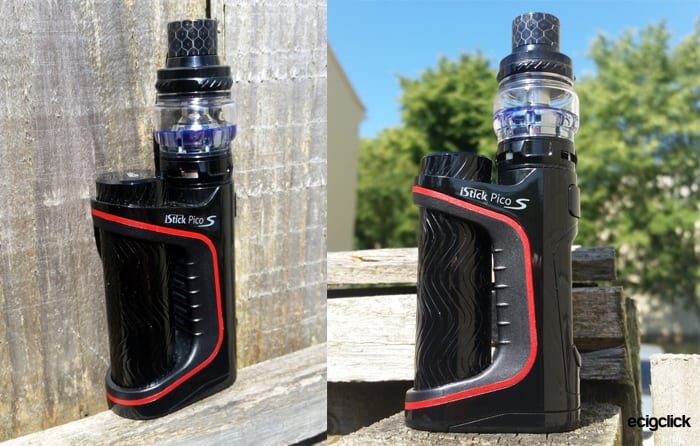
There is no denying this is really striking in the design department. I think Eleaf Googled “2018 vaping trends” and put the list of results all into one kit.
Eleaf iStick Pico S Mod
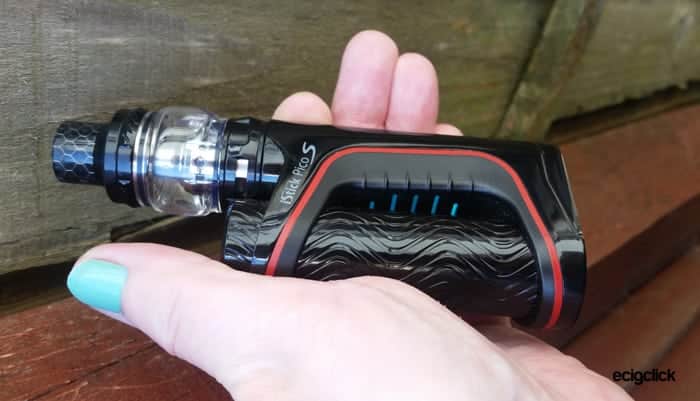
So you have LEDs which light up behind the battery tube – these look amazing but if they annoy you or reduce battery life you can always switch them off.
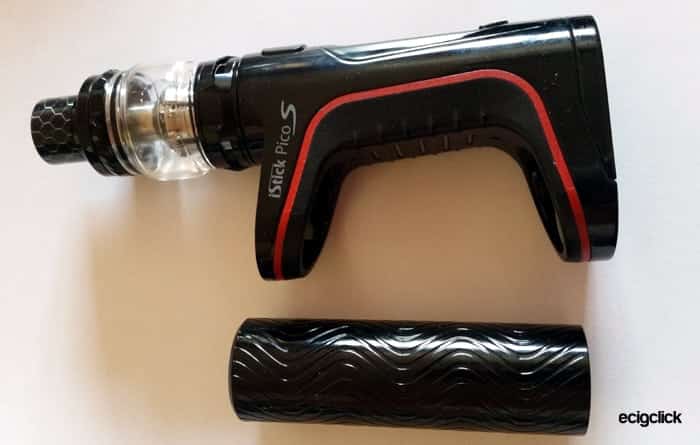
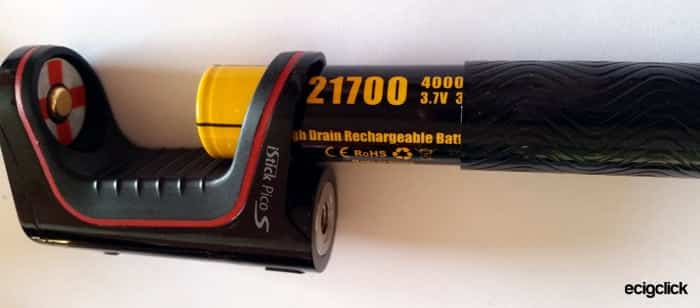
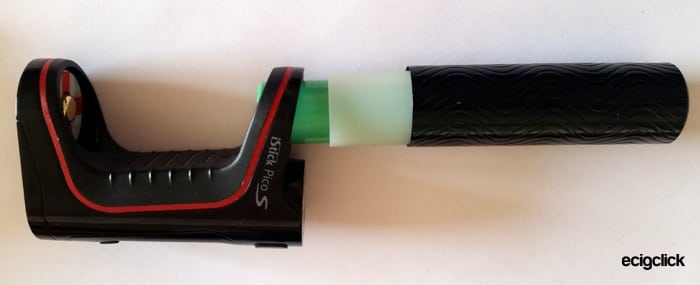
Instead of a battery enclosed in the body with a removable cap – the body is more open on this – more of a “frame”. So the battery is housed in a tube which unscrews from the frame.
The excellent result of this means you can now get tanks of up to 26mm diameter to fit on the top – older models had a huge battery cap and 22mm tanks were the maximum which would physically even screw on.
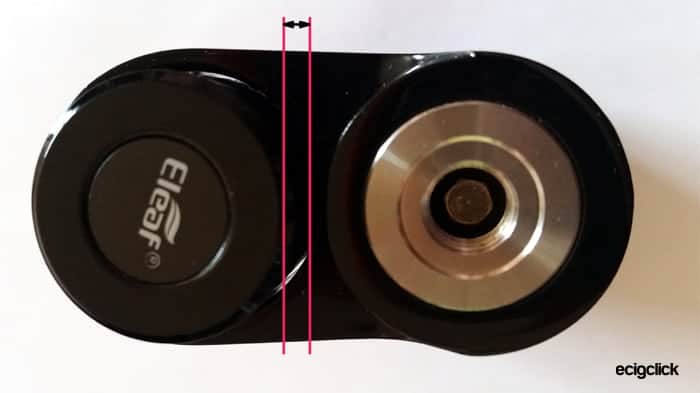
I had issues with my battery tube, it sits in a hole in the top of the main frame of the body and the hole is quite a bit bigger than the tube diameter. So even with battery installed and tube fully tight every time you pick the mod up or press fire the tube moves inside the hole. I lost count of how many times I checked the tube was fully tight. The tube and the screen are the natural places you grip to pick the mod up and hold it.
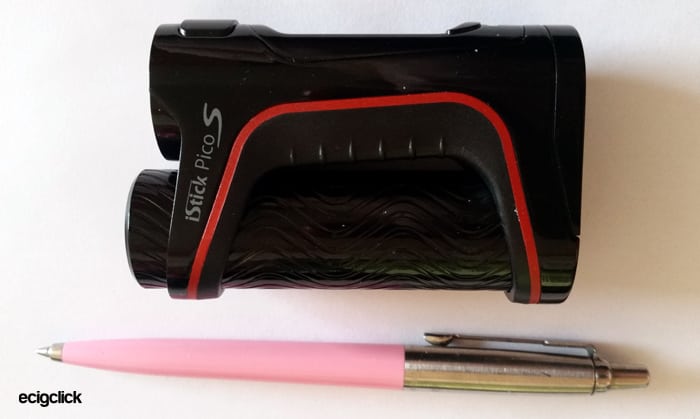
Apart from the tube the rest of the mod is solidly built despite being really lightweight.
Eleaf Ello Vate Tank
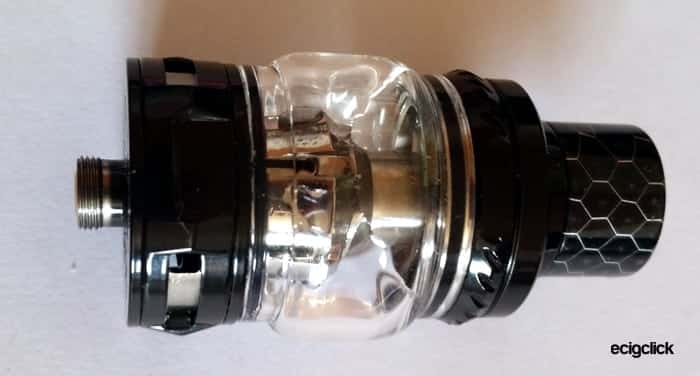
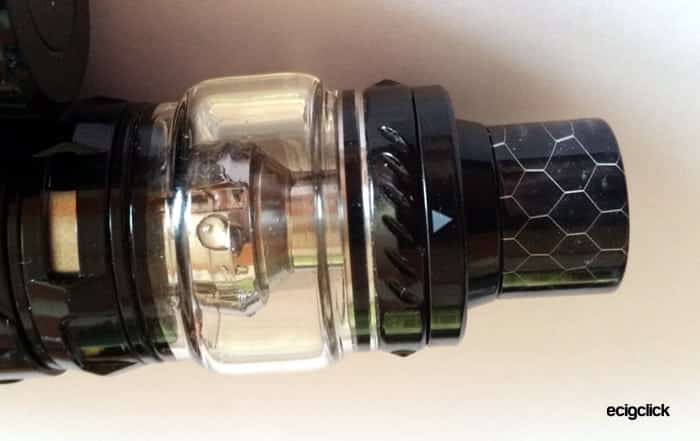
Yep this has all the gimmicks, bubble glass, resin cobra drip tip and mesh coil heads.
But this is a nice looking tank and in the black it does sparkle and look lovely.
I will mention the elephant in the room – it does look like a modern Smok tank. As do most tanks lately – even Joyetech and iJoy are producing similar designs.
You get an easy top fill slide cap and the bottom adjustable airflow ring is super smooth and doesn’t stick when placed on top of a mod.
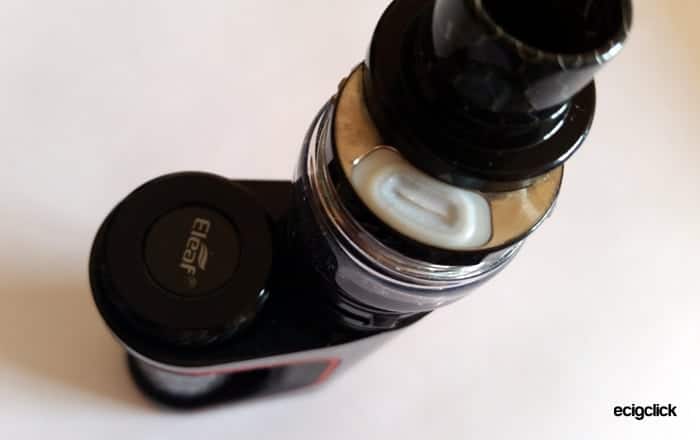
There is a very small arrow indicating where to push the top fill cap and I have to be honest it took longer to find it each time than I would like.
How Does the Eleaf iStick Pico S Kit Perform?
Basic operation
The user interface is an updated version of the familiar Pico I used years ago – just more options and icons instead of text for the main menu.
- To turn on/off = 5 fast clicks of fire button
- Adjust the wattage / temp (depending on mode) = up and down buttons
- Change power mode = press the fire button 3 times
- Enter menu = fire button and + button at the same time
Upon entering the menu you then have various sub menus:
Sub Parameters
In this menu you can choose what to display on the screen – choose from Puff counter, Puff time or Amps.
Stealth
You can select on or off for stealth mode. Stealth mode basically turns the screen and LEDs off for vaping – so you are not so visible!
Pre-Heat
Sometimes if using large coils which take a while to heat up you can boost the power for the starting period of the firing operation. Read more about power curves in our Guide.
Logo
Turn the screen logo on or off
Colour
In this menu you can select the colour of the LED display behind the battery tube or turn it off altogether.
Version
This menu tells you the current version of firmware on the device. Good to see if you are not sure if an update is required.
Battery
This displays the battery voltage.
Coil
You can select lock or unlock. This locks the coil resistance to the memory – the mod can then calculate using temperature control how the resistance will vary according to temperature and adjust the power accordingly. The coil resistance needs to be locked when the coil is cold and before adjusting the temperature control. For help with Temperature Control read our guide!
TCR
You can enter TCR settings and store them in the memory slots – there are 3 available M1, M2 and M3.
Exit
Select the Exit icon to exit the menu and return to the home screen.
How To Install The Battery
- Hold the battery container tube at the side where the grips are and unscrew this. If a battery is already installed make sure it won’t fall out.
- For the first use if a battery was included in the kit there is a small insulator sticker on the top of the battery so remove this.
- To install 20700 or 21700 battery observe the polarity (+ at bottom of mod) put the battery into the tube and screw the tube back onto the mod.
- To install 18650 battery insert the battery into the adaptor negative first and then the adaptor into the tube – again with the positive post at the bottom of the mod. Screw the tube back onto the mod.
It is not recommended to charge the battery in situ. Remove the battery and use a good brand external charger. Always have a glance at and/or feel of the outside of the battery when removing and installing. Any tears to the wrapper or general damage makes the battery dangerous. Either apply a new wrap if it is torn or discard the battery if it is damaged.
For more details read our guide to Vape Battery Safety.
Eleaf Ello Vate Tank
The tank comes with a coil installed so fill up, leave for 10 minutes for the coil to absorb the e-liquid and adjust the airflow to your preference. To adjust the airflow turn the ring on the base of the tank. The more of the slot exposed = more airflow and close that slot off to restrict the air coming into the tank.
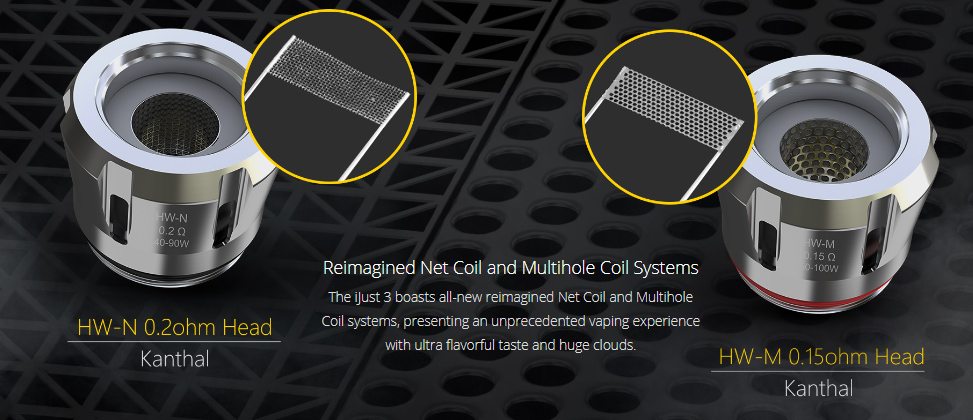
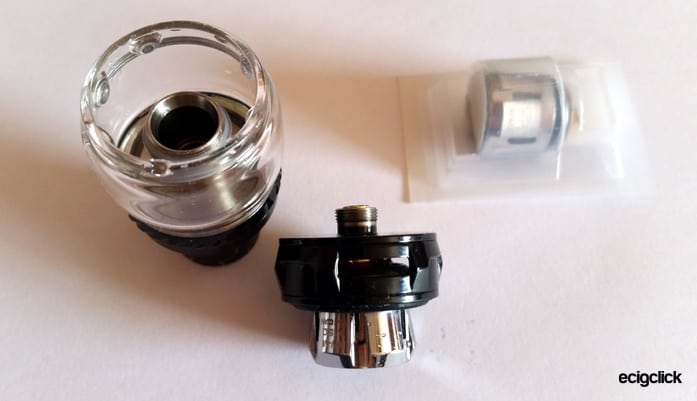
The coils in the kit are the HW-N (Net) and HW-M (Multi-hole) which are mesh style coils.
How To Fill The Eleaf Ello Vate Tank
- On the top of the tank is a tiny weeny arrow – find it!
- Push the top of the tank in the direction of the arrow.
- On the top of the tank is a filling hole – this looks like it is blocked, however stuff an e-liquid nozzle into it and you will see it does open up to allow you to fill the tank.
- Observe the liquid level through the tank glass.
- Push the top of the tank to the closed position.
The “flap” on the fill port does divide opinion! I don’t have a problem as I use 10ml bottles with nozzles but for larger nozzles or dripper type bottles it can cause issues. There is a new gasket in the kit without the “flap” so simply replace that if you find it hard to refill.
How To Change The Coil Head
- Remove the tank from the mod.
- Turn the tank upside down and unscrew the tank base.
- If installed unscrew the existing coil head.
- Screw a new coil head into the tank base.
- Apply a few drops of e-liquid to the bits of cotton you can see on the coil head.
- Screw the tank base onto the tank.
- Refill the tank as described above.
- Leave the tank to stand for at least 10 minutes – the cotton in Mesh coil heads tends to be quite dense so needs a while to fill up with liquid – and a dry hit off mesh is never good.
Flavour & Cloud Production
For this review I am using my usual e-liquid which is Stika Bombz Fruit Salad. This is 6mg nicotine strength and is 80% VG. This is designed for high power sub ohm tanks. If the term “VG” has just gone right over your head read our guide to VG & PG in E-liquid.
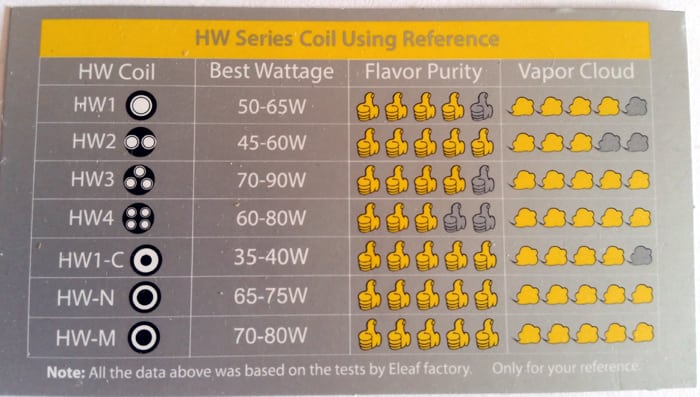
Included in the kit is a card showing the best power settings for the HW range of coils. It is best to follow this and start slightly lower than recommended on a new coil head.
HW-M Coil Head – 0.15Ohm – 70-80W
This is a 0.15 ohm Kanthal “Multi-hole” coil head which is recommended between 70-80W.
I tried this at varying wattages and with the airflow in all the positions and yet again the flavour is a bit muted for me. I used this the most at 70-75W though.
That super wide airflow does give great clouds but I just find this a dry sort of vape which feels cool and lacks flavour sadly.
I did give this coil head a good chance and used it for 4 days and almost 500 puffs but no improvement sadly. The coil life seems good – 4 days and I only changed the coil to test the HW-N – this HW-M was still working fine.
HW-N Coil Head – 0.2Ohm – 65-75W
This is a 0.2ohm Kanthal “Net” coil head recommended between 65-75W.
I started off a 65W and not much happening really, up to 70W and am getting lots of vapour but even with the airflow almost closed still little flavour. I wanged this up to 75 and 80W and this is getting warmer. The clouds are excellent.
This coil is slightly better than the HW-M in my opinion but still way inferior to some of the better mesh coils available now.
The vape from these coils just feels so dry and makes me guzzle glasses of cold drink. They soak up every bit of spit you have ever produced.
Eleaf Ello Vate Tank Performance
The Ello tank range is used on a few of the Eleaf models now – I have reviewed the Ello TS (which came with the Tessera Kit) and our Kevin reviewed the Ello Duro (which came with the iJust 3 Kit). I also have an iJust 3 kit!
The Ello range use the HW range of coil heads. I have found I am not really a fan!
I prefer a restricted DTL vape and the marvellous Melo 4 tank (in the iStick Melo kit) was just perfect. The airflow in both the Ello tanks I used were far too wide open for me and thus dampening the flavour.
And more of the same here really – despite the Ello Vate and Ello Duro coming with the new HW-M and HW-N mesh style coils I’m personally still not impressed really.
I have used the Freemax Fireluke Mesh and the Horizon Falcon Mesh and both are far superior for flavour and you have the ability to close down the airflow more.
Actually thinking about it – the Ello tanks look like the Smok TFV12 Prince and actually vape the same too! All air and vapour and not much flavour. Plus it can’t be a co-incidence that the coil heads are interchangeable with Smok TFV8 Baby too…
Oh and to add to the woes – the Ello Vate tank leaked from the airflow for me too – great…
Eleaf iStick Pico S Mod Performance
This does get very hot! So far testing the HW-M coil at 70W this mod gets very very warm!
After a week of use just using the supplied Ello Vate tank and testing those coil heads I decided that tank really wasn’t my cup of tea. So I wanted to try some of my other sub ohm tanks on here. Oh dear this is where things go a bit downhill sadly.
I tried both of my Fireluke Mesh tanks, plus the Vaporesso NRG SE (From the Vaporesso Revenger Mini kit), plus the Melo 4 tank and the Pico S did not like them one bit. Ranging from “Atomiser short” to “No atomiser found” I could barely get the mod to fire at all.
In fact the only tank I owned which sort of could be used on this was the Uwell Nunchaku which is a bit of a pain as this runs at less than 50W so not testing the full power of the mod. I spoke to soon as it is now chucking up errors with this tank too.
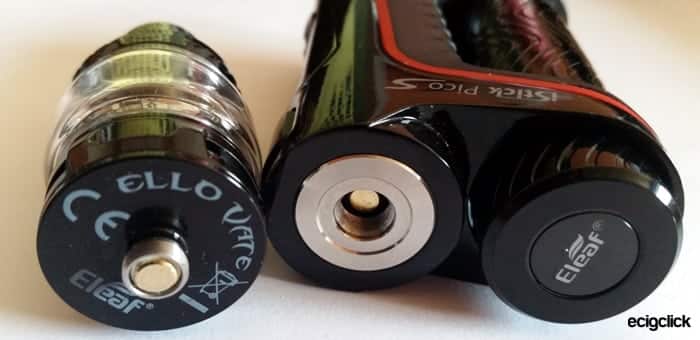
So I tried cleaning the 510 pin in the mod and on my tanks, all the tanks worked fine on other mods so they were not the problem. I even moved the 510 pin up and down a bit on the Pico S in case it was stuck. But sadly made no difference.
So either the pin is quite deeply set and not touching the base of the tank properly or mine is faulty. I did try to “wiggle” the tanks a bit to see if that would make contact but again no joy.
I put the original Ello Vate tank back on to do the battery life testing – however the tank had leaked all over my atty stand too – so perhaps that leaking has knackered up the 510 in the mod – as it now keeps throwing faults even with its own tank.
Checking the Eleaf website there are no firmware updates available so this doesn’t appear to be a firmware issue that Eleaf are aware of.
So take that as you will, could be just mine perhaps?
Battery Life
This mod is so versatile – it can use the included 21700 battery, a 20700 or with the adaptor an 18650 battery.
As I own all three types of battery I wanted give you a rough idea of the battery life I got.
However due to the fact that the mod won’t recognise any tanks – even the one it came with I am unable to use it long enough to get any indication of battery life.
Pros
- Really lightweight even with 21700 battery installed
- Lovely design features
- 21700 battery included
- Ability to use all 3 main types of battery
- Great kit contents
Cons
- Battery compartment tube moves in the housing when you hold or pick up the mod.
- Ello Vate tank is more for vapour than flavour – even with Mesh coil heads
- This mod did not like my other tanks – even another Eleaf tank resulted in errors.
- Eventually the mod even rejected the tank it came with!
- Ello Vate tank leaks
Final Review Verdict
Mod wise I had a lot of issues – the minor I had being with the wobbly battery tube (I was constantly checking it was tight) and the mod getting quite warm.
However not being able to use other sub ohm tanks on here made me not like the Pico S very much. Eventually the mod even started rejecting the tank it came with. Quite an epic fail really.
I wasn’t a fan of the Ello Vate tank – this is the third tank from the Ello range I have tried and they are just not as flavourful as a lot of sub ohm tanks now. They are great vapour chuckers though – but I prefer intense flavour. The Melo range of tanks are better in my opinion.
The Ello Vate tank has leaked like a badly run sewage works so I have come to the conclusion this seems to have killed the 510 connector in the mod.
So sorry to be so negative as usually I love Eleaf stuff and it is generally of a high quality – but the kit I received was just a catalogue of faults.
Eleaf have concentrated on bringing the iStick Pico into 2018 – but the flaws make this sadly a weaker member of the Pico family.

