(Updated – See bottom of review for why…)
In October I wrote a preview for the Eleaf iStick Nowos kit and it caught my attention right away – so I am very pleased to get my grubby paws on one in real life!
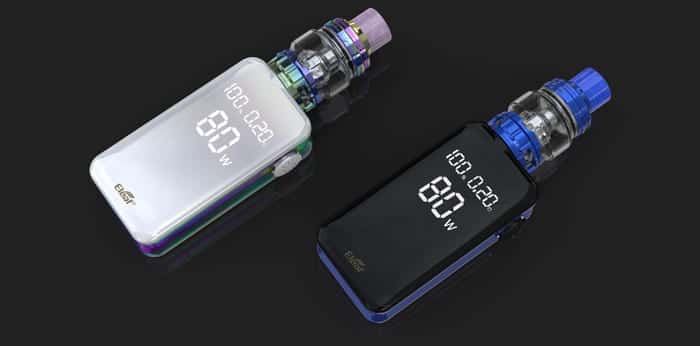
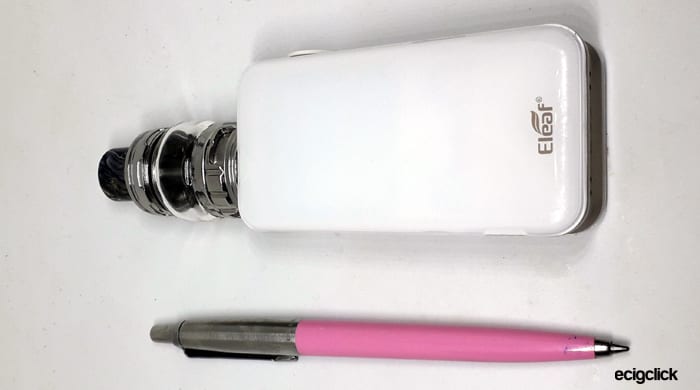
The most striking feature on the new Nowos mod is what appears at first glance to be no screen.
The front and rear of the mod just look like Perspex covers.
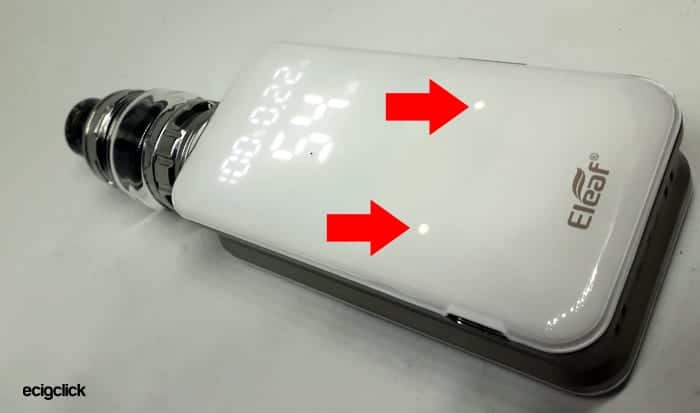
However power up and the front cover becomes a screen with “old school” LCD style characters!
You will get a maximum output of 80W from the mod and there is an internal 4400mAh battery – which when you compare to a 18650 battery usually around 2500-3000mAh is pretty decent.
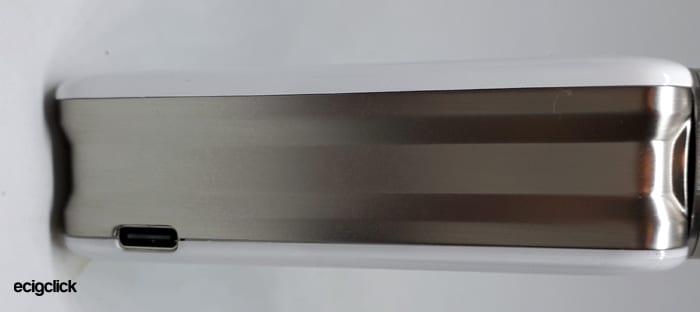
Another feature is the USB charging port being a USB C instead of a standard micro USB connection. This means there is no wrong way around to install the cable and faster charger speeds.
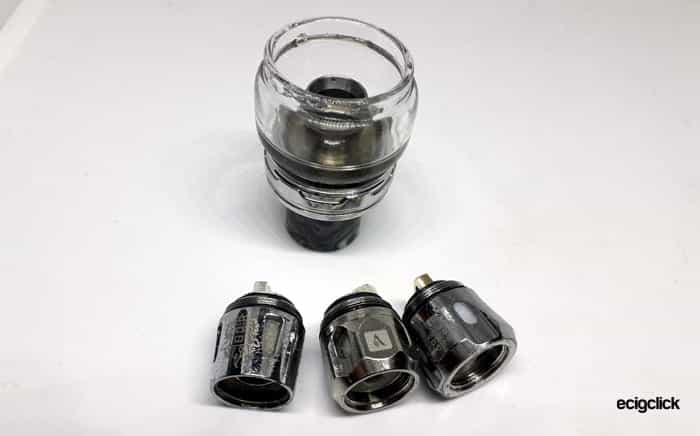
In the kit you get the Ello Duro tank – previously used on the iJust 3 and Saurobox kit – however this time you get dual mesh coils in the HW-N (net) and HW-M (multi hole) style.
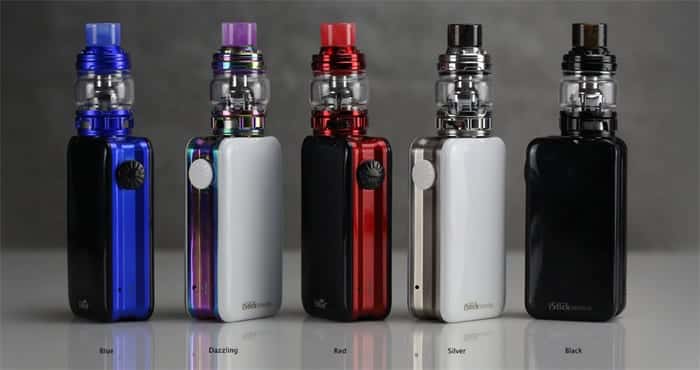
There are 5 colours to choose from: Blue, Dazzling, Red, Silver and Black.
The kit has been sent to me free of charge for review purposes however I will report back honestly on my findings with the kit I have in my possession.
Come to me my pretty and let’s see how you vape!
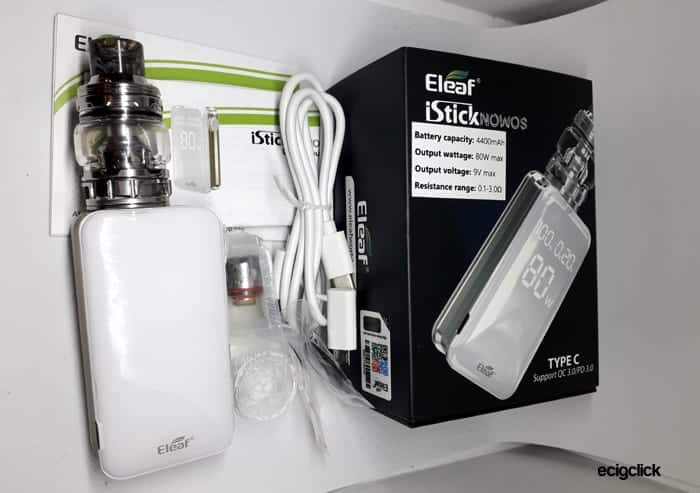
What’s In The Box
- Eleaf iStick Nowos mod
- Eleaf Ello Duro tank
- HW-N dual coil head
- HW-M dual coil head
- Spare parts
- QC USB cable
- User manual
Features
Eleaf Nowos Mod Specs
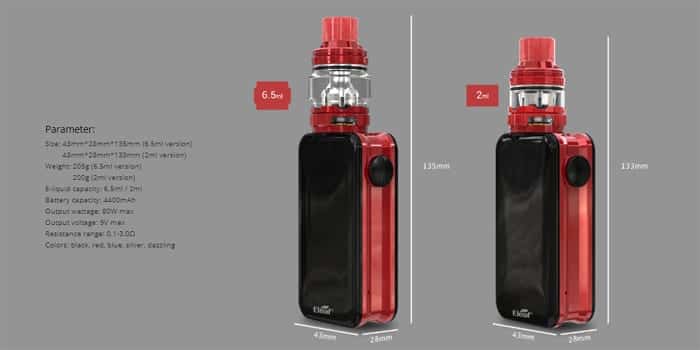
- Size: 135x28x43mm (With tank – 6.5ml version) / 133x28x43mm (With tank – 2ml version)
- Battery: 4400mAh Internal
- Output: 80W max
- Resistance range: 0.1-3ohm
- USB C charging and QC3.0/PD3.0 charging protocol
- Touch screen front panel
- Compatible with tanks up to 26mm diameter
Eleaf Ello Duro Tank Specs
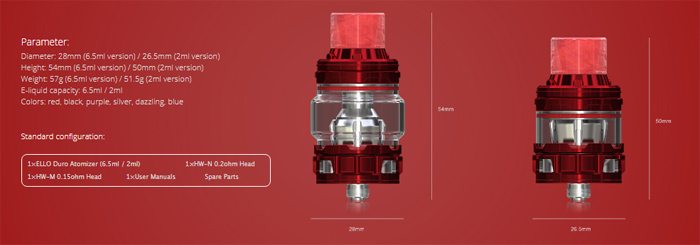
- Size: 28x54mm (6.5ml version) or 26.5x50mm (2ml EU Version)
- Capacity: 6.5ml (standard) or 2ml (EU Version)
- Uses HW coil heads
- Top fill port
- Airflow Adjustment
Build Quality & Design
I received the Nowos kit in the Silver version.
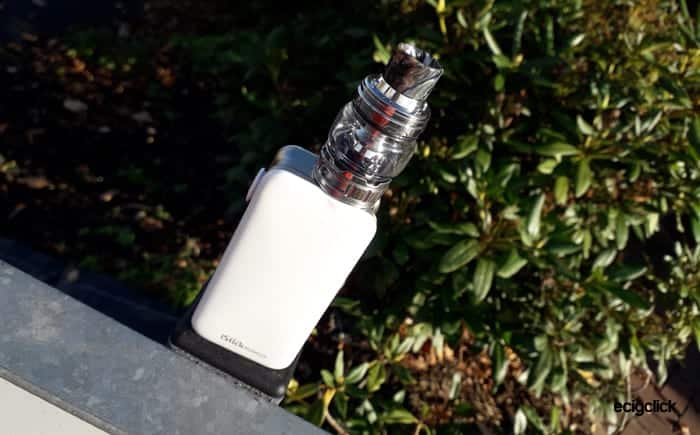
It really is a striking kit, some people might just think it is plain at a first glance however fire up that screen effect and it transforms into something special!
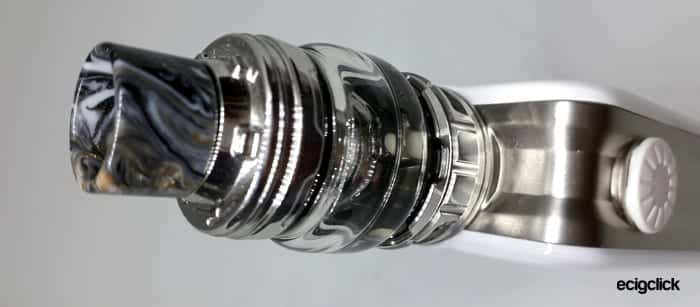
Even the tank looks beautiful sat on top in shiny metal to match the edges of the mod.
As usual the instructions are great and the kit was well packaged with plenty of O-rings and a spare glass tank.
Eleaf iStick Nowos Mod
The front of the mod (hard to tell when it is switched off!) is the side with the “Eleaf” logo.
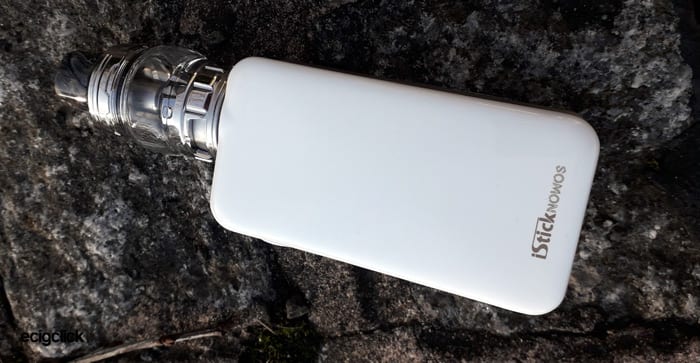
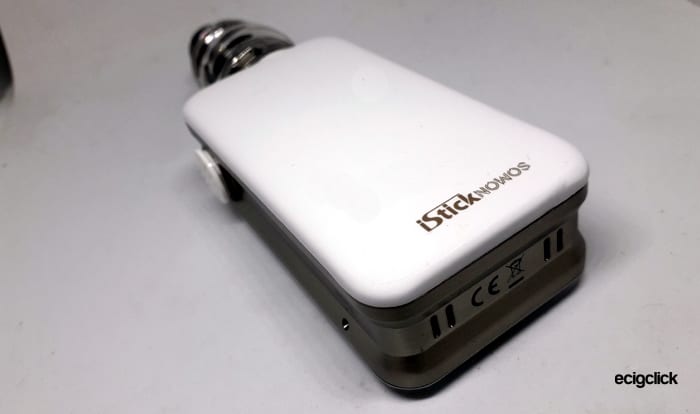
The rear of the mod is the side with the “iStick Nowos” branding.
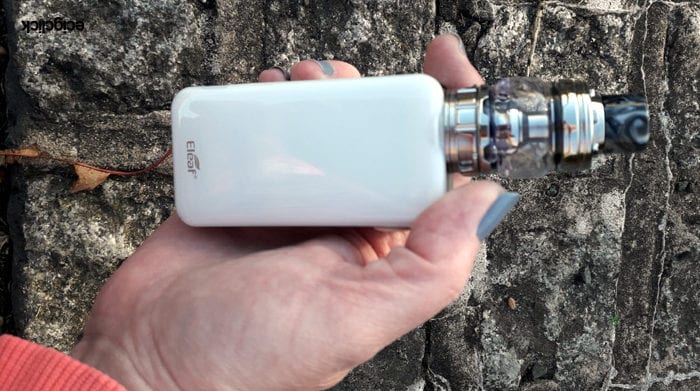
This is a great size and really light in the hand. If you are right handed like me and put the mod in your right hand with the fire button at your thumb then the screen will always be on the correct side. It’s a bit more faffy if you tend to favour your left hand and you will have to press fire with your fingers.
On the same side as the fire button is a recessed reset button which is useful as with an internal battery if it malfunctions you can’t just whip the battery out.
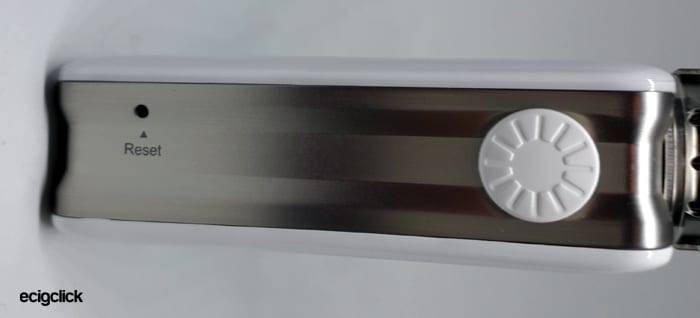
The base of the mod has the legal logos and 4 battery vent slots.
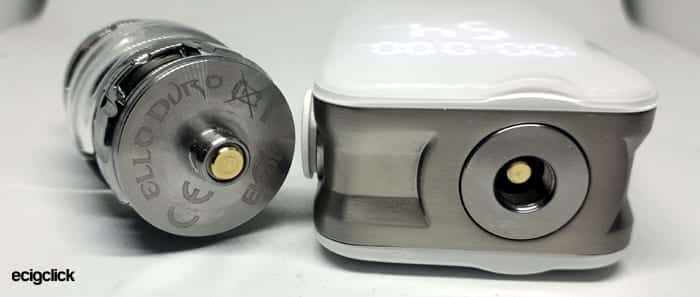
The top cover houses the 510 connection. According to Eleaf the mod will accommodate tanks of up to 26mm diameter without overhang.
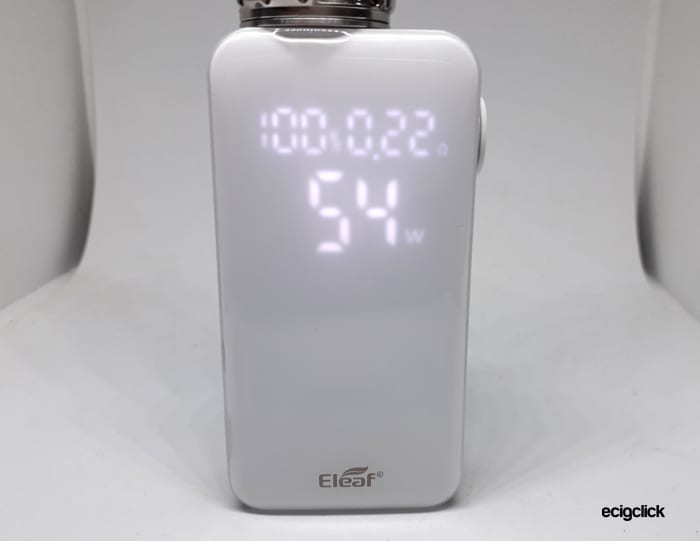
Now the screen – if you can call it that – is basically LCD style numbers behind the glossy front panel.
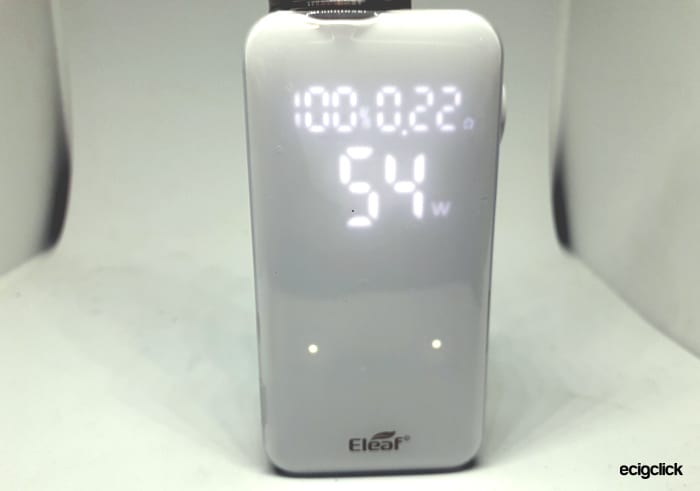
It displays the wattage you have set, the coil resistance and battery charge %. When you vape it also shows the puff time in seconds and 0.1 seconds.
There is only one button on the mod – the side mounted fire button – which is clicky and responsive.
To make adjustments you click the fire button 3 times and two little circles light up – these are the adjustment buttons – they are touch sensitive and you touch these to adjust.
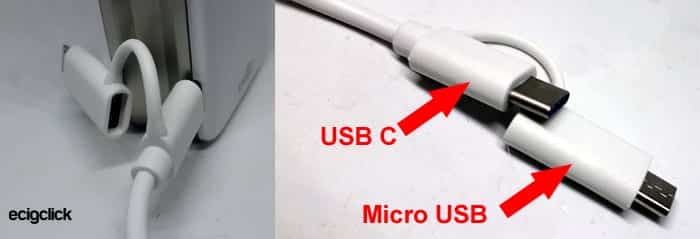
The charging socket is a USB C type connector- these connectors can be put in either way around – none of the annoying turning the connector over 5 times trying to fit.
The charging cable also has a micro USB adaptor on the end which is very useful. I thought initially it would be a pain if you have say one USB cable in your car or PC for charging a phone, Ecig etc. As there is an adaptor you can still use this to charge other micro USB devices – however it still means you carrying the cable around.
Eleaf Ello Duro Tank
I have been sat here examining the mod to describe its features and build quality. Sat with it in my hands turning it over and upside down to investigate everything.
Whilst doing so the sodding Ello Duro tank has leaked all over me. Thanks for that.
I don’t know why but none of the Ello range of tanks like me.
On the Eleaf Tessera kit the Ello TS tank leaked several times and killed the mod, on the iStick Pico S kit – the Ello Vate tank leaked on me too. And yet again this thing is trying to ruin my fun.
I will strip it down – replace coils and seals and see if anything was loose before I feel brave enough to risk covering my desk in 6.5ml of e-liquid. Luckily before it leaked the coil soaked up a few ml of liquid or it could have been worse.
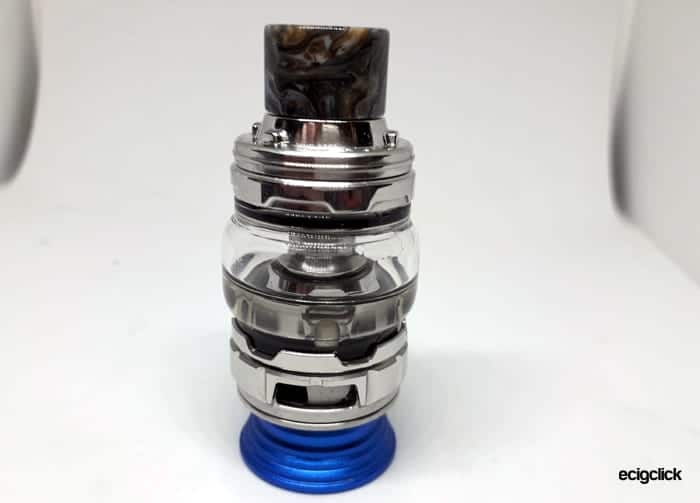
I took the tank apart, re-installed the coil, checked the seals and reassembled. I filled the tank and left it a few days to check for leaks and so far so good nothing to report.
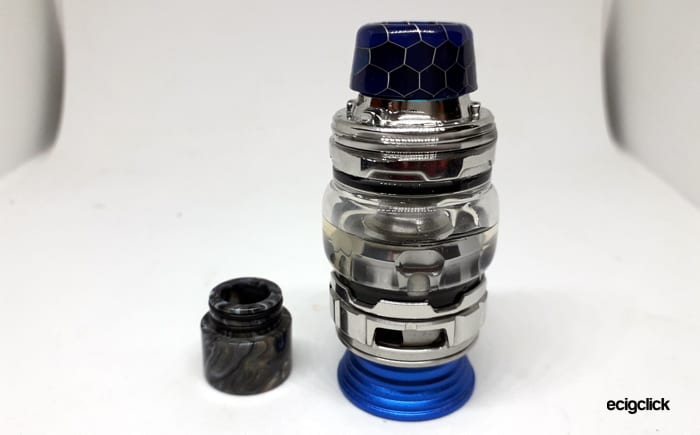
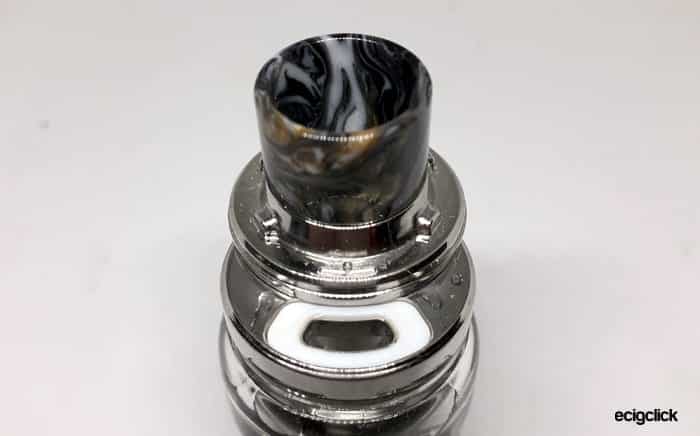
If you want to change the drip tip – the Goon style 810 (No O-rings) were too loose but standard 810 (with O-rings) did fit although some were a bit tight.
The airflow control at the base of the tank is very smooth to adjust – it should be really after several ml of e-liquid pissing out of it.
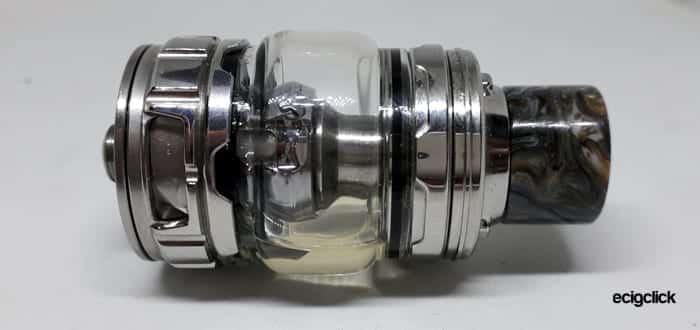
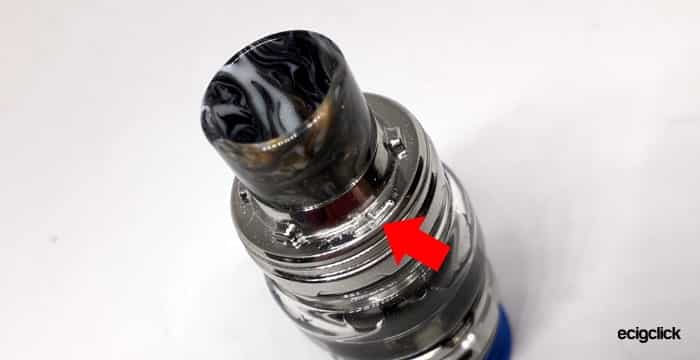
There is a slide top fill cap and the slide point is marked with a kind of “T” shape – very hard to see on the silver version. Also as mentioned below the filling port causes airlocks if you don’t insert the bottle nozzle fully into the hole.
Even after curing the initial leak – tipping the mod over only slightly sometimes results in e-liquid leaking out of the airflow intake. FFS!
Set-up Guide
The tank and mod will need screwing together before use.
The HW-M Dual coil should be installed already on the tank. If you wish to change the coil see the guide below.
I would recommend checking the coil and base are tight as I got leaks.
You need to fill the tank as described below, adjust the airflow setting to your preference and then you can turn the mod on!
Mod Basic operation
There is only one physical button on the mod – the fire button…
- Power on/off = 5 clicks of the fire button
- Adjust power = 3 clicks of the fire button and the two circles should appear on the front of the mod. These are touch sensitive adjustment buttons. Press the up or down as required. 3 clicks of the fire button exits adjustment mode and the buttons disappear.
- Vaping = press the fire button
- Reset = if the device is suffering from a fault use a pointy object to press into the reset switch orifice.
- Atomiser protection = if firing for more than 10 seconds the output cuts off – to prevent coil damage in the case of accidental firing or overheating.
- Short circuit protection = the screen will display “SHT” – made me giggle that – like the mod is saying “Oh Sh*t”…
- Low voltage protection = below 3.3V the device will not fire. Recharge to use again.
- Charging temperature protection = the device will stop charging if the internal temperature is below -5°C (23°F) or above 50°C (122°F). Over the upper temperature limit the screen will display “HOT”.
- Firmware upgrade = attach the mod to the computer/laptop using the USB C cable and follow the instructions on the Eleaf website. There are no updates available as of November 2018.
There is no temperature control or other menu options so this is pretty basic feature wise.
However this also means less to drain the battery too!
How To Charge The Battery
This has a USB C connector on the mod so make sure to only use a USB C cable.
USB C has the capability to transmit more power – in theory there are 3 modes of charging:
- DC 5V / 2A
- DC 9V / 2A
- DC12 V / 1.5A
These all depend on the type of USB outlet you are using. Some USB ports will not supply the higher current. For instance a lot of PC’s will only output 0.5A. So even with a USB C cable you will not be charging up any quicker. A lot of power banks and newer devices may be able to output the higher power – look for them having “QC 3.0 / PD 3.0 Protocol”.
- Using the supplied charging cable install the small end into the port on the mod. You will not need the attached adaptor – the adaptor is for charging other devices with a standard Micro USB socket.
- Install the large end into a suitable USB outlet.
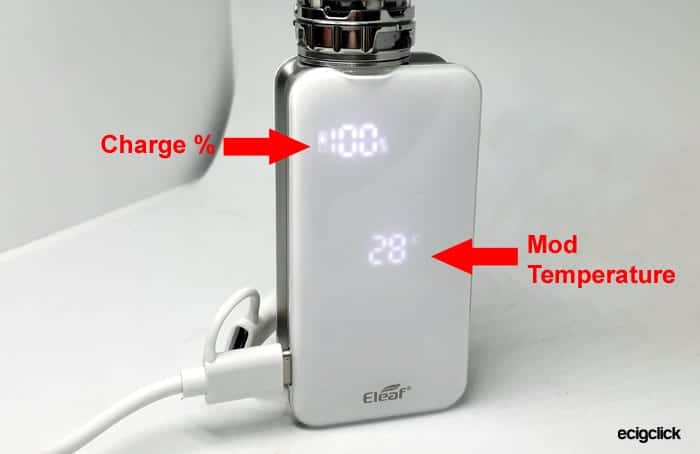
- Whilst charging the mod will display the battery capacity percentage and the temperature of the mod. It does have a safety feature to cut the charging off if it exceeds temperature limits.
- When fully charged the screen will go blank – it does stay on “100%” for a while so be patient and it will go off when charged.
How To Fill The Tank
- On the top cap of the tank is a tiny “T” shape – find this and that is the point to push the top cap across.
- The cap slides open to reveal the filling port.
- Add e-liquid through the port and watch the liquid level on the side of the tank.
- Slide the top cap until it closes.
- If this is the first fill or a new coil leave the tank to stand for 10-15 mins to allow the cotton in the coil to soak up the e-liquid. You may find you need to refill again after this.
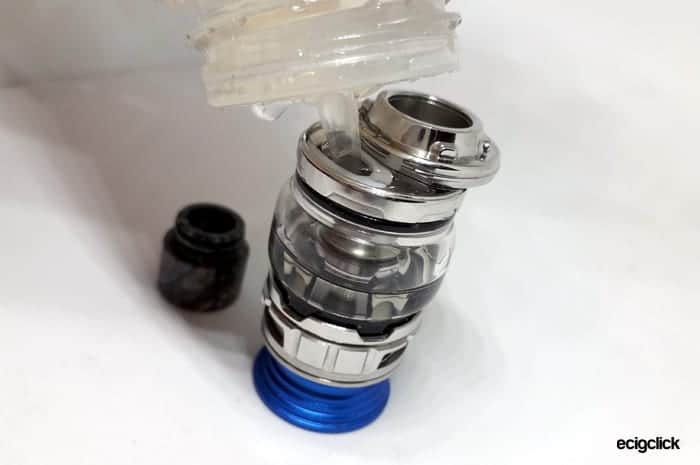
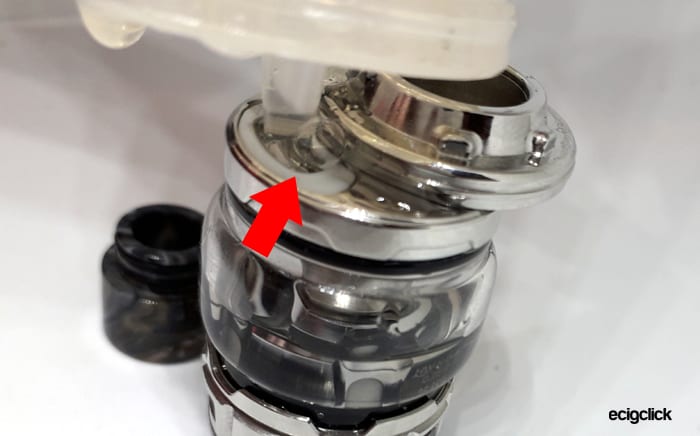
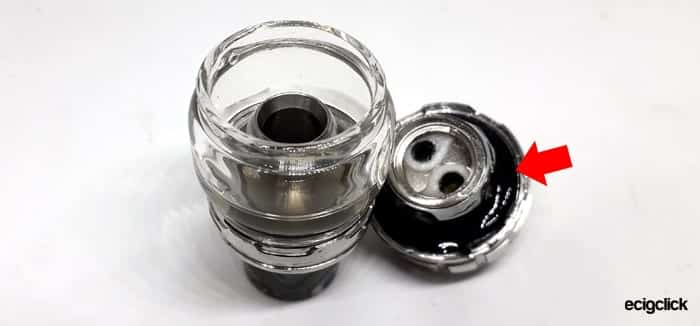
One issue I had was with larger bottle spouts there was a lot of air locking. If you couldn’t shove the whole spout into the fill hole (ooh matron) you would get bubbles pop up and e-liquid spurting back out (marked with arrow on photo below!).
Also I found it easier to fill this with 10ml bottles as my short fill 80ml bottle was a nightmare!
If you have this issue remove the drip tip and that means you can get the spout further into the fill hole. God this sounds filthier the more I type – you get the idea though haha!
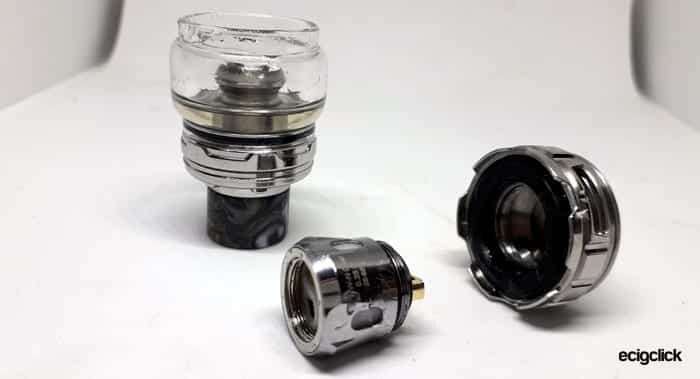
How To Change The Coil Head
If the tank is more than half full you are likely to get some liquid leaking during the coil change so sit the top part of the tank upside down on some tissue.
- Remove the tank from the mod.
- Tip the tank upside down and unscrew the tank base.
- If a coil is already installed unscrew this from the tank base.
- Screw a new coil into the base.
- Make sure the O-ring is correctly located on the tank base – it can move or stick to the glass.
- Replace the base on to the tank.
- Install the tank onto the mod and fill as described above.
One good thing about the Ello tanks is you can use other coil heads in here. For instance the TFV8 Baby range, the Vaporesso GT and Vaptio Frogman coils will all fit this tank. I had a TFV8 Baby and a GT coil head so I tested if they fit and they do and fire up OK.
How Does the Eleaf iStick Nowos Kit Perform?
Flavour & Cloud Production
This is a sub ohm tank – therefore best suited for e-liquid with a higher VG content. High PG liquids will be too harsh and probably too thin and cause leaks. For info about PG and VG read our Guide.
I am using my usual 80% e-liquid – Stika Bombz Fruit Salad – I use this all the time so am quite used to how it should taste. It is only 6mg nicotine as you don’t need high nic in sub ohm tanks.
The airflow on this Ello Duro tank is stupidly airy – I like a restricted DTL vape and I am running this with the airflow only a quarter of the way open and it still feels like sucking in fresh air.
As a result of this airy vape the flavour in my opinion does suffer.
I think the Ello range is kind of targeted to the Smok TFV12 Prince style vaper – loads of clouds but a little lacking on the flavour front.
HW-M Dual Mesh Coil
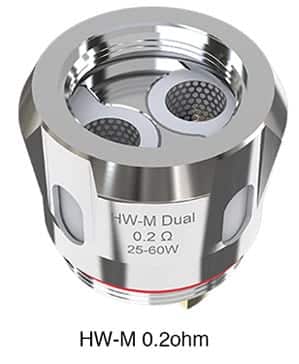
So this is a 0.2ohm dual Kanthal mesh coil head. The mesh pattern is what Eleaf call “Multihole” – hence the “M” in the name.
The recommended power setting for this is 25-60W.
I started at 40W and not much happening really, over 50W and you do start to get some taste.
I found at about 57W you do start getting some flavour but it was starting to taste burnt – this is below the recommended setting too! But over 60W and it’s getting dry and tasting quite toasty.
It is a really cool vape – which again doesn’t make the flavour shine. You do get a lot of vapour though. I used this for about 4 tankfulls at 54W and there was no improvement in performance sadly.
This is slightly better than the single element HW-M coil – but still poor in comparison with other dual mesh coils such as the Freemax Mesh Pro and Geekvape Alpha. Even single mesh coils such as the Horizon Falcon and iJoy Avenger kick out more taste than this HW-M Dual.
I couldn’t wait to change this coil over for the dual Net version.
HW-N Dual Mesh Coil
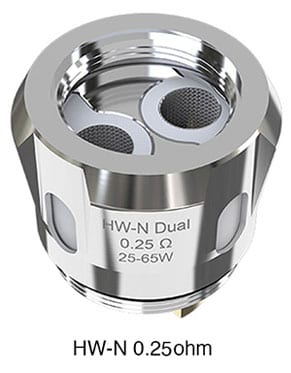
The HW-N Dual is a dual mesh Kanthal coil and has 0.25ohm resistance. It read 0.21ohm when installed on the mod.
The recommended wattage for this is again 25-65W. I had the airflow in the 1/4 open position – as I do like a restricted DTL vape but it is still very airy for me even in this setting.
I started at 30W and apart from a small amount of vapour it didn’t feel like I was pressing fire – so why you would want to use this at 25W I have no idea.
At 40W the vapour improved but still no taste or warmth.
Moving up to 50W and more vapour than I was expecting but way less flavour still. At 55w this has improved a lot and plenty of vapour and slightly more flavour – in fact better than the HW-M version. But the flavour is still way below the standard of other dual mesh coils I have used. Pretty disappointing taste wise.
At 60W things again have improved but this still feels cool and dry to vape on. Makes me super thirsty! 65W is still slightly better too – doesn’t taste as burnt as the HW-M at higher wattages.
However the HW-N is bearable to vape on so will stick with this coil to do the battery and mod tests.
One other downside is that this coil at 65w is bloody thirsty and considering what a mare it is to fill – not good. If this was the 2ml version I would be tearing my hair out!
iStick Nowos Mod Performance
The screen display is nice and clear and the fire button responds quickly.
One slight problem I have found is the touch sensitive adjustment buttons – they are not that responsive. You have to move your finger and keep pressing them to get the wattage to adjust.
The fire up time doesn’t feel staggeringly quick like my Voopoo Alpha One or the Livepor 230 however it isn’t slow – just feels pretty average.
It feels slightly under-powered – only by about 2-3W – I tried the tank on my Voopoo Alpha One and found setting the Voopoo to 65W the performance seemed the same as the Nowos set to 68W.
Obviously I have no sophisticated equipment to test the power output – but using the same tank and coil between the two mods I could sense a slight difference in output. But nothing to cause huge concern.
Had no faults or issues with the mod at all.
Battery Life
This is an internal battery mod so no variants according to what battery you use. Also there are no lights or screen brightness settings which could drain the battery further.
I had the Eleaf iStick Melo mod with an internal 4400mAh battery and ran that at around 55W and found the battery life to be incredible – so will the Nowos match this? I would imagine the battery is probably the same as the Melo mod?
The wattage setting and your vaping habits will obviously make the battery life vary. But to give you a guide I got 13 hours vaping at 65W.
The battery display is weird – it took 11 hours to go from 100% to 88%. Then only 2 hours to go from 88% to 0%. So if below 90% beware you won’t have long before that battery conks out – very deceiving.
Pros
- Looks stunning
- Mod build quality is excellent
- Quick charge time
- Lots of vapour from HW dual mesh coils
- The HW-N coil gave OK flavour
- Lightweight easy to use mod
- Battery life is epic – just beware below 90%
Cons
- Ello Duro tank leaked after first fill – even the odd leak later on when tipping the mod slightly – not handbag friendly!
- Low flavour output from HW dual mesh coils.
- No puff counter – I use this for battery life – but many people don’t use this feature so subjective
- Adjustment buttons not always responsive
- No display adjustments – for instance brightness or customising the data displayed.
- Remaining Battery life indicator is weird – takes forever to go below 90% but very quick discharge after that.
- After 3 months of light use the battery will no longer hold its charge sadly.
Final Review Verdict
The Eleaf Nowos mod is a winner all day long.
Only slight moan is the adjustment buttons are not always responsive you have to be aware of your finger position and adjust it to get them to respond.
The mod is beautiful to look at, super easy to use – no complicated menus and there are no battery draining bling features such as lights and flashy screens.
The tank however – well more specifically the coils are poo. Well if you want loads of clouds they are fine, but if you have e-liquid with flavour and want to taste that flavour – get a different tank. If you like chucking flavourless clouds the HW dual coils are fine…
Buy the mod and use it with a 40-60W tank such as the Nunchaku, GeekVape Alpha or Eleaf Melo. Any higher wattage tanks will hammer the battery as this is only an 80W max output mod.
Updated 13-3-19
Sadly my lovely little Nowos mod is very very poorly.
I love this little thing and have been using it with the excellent Melo 4 Tank with the mesh coil which came in the Eleaf Pico X kit.
However three months on from this review the battery will no longer hold a charge. I charge it fully and even if I instantly switch it off before leaving overnight the battery is around 5-8% charged when I switch it back on the next day.
Plus charging this using the USB C cable has become a pain. I have no other USB C devices so can only use the one cable I have for charging. I tend to charge my devices whilst sat at my desk working. The USB C cable or device seems to keep screwing up the USB ports on my PC. Either “Power Surge” problems or “Device not recognised” issues keep occurring which are only solved by restarting my PC.
So charging this daily has become annoying too – especially now as the battery will not last.
I have checked the Eleaf website are there are no firmware upgrades – it is only showing the original firmware. I have also tried using the “reset” button but no difference.
Such a shame as I really loved the mod – but it hasn’t quite made it 🙁



I’ve bought 2 of these because it is the only one on the market at the moment with USB C with a big enough battery, but had the same issue with both where the fire button stops working and fires by itself causing the tank to leak and overheat. Really wanted to like this mod, but will not be buying a 3rd…
Have had mine for a couple of months, and now it starts firing by itself.
The button is crap.
No charging issues.
I loved this mod so much bc it was a beautiful and the clouds were pretty good but it died on me too after a couple of months. If I was richer id just buy a bunch of them so I could always have one lol but not worth it when you’re broke.
Absolute junk, battery display is wrong, button is junk, device fires while sitting by itself…I wanted to like it
Such a shame isnt it as I loved the mod – but the issues were a nightmare. The battery display was weird on mine stayed at like 90% all day then suddenly dropped. The flipping thing stopped charging and working completely not long after that!
Hi Michelle, it seems to me that you were just unlucky and had a faulty one, with the battery indicator acting up and then that charging issue.
I can happily say that mine keeps working perfect so far after 6 months (knock on wood).